Some weekends are for relaxing or fêting friends. Other weekends are for backcountry adventures or polar plunges in currently 35° Lake Champlain. But today was dedicated to cladding — T&G paneling inside the icehouse and clapboard outside the outhouse — with four dedicated members of Rosslyn’s icehouse rehab team swapping R&R for punch list productivity. Let’s take a quick look at the Saturday siding progress.
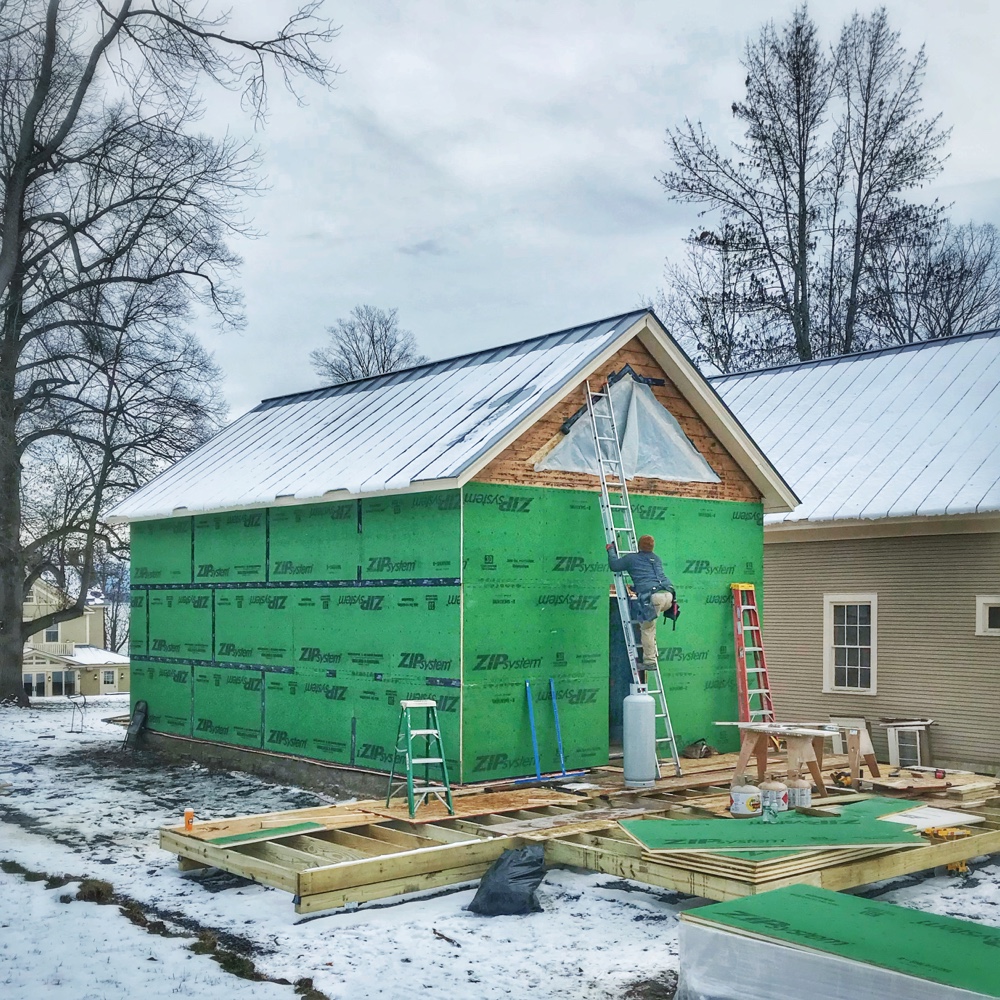
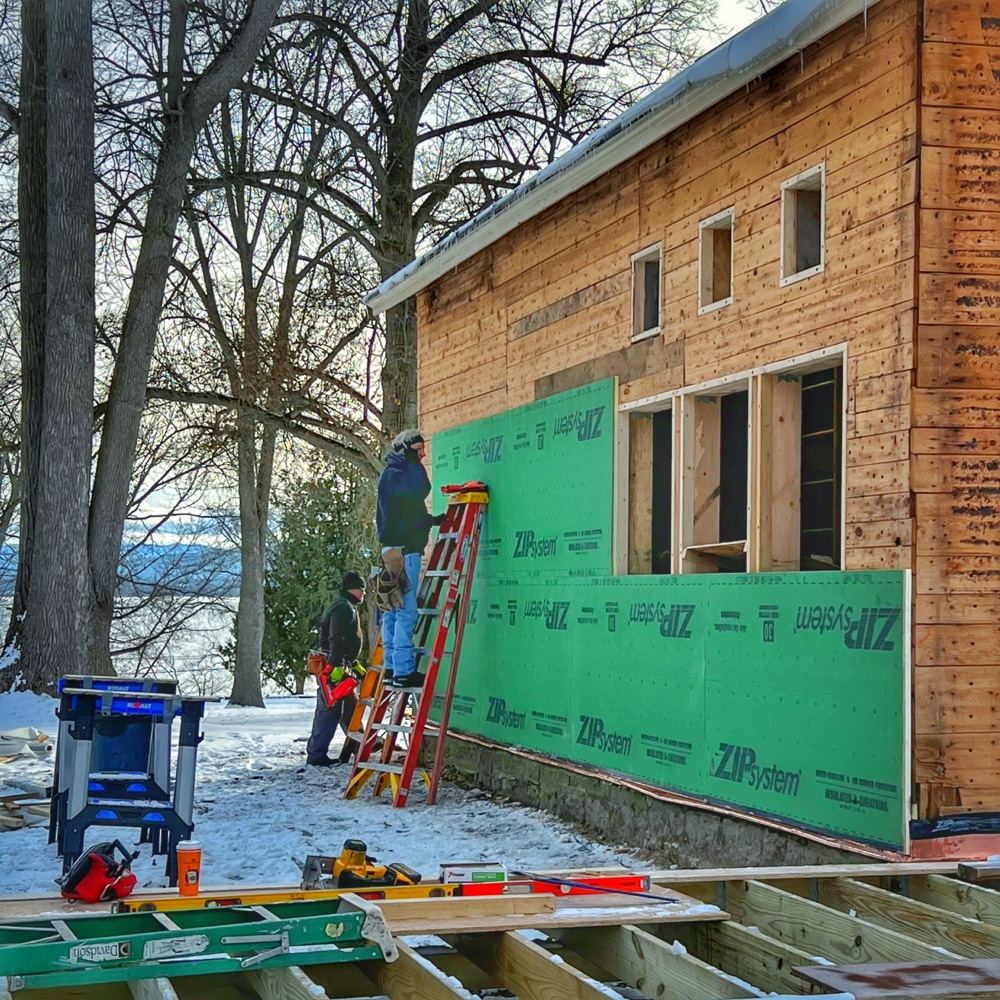
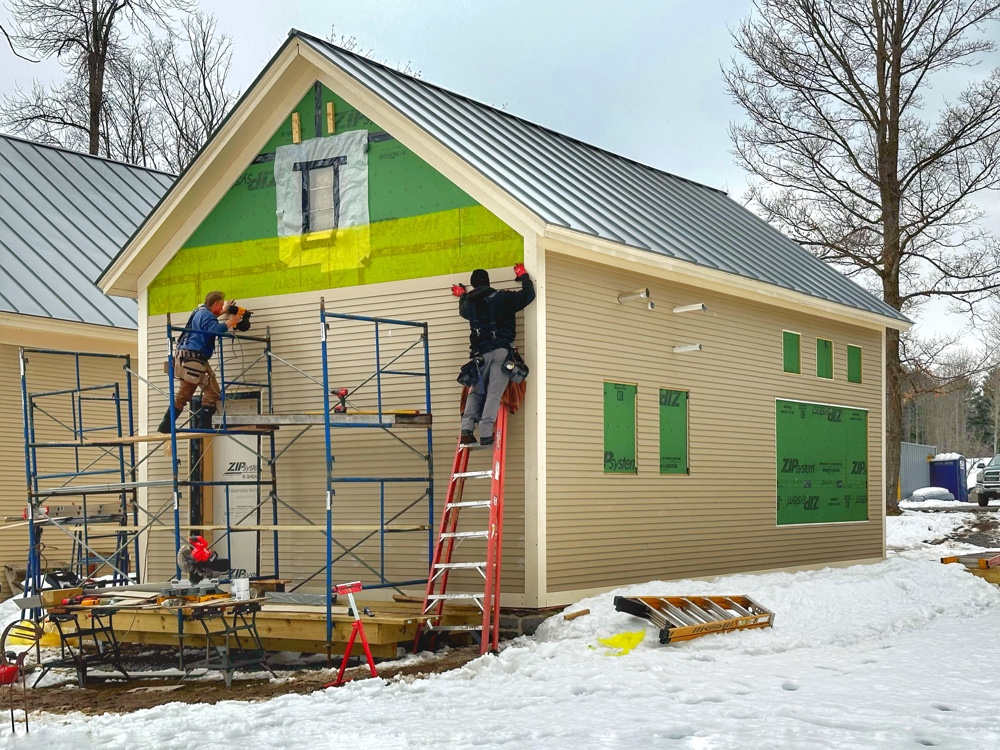
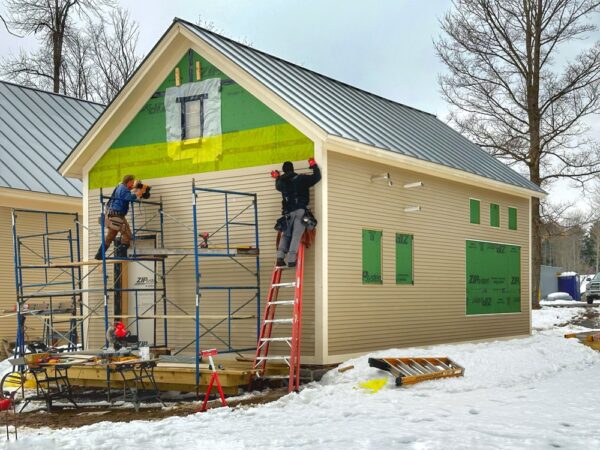
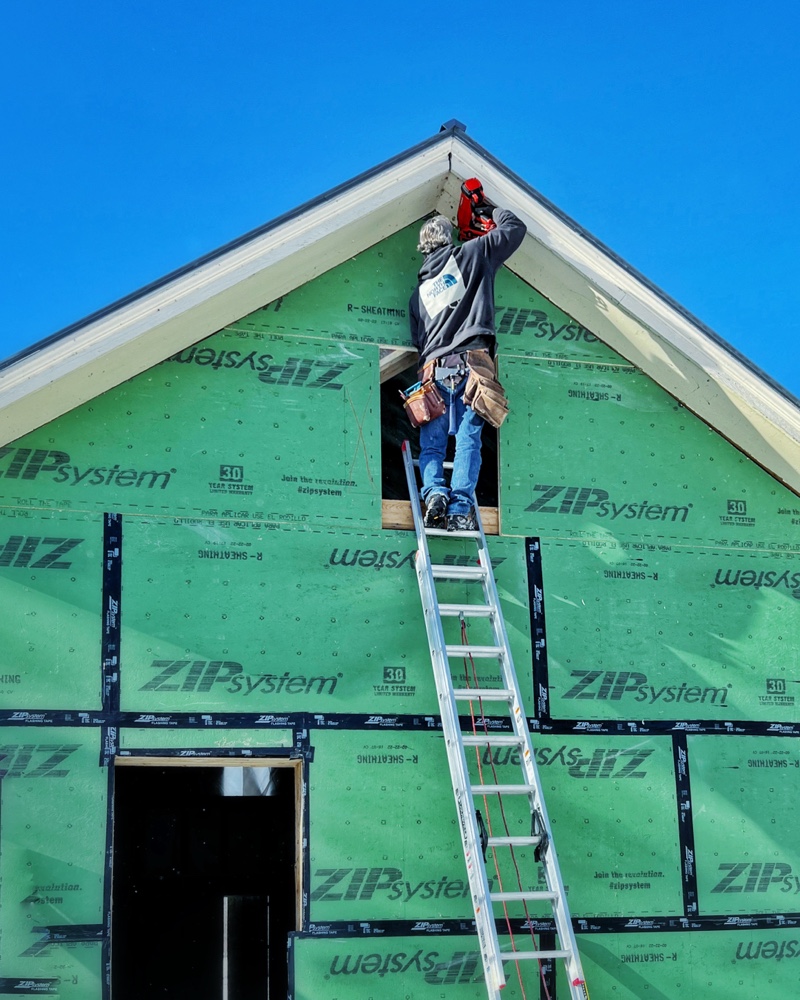
Saturday Siding: Calvin and Eric installing clapboard on the icehouse’s west elevation (Photo: Geo Davis)
Proceeding with our unusual siding-before-windows protocol, Calvin and Eric moved forward with clapboard installation on the west elevation. The fourth and final façade!
It’s exciting to see the ZIP System paneling (and the Benjamin Obdyke Slicker) disappearing from view since it offers a highly visual barometer Reaser on the overall trajectory for this stage in the project.
Next we need to mark the precise location for the future gable window, install temporary trim “stops” for the remaining clapboard, and carry the clapboard on up to the roof. But given the forecast for tomorrow, a midday high of a about 25°, we’ll shift the focus inside to paneling.
Saturday Siding Mashup
Here’s a video remix of today’s Saturday siding progress (juiced up with a mesmerizing drum soundtrack and a retro film feel, my not-so-subtle homage to Rosslyn’s timeless allure.)
I started an update a couple of weeks back that never made it out of the nest. An unfledged fledgling… At issue? Heat and humidity stabilization in the icehouse to properly acclimatize lumber pre-installation.
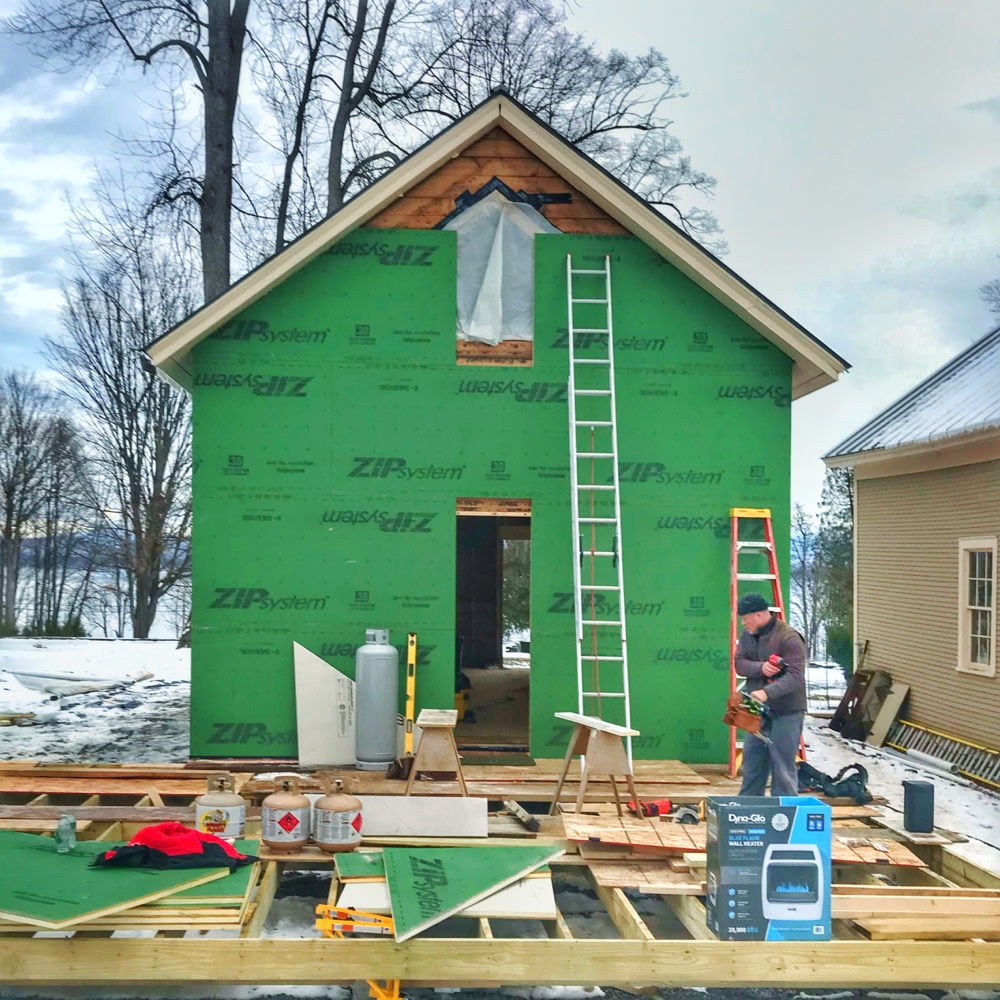
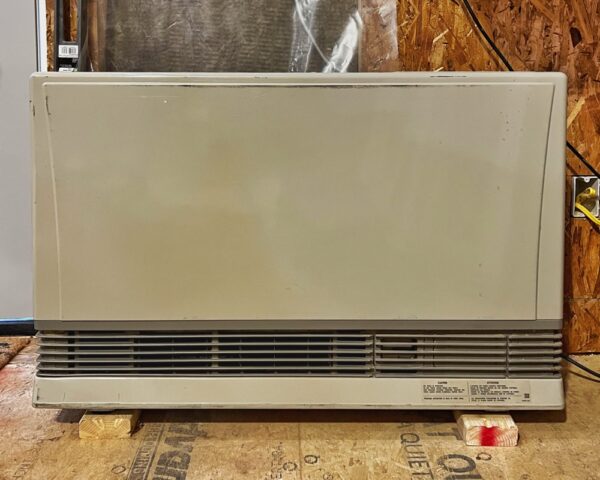
Temporary LP Monitor Heater (Photo: R.P. Murphy)
Given a few savvy questions about how we planned to install finish woodwork (flooring, paneling, etc.) in the icehouse — which until recently still had no heat and still had leaky apertures where windows and doors won’t be installed until May — I had initiated a quick explanation for how we planned to temporarily stabilize the temperature and humidity to ensure predictable, effective lumber acclimatization. Initiated but then neglected. The questions have continued, mostly from carpenters a others savvy to the expansion and contraction of wood. So I’m returning to the topic, better late than never?!?! The silver lining? Our plan for stabilizing the heat and humidity was implemented a couple of weeks ago. And it’s working well.
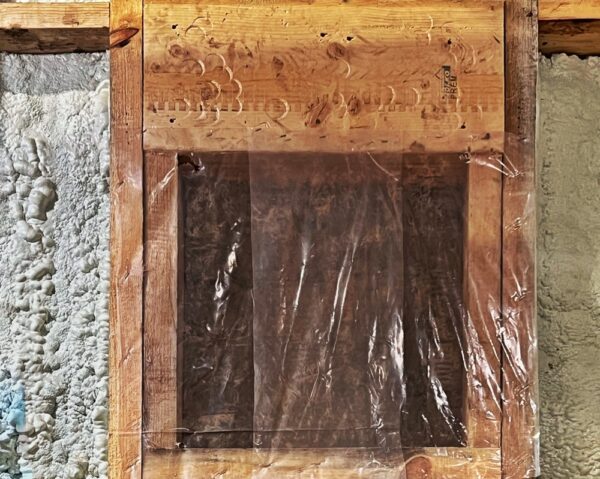
Stabilizing Heat & Humidity in Icehouse (Photo: R.P. Murphy)
After my last visit Eric and Peter coordinated, source, installed efficient LP monitor heater that is thermostatically controlled and piped temporarily to an external propane tank. This setup, in conjunction with well insulated apertures, has effectively enabled us to stabilize the interior of workspace for the coming months, creating a heat and humidity controlled “envelope” where temperature and moisture are stable so that finish lumber can be properly acclimatized.
Another positive twist of fate: Eric was able to source an oversized monitor heater (more than satisfying our BTU needs for the small space) that had been previously but lightly used at a discounted price. Win, win. Hurrah, Eric!
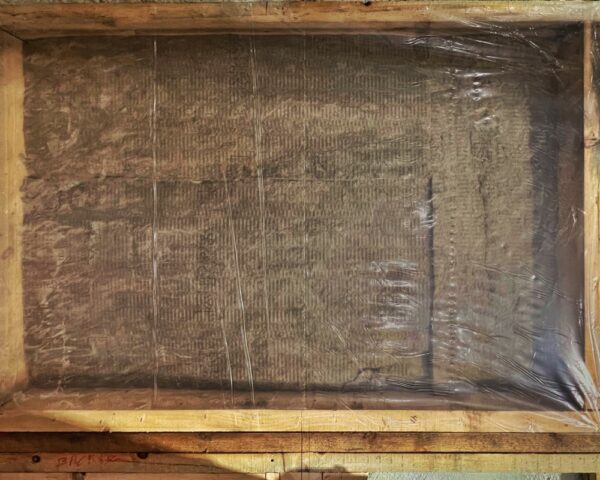
Stabilizing Heat & Humidity in Icehouse (Photo: R.P. Murphy)
The photo at the top of this post is the monitor heater, and the next two photographs show examples of interior vapor/air barriers (plus rock wool insulation) that were added to the apertures. Window and door framing was undertaken prior to installation of the ZIP System paneling, so there was already a decent barrier in place for these apertures. But we needed to further improve thermal and moisture barriers, especially on the north and west elevations where ample fenestration made it more challenging to control the interior work environment 24×7.
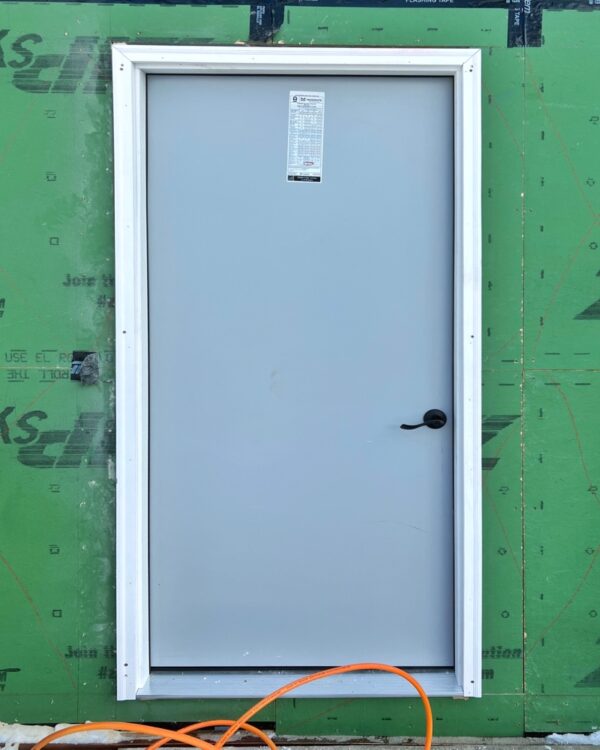
With the monitor installed and working well and the interior/exterior barrier effectively controlled, there remained one additional temporary-but-important complement: a secure, functional access for day-to-day work. Ad-hoc closure systems had been adequate early on, but it was time to install a convenient but lockable, well insulated, pre-hung exterior door.
Temporary Exterior Door (Photo: R.P. Murphy)
Kudos to Peter and Eric buttoning up the space to ensure forward progress over the last couple of weeks. I’m looking forward to witnessing firsthand tomorrow afternoon the hardwood flooring (beech) in the loft, for example, an accomplishment that was possible only once the heat and humidity stabilization was complete and the materials had acclimated on site for a couple of weeks.
I’ve waxed whimsical on autumn before, and I’ve celebrated wonder-filled winter aplenty, but what of the blurry overlap between the two? Well, today I’d like to pause a moment betwixt both current seasons. Or astride the two, one foot in autumn and the other in winter. To borrow a morning metaphor from my breakfast, let’s pause for persimmons (as a way to grok — and hopefully embrace — our present seasonality.)
What?!?!
For the time being let’s sidestep the vexing fact that almost a dozen years into cultivating three persimmon trees in Rosslyn’s orchard we’ve never produced a single edible persimmon. Instead let’s look at persimmoning in terms of this morning’s sweet and sour, ripe and rotten persimmon episode.
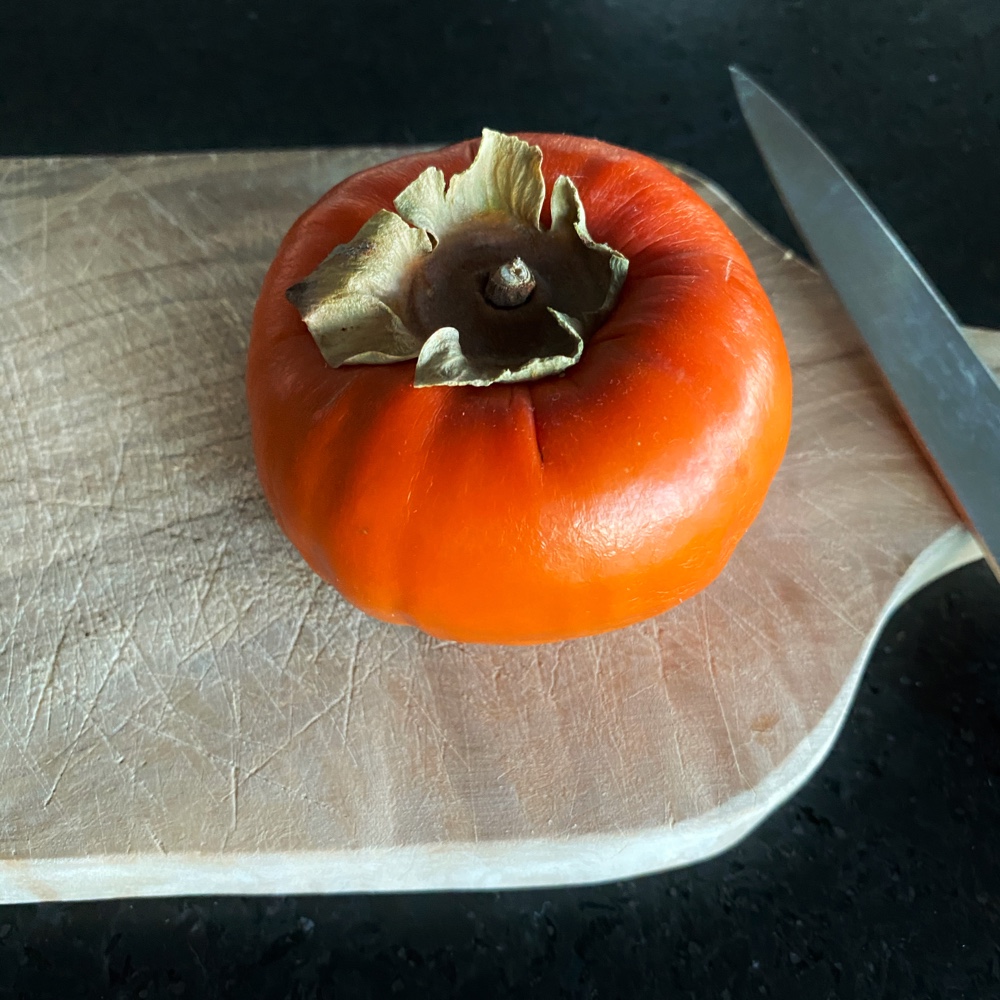
Fuyu Persimmon, Sliced (Photo: Geo Davis)
I’ve been monitoring two pretty persimmons in the fruit bowl. I’ve been checking them daily for ripeness. Firm, firm, firm, less firm, slightly supple, soft, ready! Or so I thought this morning. I lifted the first much anticipated fruit in the lightless shadows of 5:00am. If felt perfect. I gathered the second and grabbed a small cutting board. I prefer to allow my mornings to illuminate naturally, calibrating by circadian rhythms holistically, so I generally avoid turning on the lights, even this time of year when 5:00am is still shoe polish dark. As I prepared to plunge a knife into the first persimmon, I detected something unsettling. The slick surface of the persimmon had a fuzzy spot about the size of a quarter. I turned on the light, low, but enough to show that I’d missed my moment with the persimmon. It was rotten. Moldy. Both. I’d literally been checking daily, often lifting both fruit from the bowl to examine them, but somehow this previously perfect fruit had suddenly become rotten. The second fruit showed not fuzzy rot spot. I carefully cut out the leafy stem, and sniffed the inside of the persimmon. Perfection. Somewhere between the consistency of gelatinous custard and viscous liquid, the persimmon was divine.
Fuyu Persimmon, Sliced (Photo: Geo Davis)
At this point seasoned persimmon aficionados are aware that I’ve been recounting an experience with hachiya persimmons (rather than fuyu persimmons), and the photos portray the latter. You are correct astute reader/persimmon connoisseur. And as my prologue likely betrays this morning’s experience was not well suited to photography. But it did remind me of a previous persimmon apropos of the actual topic I’d expected to explore in this post (but have so far mostly skirted.) And that memory, of a similar morning anticipating and then partially enjoying a persimmon is what lead me to these photographs. Why partially, I can hear you think. I partially enjoyed that persimmon, a fuyu persimmon, because the first few slices were ripe and delicious. But partway though the small fruit the sweet turned to astringent. And this puckering experience is a sure sign that the fruit is not yet fully ripe. Now, lest I’m misleading you again, I’m sorry to say, the photographs in this post are not of that persimmon either, though they are, in fact a fuyu persimmon. And, as a discerning eye might note, this photographed persimmon was delicious throughout.
So why all the persimmoning? The memories of this morning’s fruit and the part ripe, part unripe fruit a year or two ago, offer me a glimpse into the sort of autumn-into-winter transition we’re in right now. Almost ready, almost ready, over ready! And sometimes ripe and unripe at the same time. And, as I understand it, persimmons are often culturally associated with joy, good fortune, and longevity. I am hopeful that our present season change, still in limbo, but creeping closer and closer to that transition from autumning to wintering, from autumn vibes to winter vibes, might — like persimmons in the best of circumstances — may portent joy, goof fortune, and longevity for the rehabilitation projects underway in the icehouse, the boathouse, and our home.
1-1/2” ZIP System insulated panels reading for installation (Photo: Hroth Ottosen)
Willing Winter Away a Little Longer
There’s something meditative about this time of year, a marginal meditation on interstices, on the span between autumn and winter, harvesting and larder hunting, biking and skiing, Thanksgiving and Christmas,… This liminal space is tied with winter-to-spring for most dramatic transitions in the circle of seasonality. And yet some years, this year, the switch is far from binary. There are moments when we appear to be on the crux, the hinging moment between the most abundant season and the leanest season. And other moments we’re currently in both concurrently. Ripe and rotten. Well, not rotten, really, but in terms of exterior carpentry, the going gets exponentially more challenging once snow arrives and temperatures plunge.
And so, for a while longer, we’re willing winter away. Tomorrow we’ll be installing the first round of spray foam insulation inside the icehouse, and we’ll *hopefully* begin installing the ZIP System paneling outside the icehouse. In other words, we’re getting really close to having the icehouse ready for winterier weather. The boathouse isn’t really winterizable, however, and temperate conditions are a huge boon as we forge ahead. At the risk of temping fate I’ll admit that it’s almost as if nature is holding her breath, stalling between autumn and winter. With luck, we’ll be able to take advantage of a little more borrowed time. But she can’t hold her breath forever, and we’re all aware of that…
This non-harvest, autumning haiku was born of Carley‘s lethargic mid-morning siesta by the fireplace. Contentment, canine style. It’s a tough life.
https://www.instagram.com/reel/CljJSOFgoFV/
Wintering: unhaiku
Between blushing vegetation
and gingerbread outbuildings,
what name for this season?

Hustling pre-hibernation and
melting flurries with breath,
what post apple appellation?
What pre skating designation?

I echo my own refrain again
into the autumn interstices
ringing with wintering song.
Willing Autumn Linger Longer
Like ripening persimmons, the transition from unripe to overripe happens whether we’re watching for it or not. Likewise fall vibes have been exiting gradually, and winter’s stark contrasts have been insinuating themselves into the autumnless voids. It’s inevitable that winter will arrive, and it will be glorious in its own right when it does. But here’s hoping fortune smiles upon us a little longer, that we can dwell in this construction-centric liminality for another week or three. Or right up until Christmas!
Hroth finishes ZIP System installation on east elevation (Photo: R.P. Murphy)
As it turns out, the snow-blizzard-cum-bomb-cyclone that hepped up meteorologists and newscasters, snarled traffic across the country, and added a decidedly wintery twist to the Christmas holiday for many across the country impacted us two totally opposite ways, one good, the other bad. Ever the optimist, I’ll launch with the glorious news: the icehouse rehabilitation is now officially weathered in. The ZIP System installation is complete, ensuring a weatherproof envelop around the months of winter work ahead. Hurrah!
The icehouse‘s original 2-ply T&G sheathing is now 100% encases in structural insulated panels, and all of the seams are taped. The ZIP System insulated panels appear to have served us well, and just in the nick of time. Although the worst of the weather, fortunately spared us.
The winter storm became a bomb cyclone on Friday as it tore through some of the country’s major cities… Atlanta, Boston, Chicago and New York are seeing wind gusts higher than 45 to 55 miles an hour, among other hazardous conditions. Buffalo was the hardest hit Friday, with wind gusts of up to 70 mph, said Greg Carbin, a meteorologist with the National Weather Service. Buffalo was ground zero, and “that’s where true blizzard conditions have been seen,” he said. (Source: Bomb Cyclone Strikes Major Cities as Temperatures Plunge
Although winds and snows fortunately were not a problem at Rosslyn, we did receive a lot of rain, rain, rain. But just barely completed ZIP System installation ensured that the icehouse was spared the damaging effects of driving rain, flooding, etc. Phew.
The photo essay below offers glimpse behind the scenes — Hroth, Matt, Pam, and Tony hustling to complete the ZIP System installation before the storm and before everyone headed off for Christmas vacation. And this brings me to the not-so-good news…
Hroth was planning to spend Christmas with his 91 year old father in California. Flights? Check. Packed? Check. All systems go? Check. But after driving 2 hours to the Albany International Airport on Thursday morning, he learned that his flights (and basically all incoming Southwest flights to Pasadena) had been preemptively canceled. After exploring options, Hroth accepted that he would be unable to celebrate Christmas with his family. He climbed back into his car and drove two hours back to Rosslyn.
Susan and I deeply lament Hroth’s unfortunate luck, especially because we’re well aware that departing earlier and postponing completion of the ZIP System installation would likely have permitted him to fly to California earlier. And so, we realize that prioritizing the weatherproof sheathing over vacation travel positively effected the icehouse rehab and adversely effected Hroth and his family. I am sincerely sorry.
Hroth begins ZIP System installation on east elevation (Photo: R.P. Murphy)
ZIP System Installation Photos
In the photo above Hroth is just starting out with ZIP System installation on the east facade. Note the newly installed flashing and custom copper drip edge that helps weatherproof the building’s cladding with accurate design integration templated from Rosslyn’s other historic buildings.
Fast forward to progress on the southside.
ZIP System installation on south elevation (Photo: R.P. Murphy)
The north and south facades were completely installed approximately two weeks (see “Zipping up the Icehouse” for a gallery and overview), so tackling the south and east elevations at once brings the project to completion. In the photo below Tony’s own weatherproofing gives a hint to how cold it was as the team raced the weather toward the finish line.
Tony and Hroth installing ZIP System insulated panels on east and south elevations of icehouse (Photo: R.P. Murphy)
Panel-by-panel, Hroth and Tony zipped up the south and east elevations, knitting together the corners to ensure that the trim be be perfectly aligned and plumb.
ZIP System installation on south and east elevations (Photo: R.P. Murphy)
Below, Hroth (foreground) and Tony (torso-less legs on ladder behind Hroth) finish nailing and taping the south facade Zip panels.
Hroth and Tony installing ZIP System insulated panels on east and west elevations of icehouse (Photo: R.P. Murphy)
With the south side complete it was time to load up the nailgun and finish up the east side. In addition to the slightly blurry action shot of Hroth rebooting for the final push, the photo below offers an intriguing look both inside and outside the icehouse, inviting contemplation of how this same perspective might look early this summer.
Hroth 2/3 complete with ZIP System installation on east elevation (Photo: R.P. Murphy)
Once the panels are fully secured, it’s critical to seal all of the seams with ZIP tape to fully weatherproof the sheathing.
Tony tapes ZIP System panels on east elevation (Photo: R.P. Murphy)
Tony is ensuring that the sealing tape properly laps upper-over-lower seams to ensure proper water shedding both during the build and into the future once the building is redlaw in clapboard.
Tony tapes ZIP System panels on east elevation (Photo: R.P. Murphy)
Getting close, Tony!
Hroth fitting final ZIP System panels on east elevation (Photo: R.P. Murphy)
Hroth is scribing and installing the final triangular panels at the gable end on the east elevation. So close…
Hroth finishes ZIP System installation on east elevation (Photo: R.P. Murphy)
You can almost hear the Paslode nailer sinking those final nails through the paneling and into the icehouse’s street timbers.
Hroth puts the finishing touches on the ZIP System installation. All four elevations of icehouse are now weathered in! (Photo: R.P. Murphy)
I’ll wrap up this bittersweet installment with heartfelt thanks to the team for seeing this critical project through to completion to ensure that increasingly inclement weather (we are after winter solstice, after all) spares the icehouse AND similarly heartfelt regrets that Hroth has been stranded at Rosslyn, unable to join his family for the holiday.
That last photo above offers a fun glimpse from my future loft study, capturing Hroth as he concludes the ZIP System installation.
Zip-up Mashup
And, for good measure, a quick video commemorating this chapter.
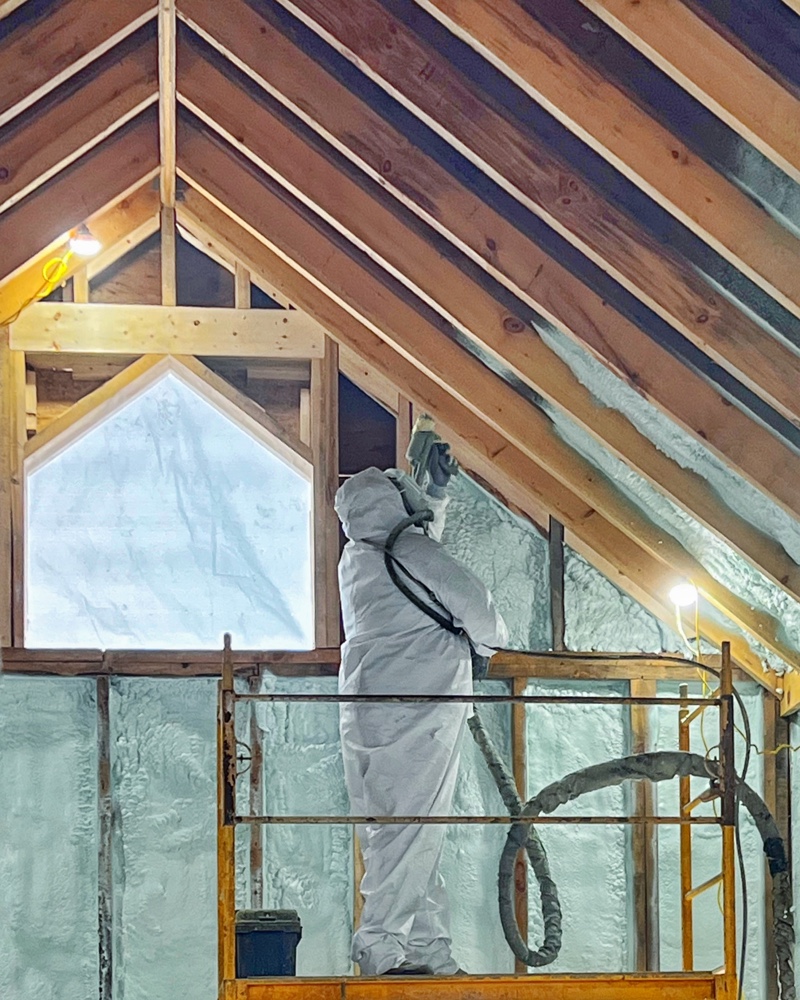
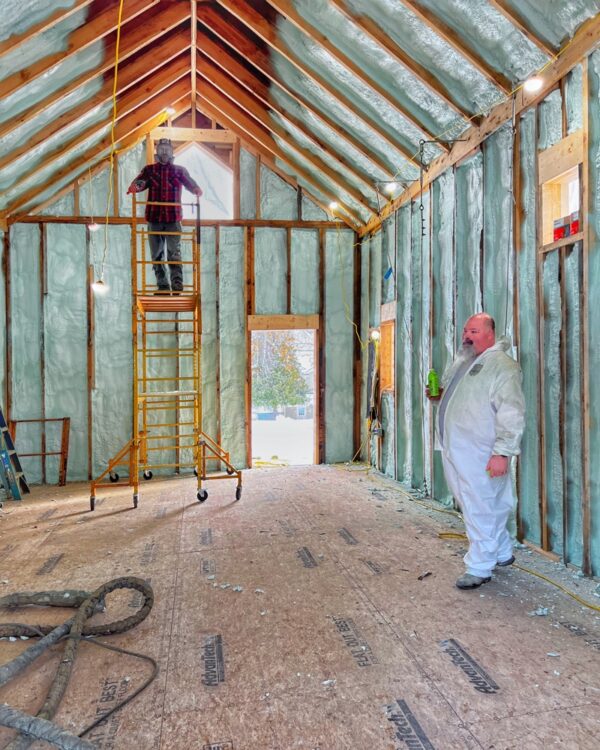
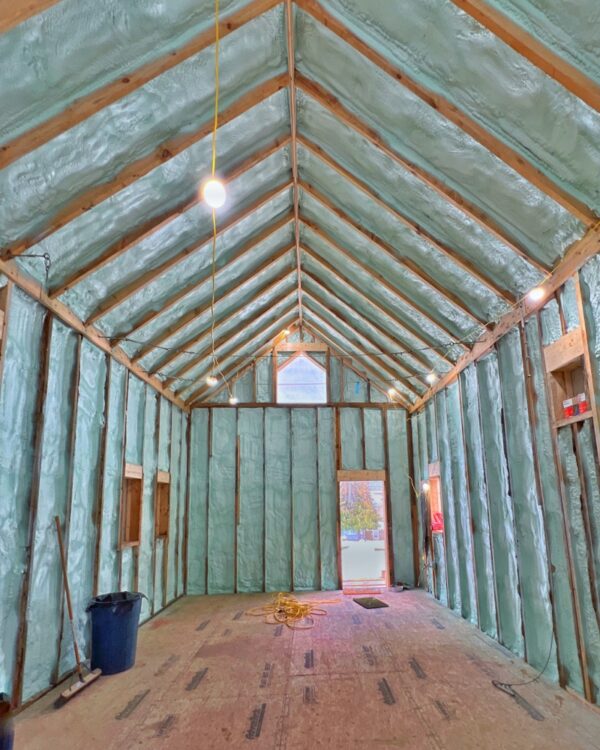
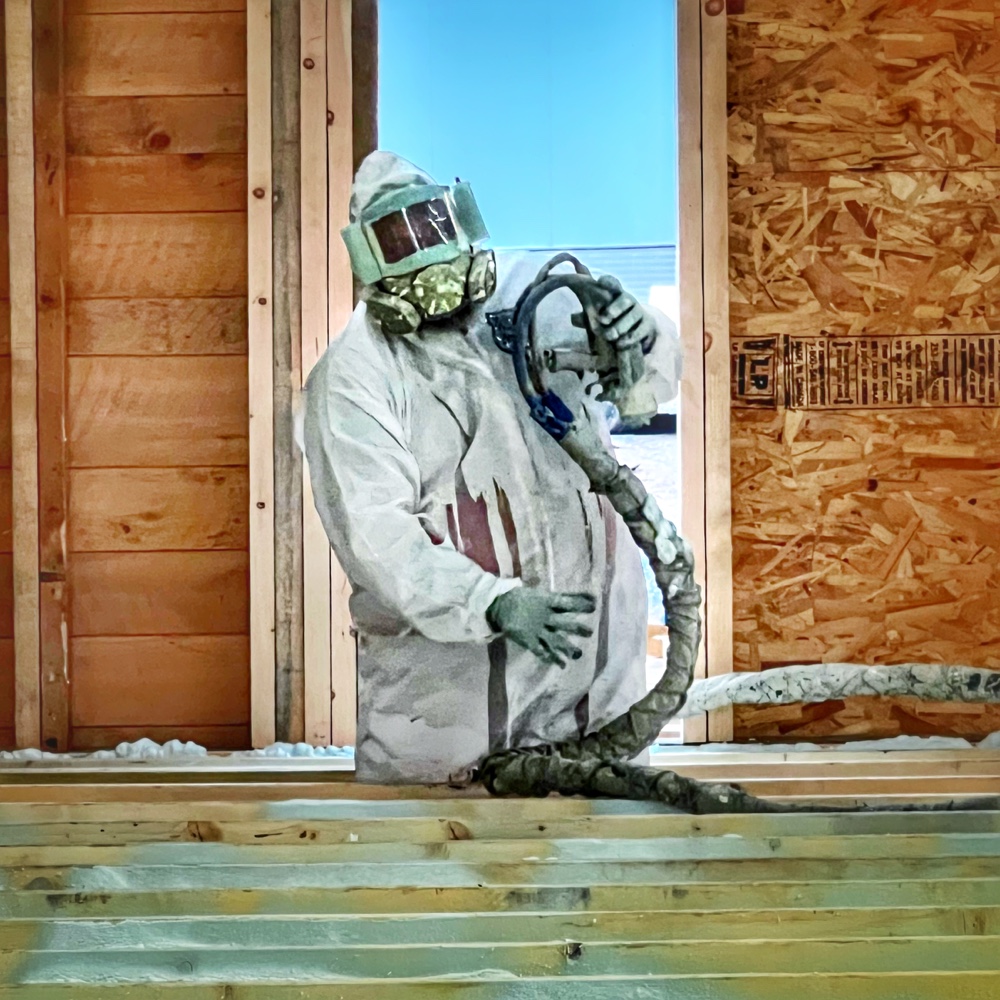
Phew. With Rosslyn’s icehouse insulation installation complete we can collectively exhale, confident and warm. Today I’d like to offer huge holiday shoutout to Kevin and Joe from Adirondack Spray Foam for wrapping up 2022 with the winter-proof armor we need to keep the icehouse project going fullbore over the coming months. Bravo!
Installing Spray Foam in Icehouse Ceiling (Photo: R.P. Murphy)
Those were my thoughts a couple of weeks ago when we started installing spray foam insulation. If phase one was a relief, completion is resoundingly reassuring, like a bear hug from the universe. Things are going to be alright. Winter will huff and puff, maybe even blast us with blizzards and deep freezes. But we’re cocooned snuggly inside a protective force field.
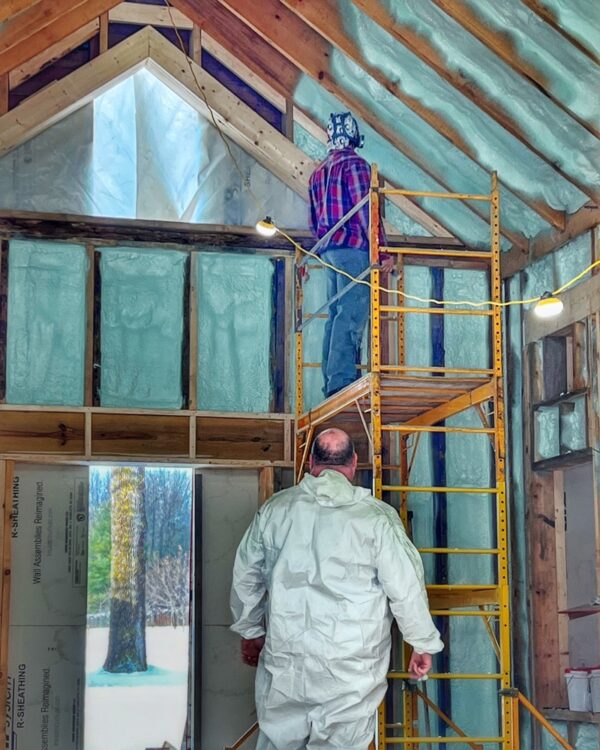
Installing Spray Foam in Icehouse Ceiling (Photo: R.P. Murphy)
And combine the insurance of a thoroughly spray foamed building with the just completed ZIP System insulated sheathing swaddling is from the outside in? Aaahhh… It’s warming to just think about it. Ongoing rehab can continue afoot despite the taunts of our Adirondack Coast winter.
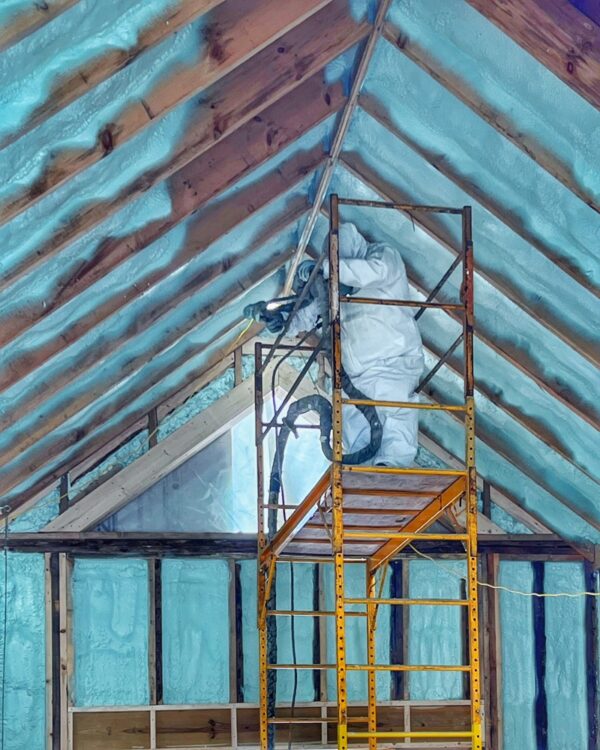
Installing Spray Foam in Icehouse Ceiling (Photo: R.P. Murphy)
As I’ve explained previously, we installed 1-1/2” structural insulated panels on the exterior which provides R-6. The 3” of spray foam inside the walls adds another R-21, and there’s a bonus between the two synthetic insulation barriers. When the size house was built in the late 1800s, they filled the interior 2 x 6 walls with wood shavings for insulation. Although we removed all of that in 2006 while remediating rot, the exterior of the framing was sheathed in two laters of T&G separated by about an inch baffled with shredded newsprint enveloped in tarpaper. So these walls should now do a remarkable job of keeping winter cold out, and summer cool in.
What about the roof?
Adirondack Spray Foam installed 7” on insulation between the rafters which will amount to an R-49 thermal barrier sandwiched between the ceiling and the roof.
Installing Spray Foam in Icehouse Ceiling (Photo: R.P. Murphy)
A decade and a half ago we wrestled with the best way to balance insulate Rosslyn. Ultimately, we concluded that our historic rehabilitation needed to balance heritage and environmental responsibility. Although we also use recycled denim insulation and mineral wool when appropriate, we’ve come to trust the energy efficiency of spray foam.
Insulation Installation Complete in Time for Winter
And then it was done. With our insulation installation complete, we can rest a little easier. January will inevitably plunge us into all manner of meteorological challenges, but we’re now in a much better position to power forward.
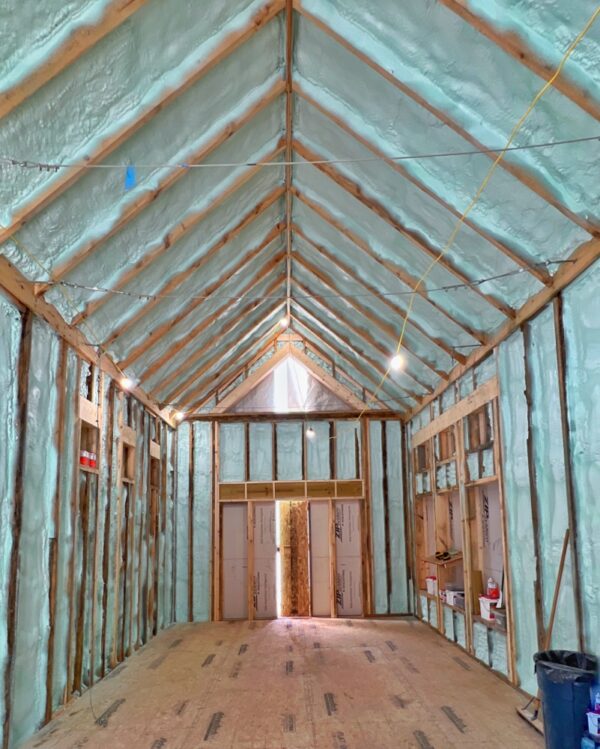
Insulation Installation Completed by Adirondack Spray Foam (Photo: R.P. Murphy)
Although blue green doesn’t exactly *look* warm, the icehouse now can be warmed with a space heater. We’ll see if reality meets expectation this week.
Insulation Installation Completed by Adirondack Spray Foam (Photo: R.P. Murphy)
In addition to wall-to-wall insulation these last two photos capture the post cleanup tidiness. It’s the perfect tabula rasa to start framing this week.
Spray Foam Insulation Mashup
Let’s curtain call this post with an almost meditative mashup of the last lap of spray foam installation.
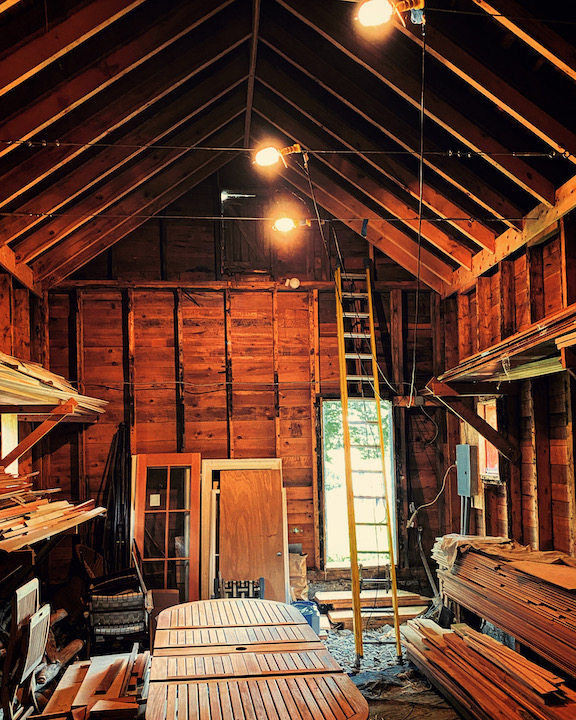
Icehouse v2.0: Looking east toward future loft inside the icehouse while fine tuning remodel proposal for the Town of Essex Planning Board. (Source: Geo Davis)
At long last it’s time to move forward with Rosslyn’s icehouse v2.0 which I’ve been alluding to for a couple of months (including in the July 2 Instagram photo of icehouse interior above.) If this is your first sneak peek inside the icehouse, rest assured that the project is still percolating. When the sweet siren songs of reimagination, rehabilitation, and repurposing merge into a mellifluous melody, I’ve learned to slow down and listen…
In the weeks and months ahead I’ll share with you the reason(s) and vision for this project as well as the cast of characters and the plan. I’m hoping to take you inside this rehabilitation project, joining the team who will transform a 19th century utility building (purpose built to store ice and preserve food) into a 21st century utility building (repurposed as a flexible studio, office, meeting, and entertaining space.) Although the icehouse won’t become the “game room” we once imagined, it will share some overlaps with that early vision.
But I’m getting ahead of myself. Let’s start in our early days at Rosslyn.
Icehouse v1.0
In 2006/7 during rehabilitation of our home, we began renovating Rosslyn’s circa 1889 icehouse (existing outbuilding located north of existing carriage barn). Top priority was structural stabilization including remediating a collapsing roof and “corn cribbing” of north and south walls by removing most windows to improve structural integrity and simplify reframing and drawing walls back together with cables. The existing stone foundation was repaired and repointed, and roof was rebuilt from within with rough hewn hemlock beams that we had milled locally complement the existing structure. A standing seam steel roof was installed to match our home and carriage barn, and the existing mechanicals were upgraded in conjunction with the other buildings. New electrical supply and subpanel, water supply, propane gas, and septic system were installed and inspected in 2006/7.
And then, the icehouse rehab stalled. Indefinitely.
We mothballed the project, deferring the next phase indefinitely until circumstances warranted moving forward. (Source: Demolition Dedux)
Until recently, circumstances distracted us, and time whistled past without returning to the question of whether or not (and how and when and why) to tackle the conversion of this unique outbuilding.
But the spring of 2020, coronavirus quarantining at Rosslyn, Susan and I spent many afternoons and evenings next to a fire pit just northwest of the icehouse enjoying the sunsets. We’d never really done this before. And it got us thinking…
Reimagination, Repurposing, Rehabilitation
I recount this curious time in other posts, but for now I’ll simply acknowledge that the early weeks and months of the pandemic allowed for a long overdue pause, an extended period of introspection. We were profoundly grateful to be able to quarantine at Rosslyn. It was truly an oasis in many respects. And this time of sequestration and slowing down and introspection opened up lots of interesting conversations.
Long story short, we began to reimagine the icehouse rehab as a slightly different sort of conversion than we’d originally imagined. For one thing, the western views in the afternoon through early evening were spectacular and distinct from one we associate with the property. We became slightly obsessed. And so we pondered ideas for some outside living space, a fire pit, a deck, maybe even a hot tub?
What if we repurposed this outbuilding to meet several of the needs not present in our home? What if the work-from-home model meant embracing the notion of a highly effective dedicated workspace but that could also double as an outdoor, socially distanced socializing hub?
As we courted the siren song our imaginations ran wild. And two years later we’re finally ready to focus the vision and get started.
Icehouse v2.0
We are at last planning to complete the rehabilitation of the ice house, adapting it from a workshop and storage space to a studio office and workshop. Minimalist open plan but integrating a full bath including shower (and possibly a hot tub on exterior deck) creates a threefold benefit: on-site restroom for workspace; a post-swim and soak restroom for visiting friends; and a restroom and wash area for gardening, etc.
Paramount in our plan is repurposing and recycling. We’re hoping to utilize sixteen years of architectural salvage, building materials, and on-property milled lumber to complete this project. I’ll try to document some of the materials we’ll be repurposing soon. And there will be some modern, non-repurposed accommodations as well including modern, energy efficient wood windows and doors that match the historic windows of the barn, foam insulation, and high efficiency mechanicals.
And because the eastern façade of this historic icehouse is visible from the road/sidewalk, we propose minimal alteration to this public viewshed. I’ll be posting some images soon.
Some progress is pretty. Framing new window aprtures, for example. And some progress is practical. Installing helical piers, for example. Insulation installation is *indisputably* in this second category. And yet, aaahhh… What a relief to have the first phase of insulation complete!
The crawlspace beneath the main floor is now isolated from what will become the first floor by a whole lot of insulation. If you look closely in the photo above you’ll see small furring strips installed at the bottom of the floor joist. We installed 2″ rigid foam insulation board on top of these and then sprayed in XXX of closed cell foam insulation.
Because this is an historic rehabilitation project, preserving the original stone foundation was critical. Successfully pinning the new foundation to the old (ensuring structural integrity for new construction) prevented us from isolating the thermal bridge (old stone foundation plus new concrete foundation and slap). So we framed in a gap around the entire perimeter of the building that allowed us to create a spray foam insulation barrier, minimizing the transfer of cold exterior temperatures during the wintertime. We also foamed the entire curb inside the crawlspace, to further isolate the thermal bridge and reduce interior and exterior temperature exchange. The photo above shows the framing gap around the perimeter, filled with foam insulation.
After Insulation Installation…
Once the spray foam insulation installation was complete, it was time for a subloor.
Supi guided this important step forward so that we can set up staging to frame the west and east gable end windows.
Icehouse Subfloor Installation Almost Complete (Photo: R.P. Murphy)
In this final photo you can see the last narrow strips of subfloor are about to be installed. Not bad for a day’s work!
Insulation Installation and Subfloor Mashup
Haven’t done an exceptionally thoughtful writeup with this post, so perhaps remixing into a begin-to-end recap of the first phase insulation installation and subfloor installation will fill in some gaps. Hope so!
https://www.instagram.com/reel/Cl_Sk_Gg7Xo/
Thanks to Kevin’s spray foam insulation team and everyone else who helped us to reach this next significant milestone. Just imagine once the walls and roof are insulation and the ZIP System panels are installed around the interior exterior envelope. Might start to warm up a little…
Nothing like a region-wide winter weather system barreling down on you to accelerate winter-proofing the construction site, right?!?! But racing the arrival of a pre-Christmas blizzard isn’t the only motivation for the sudden transformation from 100+ year old T&G sheathing to green ZIP System insulated panels though. We’ve been working toward this goal for weeks. Zipping up the icehouse is actually accomplishing several objectives at once.
Okay, let’s start with the most obvious, short term, practical objective of installing the insulated panels on the exterior of the building. But first, I should qualify what I meant by transforming “100+ year old T&G sheathing to green ZIP System insulated panels.” In this case, transformation does not imply replacing the existing sheathing with the SIPs. Instead, these insulated panels are being installed over top of the existing sheathing. And, as explained previously, the existing sheathing for the icehouse exterior walls is actually two layers of 3/4” T&G sheathing separated by perpendicular furring strips that accommodate ooolllddd school insulation that appears to have been made from shredded newsprint.
Given midwinter construction, adding the ZIP panels efficiently creates a building envelope around the entire structure, allowing interior climate control. Windows and doors will not be delivered and installed until springtime, so this cocoon will stabilize the temperature and humidity for construction while significantly improving the work environment.
Zipping Up the Icehouse (Photo: R.P. Murphy)
That’s the short term, practical objective.
There are some structural benefits as well, augmenting the existing structure (which predates our modern building codes) by creating a structural exoskeleton, that, among other things, dramatically improves sheer strength.
We’re using ZIP System 1-1/2“ thick R-6 insulated panels from Huber Engineered Wood. In addition to insulation and structural objectives, these panels also provide a moisture and air barrier between interior and exterior environments.
ZIP System Insulated R-sheathing is the simple all-in-one structural panel with built-in exterior insulation. Featuring integrated moisture, air and thermal protection, ZIP System R-sheathing completely reimagines traditional wall assemblies by streamlining exterior water, air and thermal management.
And there are some aesthetic benefits specific yo the icehouse. Preserving the original mortared stone foundation created meant working around inconsistencies such as spots where the framing was proud of the foundation and others where the foundation actually extended out beyond the framing. Aside from the visual incongruities, this has created moisture penetration and rot issues over the building’s many years of service. When we stabilized the structure in 2006-7 it was necessary to replace large sections of the rotten sill. Additional rehabilitation was necessary this fall as well. By adding an extra 1-1/2” skin around the exterior of the icehouse (and integrating a copper drip edge / flashing that isolates wood from masonry) the entire build now overhangs the foundation enough to manage moisture, snow, etc. for another 100+ years.
But wait… There’s more!
The panels are permitting us to tune up some of the geometry — wall planes and trim lines that have deviated and deflected, sagged and bowed over the years — so that the rehabbed icehouse stands proud next summer.

")
")
")
")
")
")
")
")
")
")
")
")
")
")

")
")
")
")