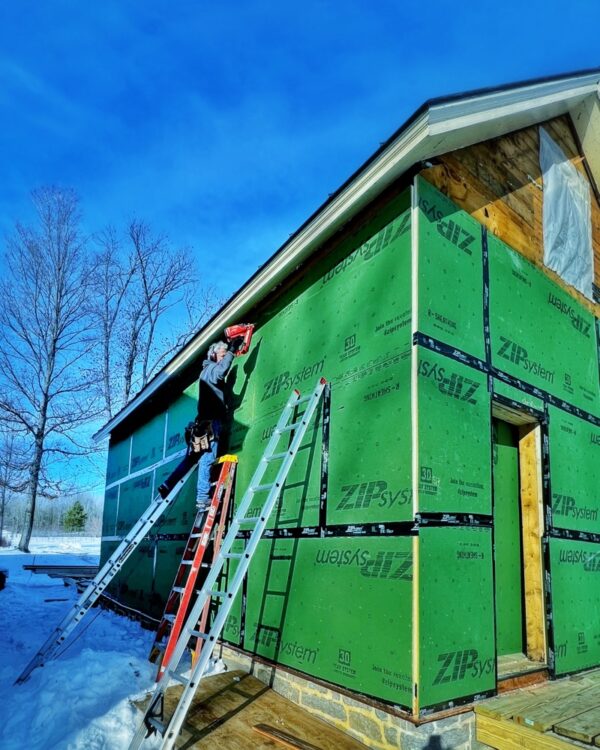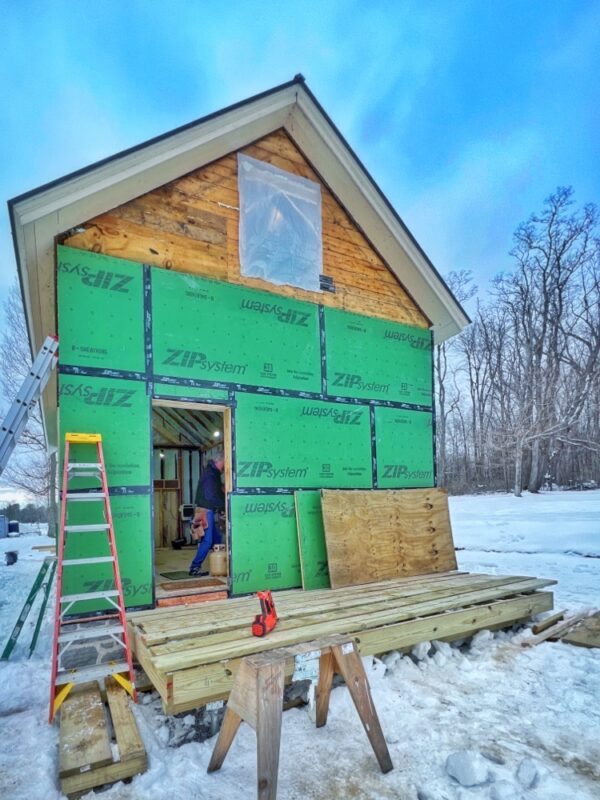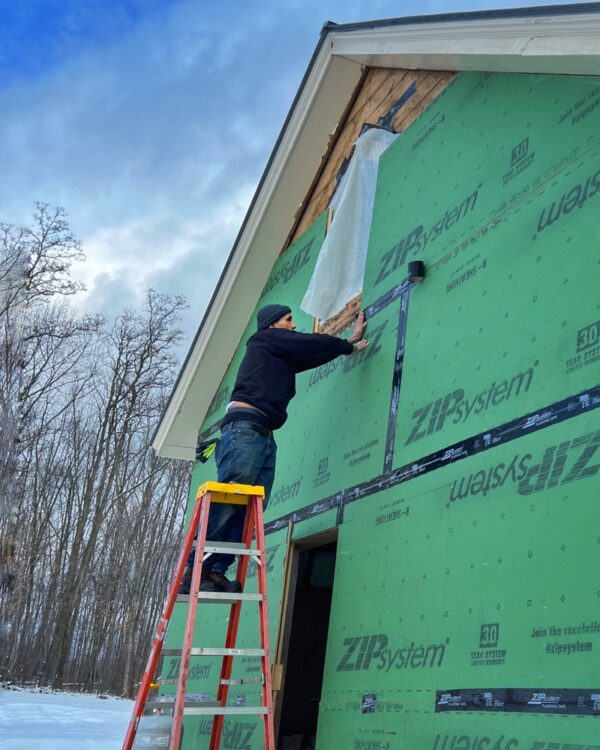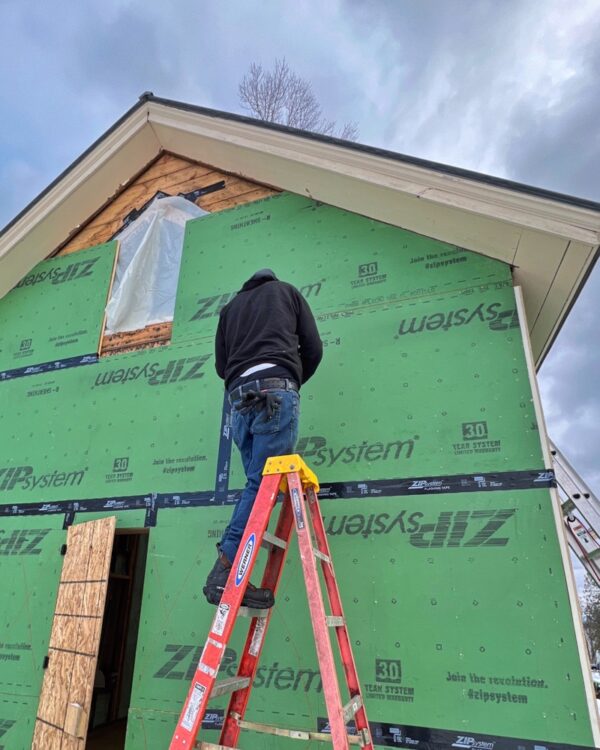
Tag: Sheathing

  • Icehouse Rehab 10: East Elevation Gable Window

    Icehouse Rehab 10: East Elevation Gable Window

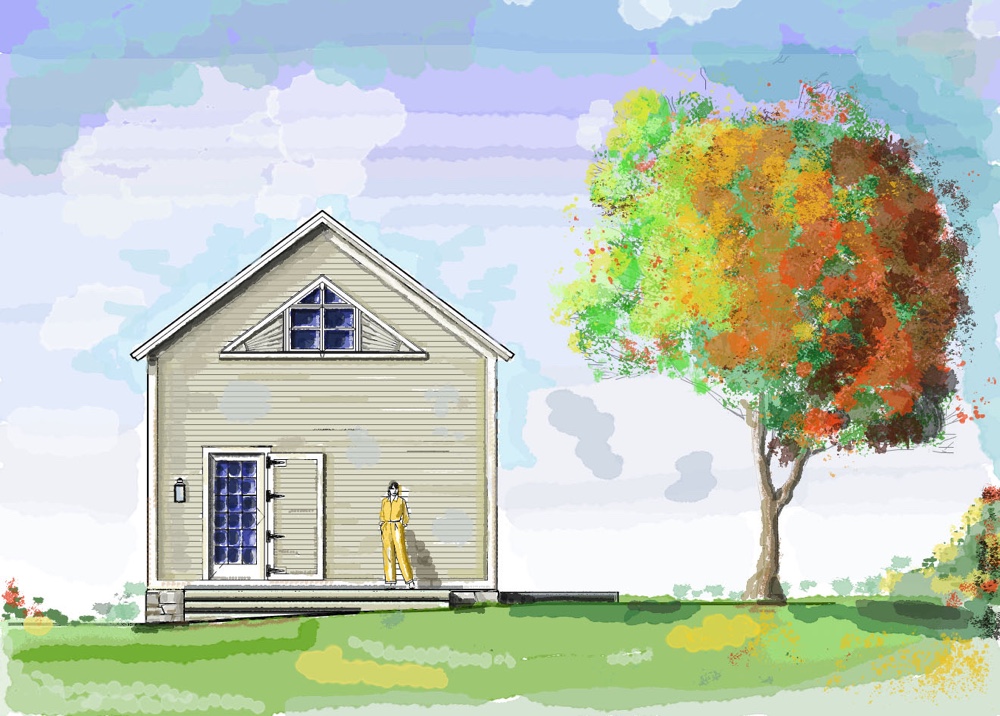
    Rendering for Icehouse Rehabilitation: East Elevation Gable Window (Source: Tiho Dimitrov)
    Rendering for Icehouse Rehabilitation: East Elevation Gable Window (Source: Tiho Dimitrov)

    I mentioned recently that framing for the expansive gable window in the west elevation of Rosslyn’s icehouse was completed, and the change was monumental. Now we’re on hold, anticipating the big reveal in a few months when the new windows arrive and the sheathing can be trimmed. For now that facade is concealed behind a plane of green ZIP paneling, effectively shrouding the dramatic transformation until springtime. Anticipation, I tell my dog, is have the pleasure…

    Today, however, I’m able to update you on Hroth‘s gable window framing for the *east elevation*. Hurrah! As you can see in Tiho‘s rendering above, the openings on the lake-facing facade will remain virtually unchanged except for a shift from opaque (solid wood openings) to transparent (glass window and door). But the the east elevation gable window will be integrated into a whimsical Essex sunburst motif that echoes the same detail on the third story, west elevation gable end of the main house. I will focus on this detail separately once we’ve made a little more progress.
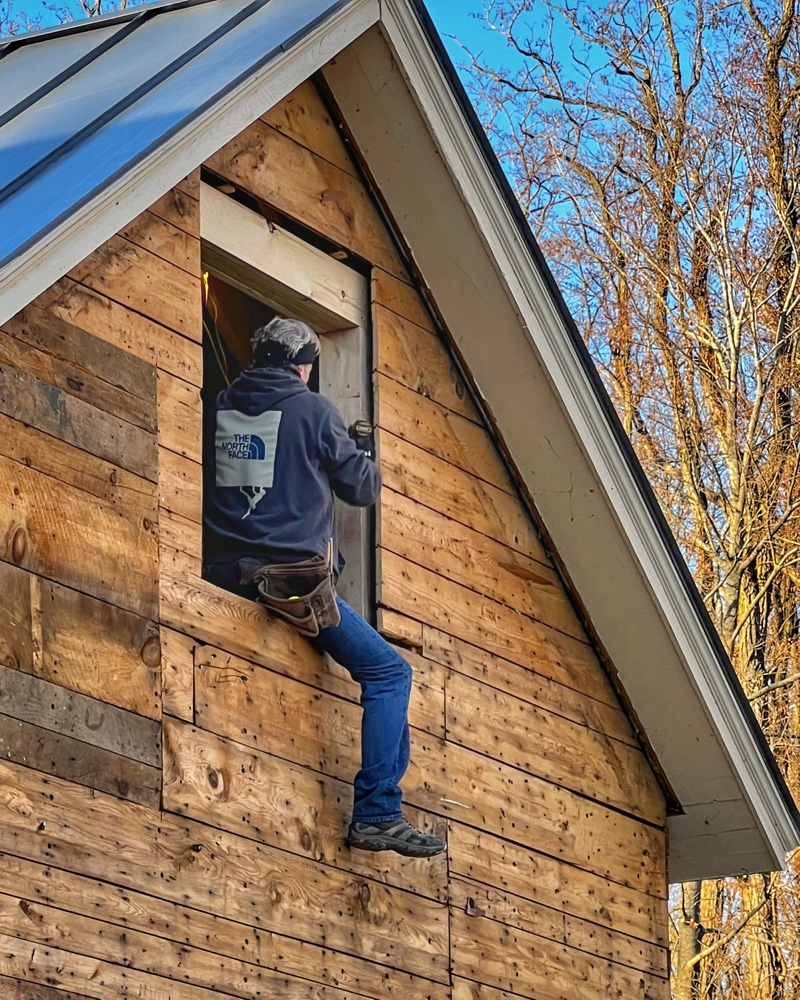
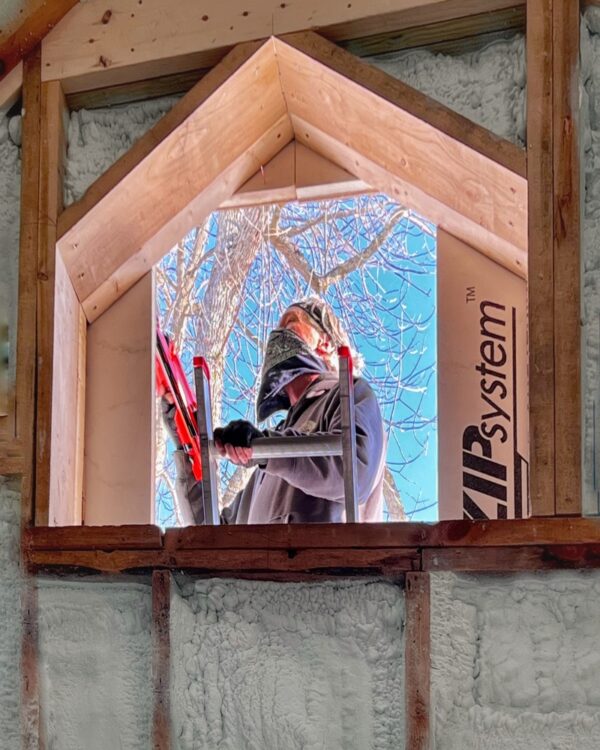
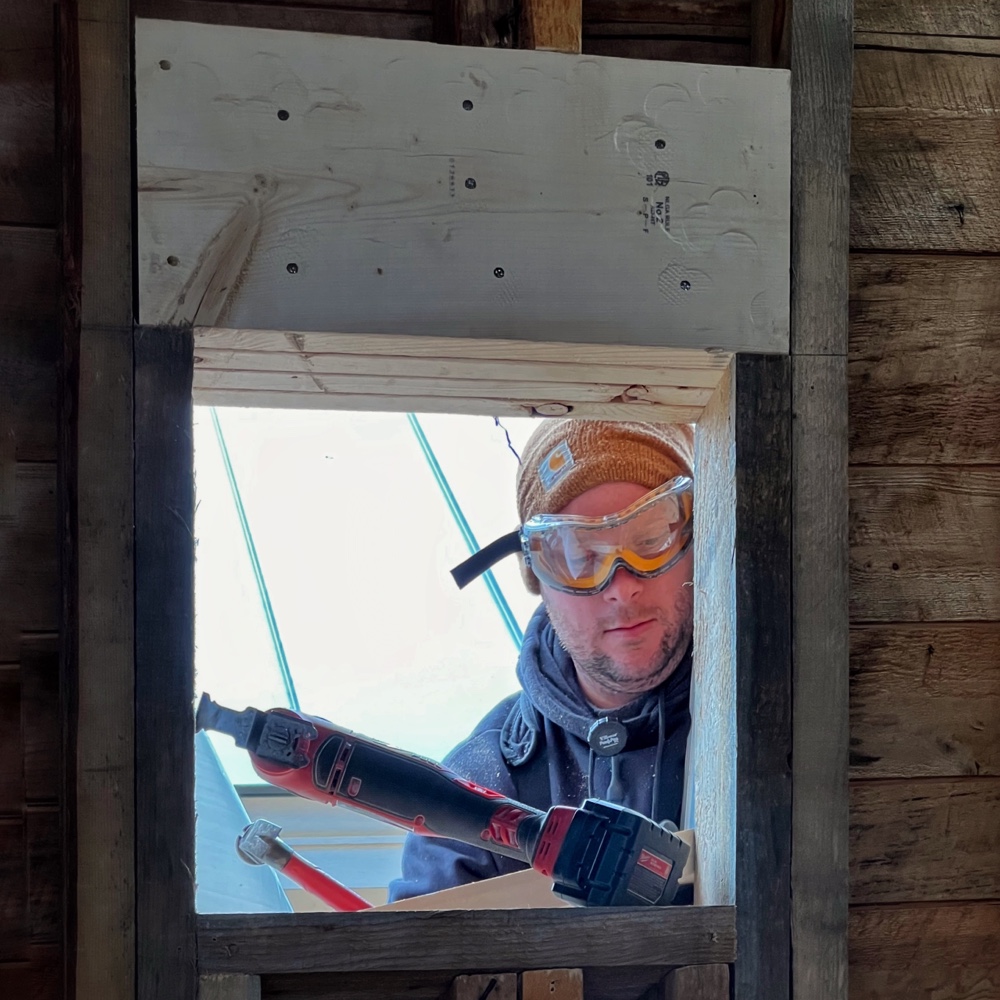
    Icehouse Interior, Hroth framing East elevation gable window (Photo: R.P. Murphy)
    Icehouse Interior, Hroth framing East elevation gable window (Photo: R.P. Murphy)

    In short, we’ve endeavored to maintain the public view shed much as it has appeared in recent decades albeit with a reimagined sunburst embellishment that weaves the icehouse together with the main house, the gates, and multiple additional sunburst motifs throughout Essex and the Champlain Valley.

    Envisioning the icehouse rehab from within, the photo below helps orient the new window as it will be experienced from the loft (still not framed) and, to a lesser degree, the main room. Morning light will illuminate the interior, offering a restrained prelude to the magnificent afternoon lighting that will bath the icehouse as the sun sets into the Adirondack foothills.
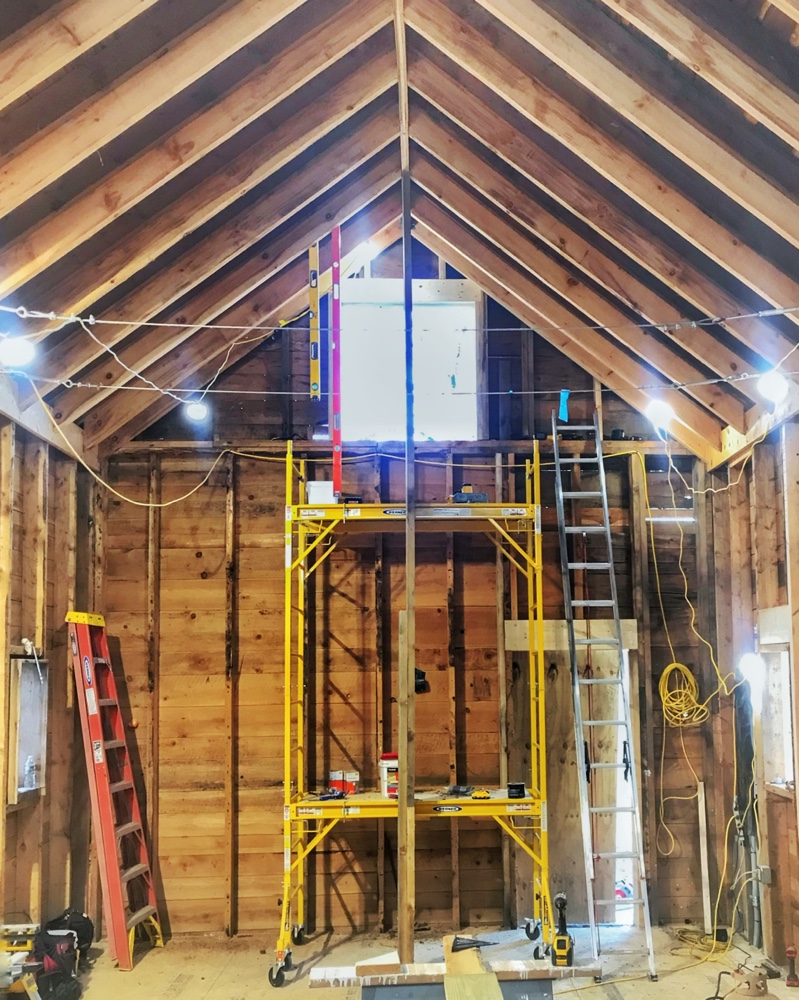
    Icehouse Interior, East elevation gable window (Photo: Hroth Ottosen)
    Icehouse Interior, East elevation gable window (Photo: Hroth Ottosen)

    The closeup below captures Hroth at the end of a long day of carriage barn carpentry looking a more than a little bit ready for some heat and a more comfortable perch. But it also captures the just completed window framing below the header, perfectly echoing the slope of the icehouse roof.
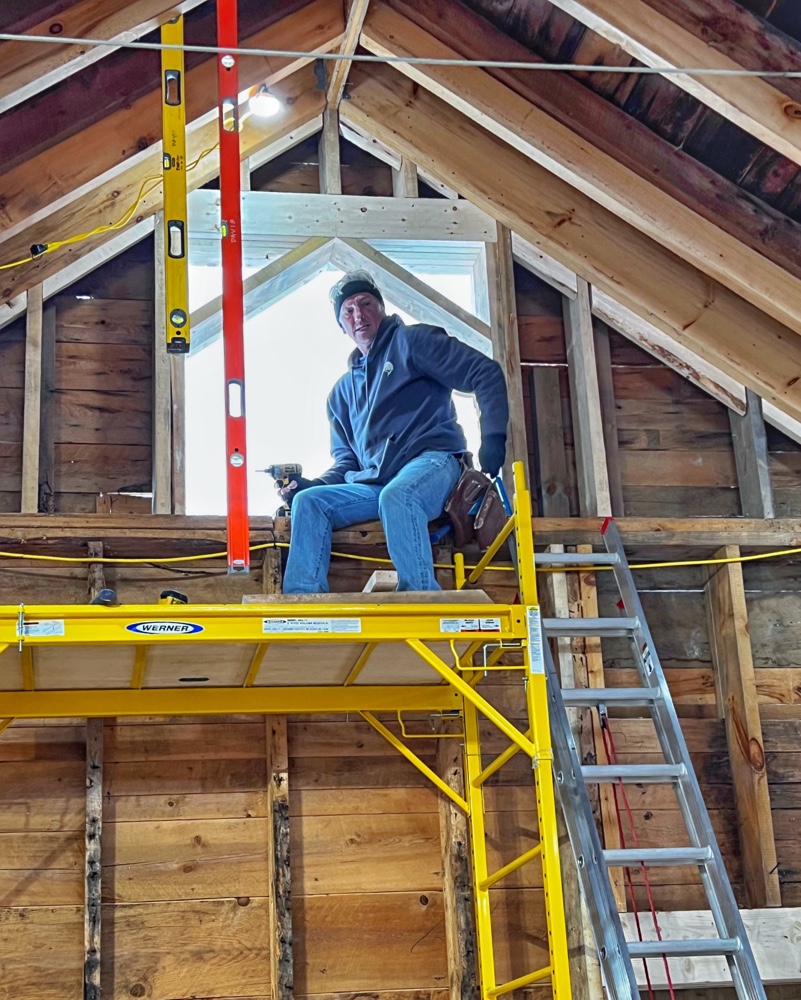
    Icehouse Interior, Hroth framing East elevation gable window (Photo: R.P. Murphy)
    Icehouse Interior, Hroth framing East elevation gable window (Photo: R.P. Murphy)

    Another closeup, gets a little closer to imagining the perspective when standing on the future loft floor.
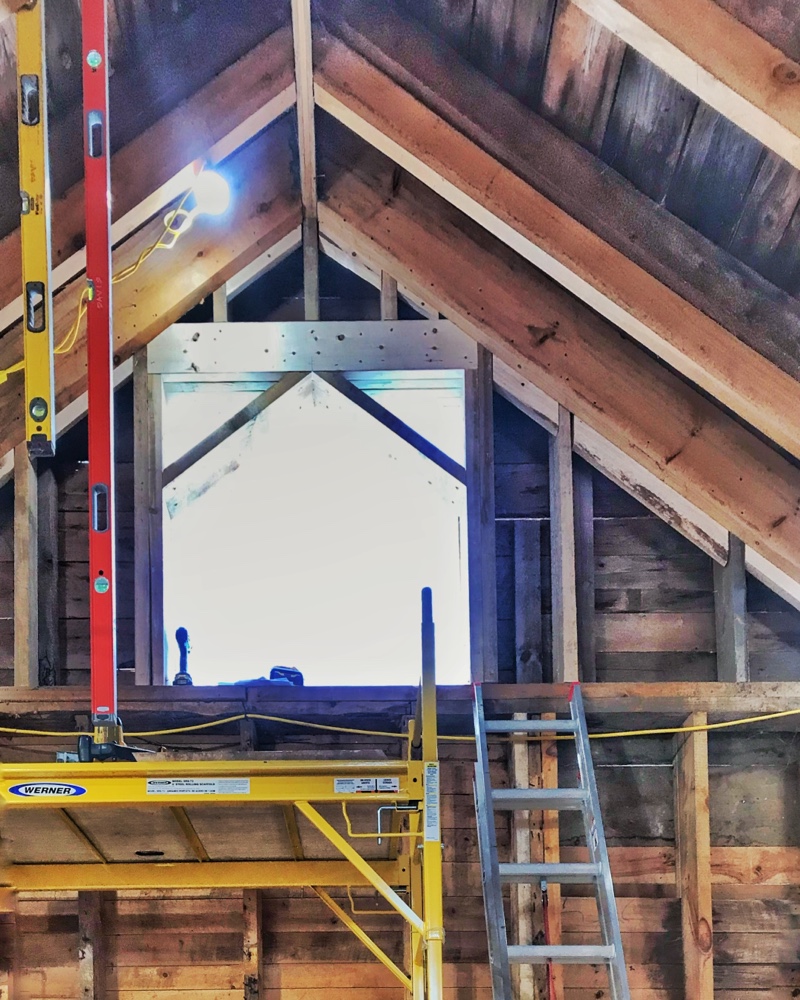
    Icehouse Interior, East elevation gable window (Photo: Hroth Ottosen)
    Icehouse Interior, East elevation gable window (Photo: Hroth Ottosen)

    Framing East Gable Window

    Shortly this aperture will be concealed behind insulated paneling much like the west elevation, but for a fleeting moment longer we can appreciate the natural light entering through the east elevation gable window framing, and we can try to imagine the daybreak view of Lake Champlain, warm sunlight illuminating the north elevation of the main house as it rises up into the summer sky.

    A new perspective is emerging as Hroth frames my future office window (from the icehouse loft). Looking east (actually southeast in this photo), this will be my morning view. Panning to the left 10 to 15° the view will be filtered through the enormous American Linden (basswood) tree and across the upper lawn, through the ancient ginkgo tree and across the front lawn to Lake Champlain. (Source: Loft Office View)

    Holes in walls. Such rudimentary changes to a building envelope. And yet such profound transformation!

    By strategically introducing apertures and maximizing transparency in this small structure we’re endeavoring to dilate the living experience beyond the finite building envelope, to challenge the confines of walls and roof, and when possible and esthetically judicious, to improve porosity with abundant new fenestration, dynamic interior-exterior interplay, subtle but impactful landscaping changes (including a new deck) that will work in concert to amplify the breathability of the interior and temptingly invite insiders outside. (Source: Gable End Window in West Elevation)

    The photo below hints at the future porosity of the this space. Imagine the window near bottom right once it is glass.
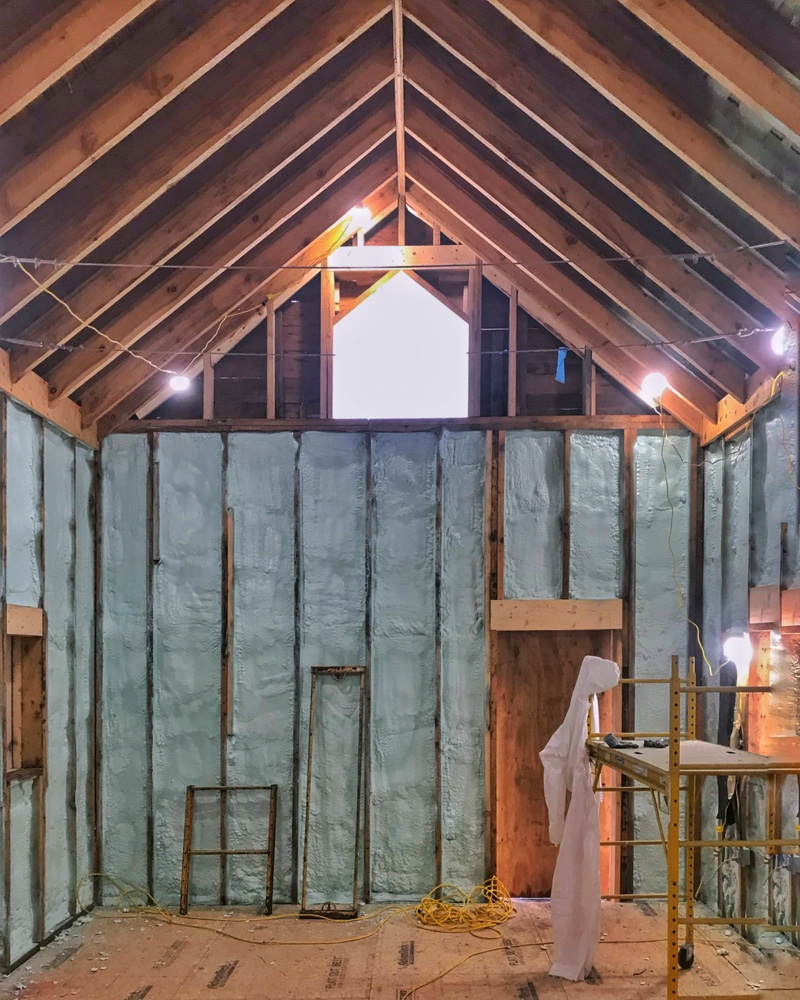
    Icehouse Interior, East elevation gable window (Photo: Hroth Ottosen)
    Icehouse Interior, East elevation gable window (Photo: Hroth Ottosen)

    Of course, framing in the balcony and eventually adding blisters will shift add interesting layers, shadows, textures, and other nuances to the transparency looking east from within. Perhaps an interior rendering or two will help imagine forward…
  • All Zipped Up: ZIP System Installation Complete

    All Zipped Up: ZIP System Installation Complete

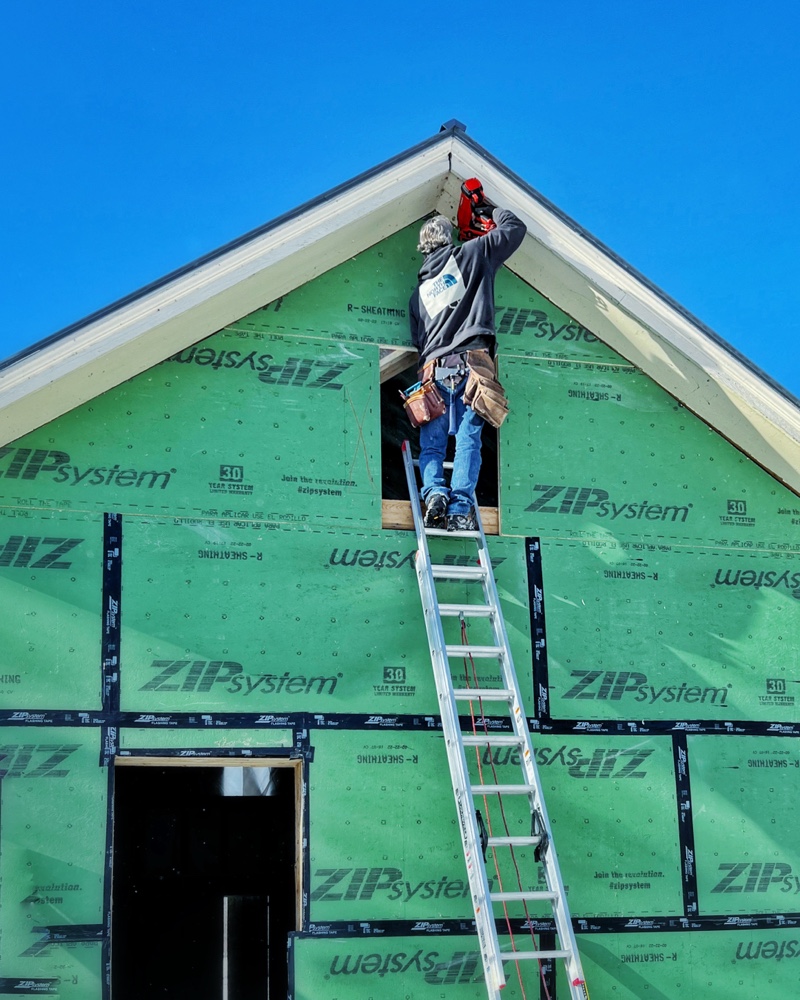
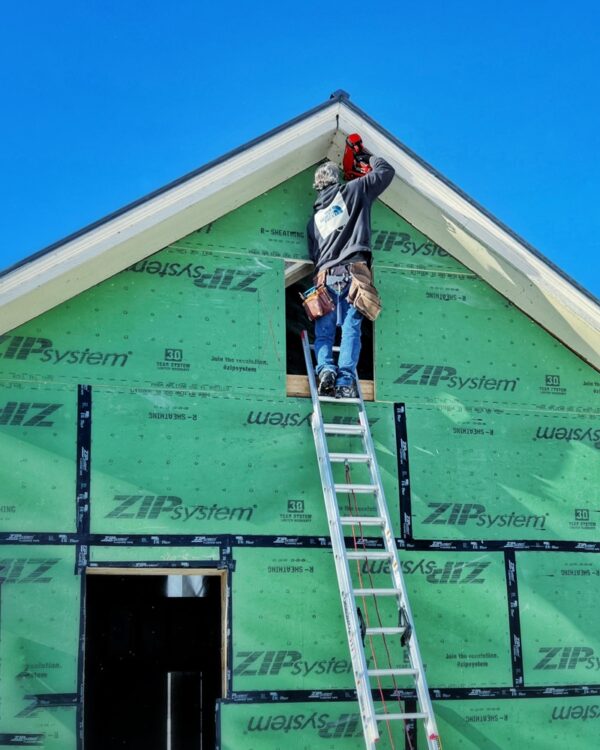
    Hroth finishes ZIP System installation on east elevation (Photo: R.P. Murphy)
    Hroth finishes ZIP System installation on east elevation (Photo: R.P. Murphy)

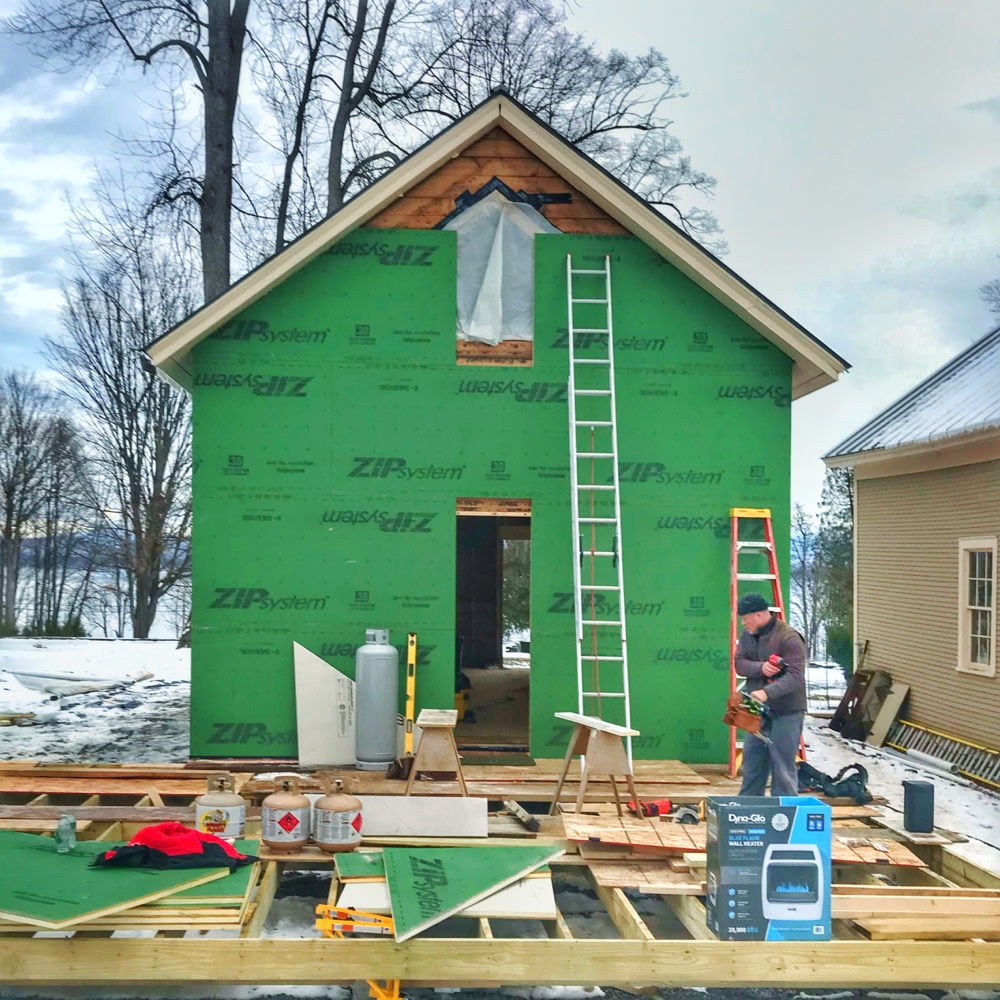
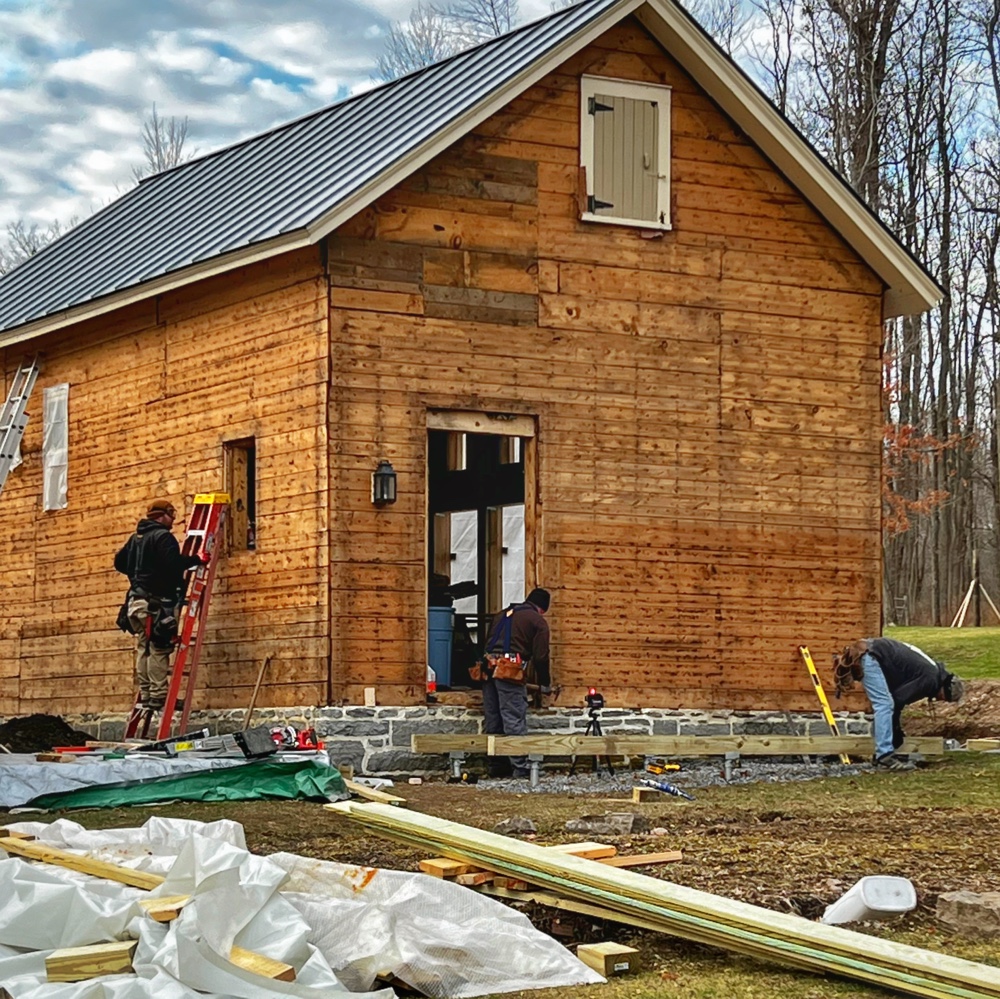
    As it turns out, the snow-blizzard-cum-bomb-cyclone that hepped up meteorologists and newscasters, snarled traffic across the country, and added a decidedly wintery twist to the Christmas holiday for many across the country impacted us two totally opposite ways, one good, the other bad. Ever the optimist, I’ll launch with the glorious news: the icehouse rehabilitation is now officially weathered in. The ZIP System installation is complete, ensuring a weatherproof envelop around the months of winter work ahead. Hurrah!

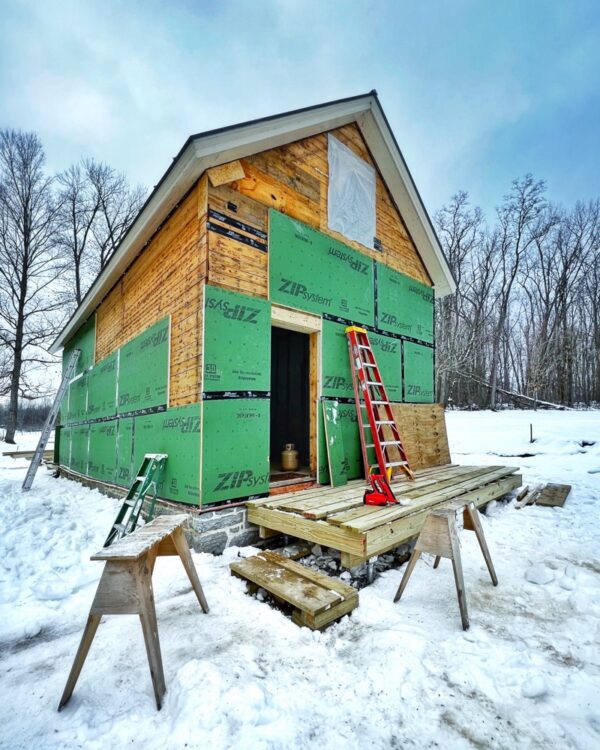
    The icehouse‘s original 2-ply T&G sheathing is now 100% encases in structural insulated panels, and all of the seams are taped. The ZIP System insulated panels appear to have served us well, and just in the nick of time. Although the worst of the weather, fortunately spared us.

    The winter storm became a bomb cyclone on Friday as it tore through some of the country’s major cities… Atlanta, Boston, Chicago and New York are seeing wind gusts higher than 45 to 55 miles an hour, among other hazardous conditions. Buffalo was the hardest hit Friday, with wind gusts of up to 70 mph, said Greg Carbin, a meteorologist with the National Weather Service. Buffalo was ground zero, and “that’s where true blizzard conditions have been seen,” he said. (Source: Bomb Cyclone Strikes Major Cities as Temperatures Plunge

    Although winds and snows fortunately were not a problem at Rosslyn, we did receive a lot of rain, rain, rain. But just barely completed ZIP System installation ensured that the icehouse was spared the damaging effects of driving rain, flooding, etc. Phew.

    The photo essay below offers glimpse behind the scenes — Hroth, Matt, Pam, and Tony hustling to complete the ZIP System installation before the storm and before everyone headed off for Christmas vacation. And this brings me to the not-so-good news…

    Hroth was planning to spend Christmas with his 91 year old father in California. Flights? Check. Packed? Check. All systems go? Check. But after driving 2 hours to the Albany International Airport on Thursday morning, he learned that his flights (and basically all incoming Southwest flights to Pasadena) had been preemptively canceled. After exploring options, Hroth accepted that he would be unable to celebrate Christmas with his family. He climbed back into his car and drove two hours back to Rosslyn.

    Susan and I deeply lament Hroth’s unfortunate luck, especially because we’re well aware that departing earlier and postponing completion of the ZIP System installation would likely have permitted him to fly to California earlier. And so, we realize that prioritizing the weatherproof sheathing over vacation travel positively effected the icehouse rehab and adversely effected Hroth and his family. I am sincerely sorry.

    Hroth begins ZIP System installation on east elevation (Photo: R.P. Murphy)
    Hroth begins ZIP System installation on east elevation (Photo: R.P. Murphy)

    ZIP System Installation Photos

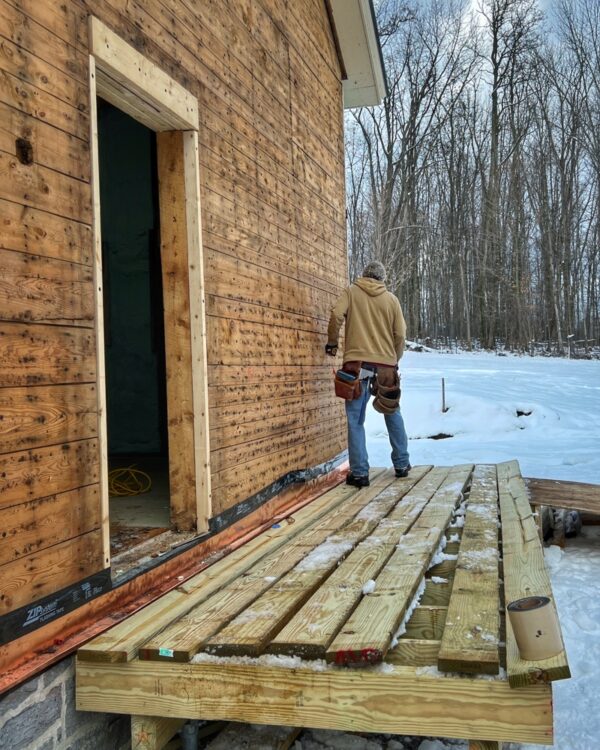
    In the photo above Hroth is just starting out with ZIP System installation on the east facade. Note the newly installed flashing and custom copper drip edge that helps weatherproof the building’s cladding with accurate design integration templated from Rosslyn’s other historic buildings.

    Fast forward to progress on the southside.

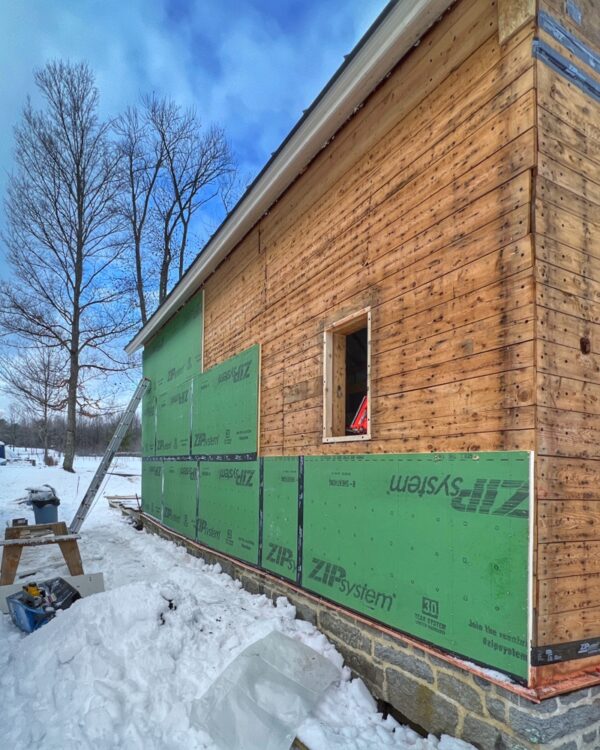
    ZIP System installation on south elevation (Photo: R.P. Murphy)
    ZIP System installation on south elevation (Photo: R.P. Murphy)

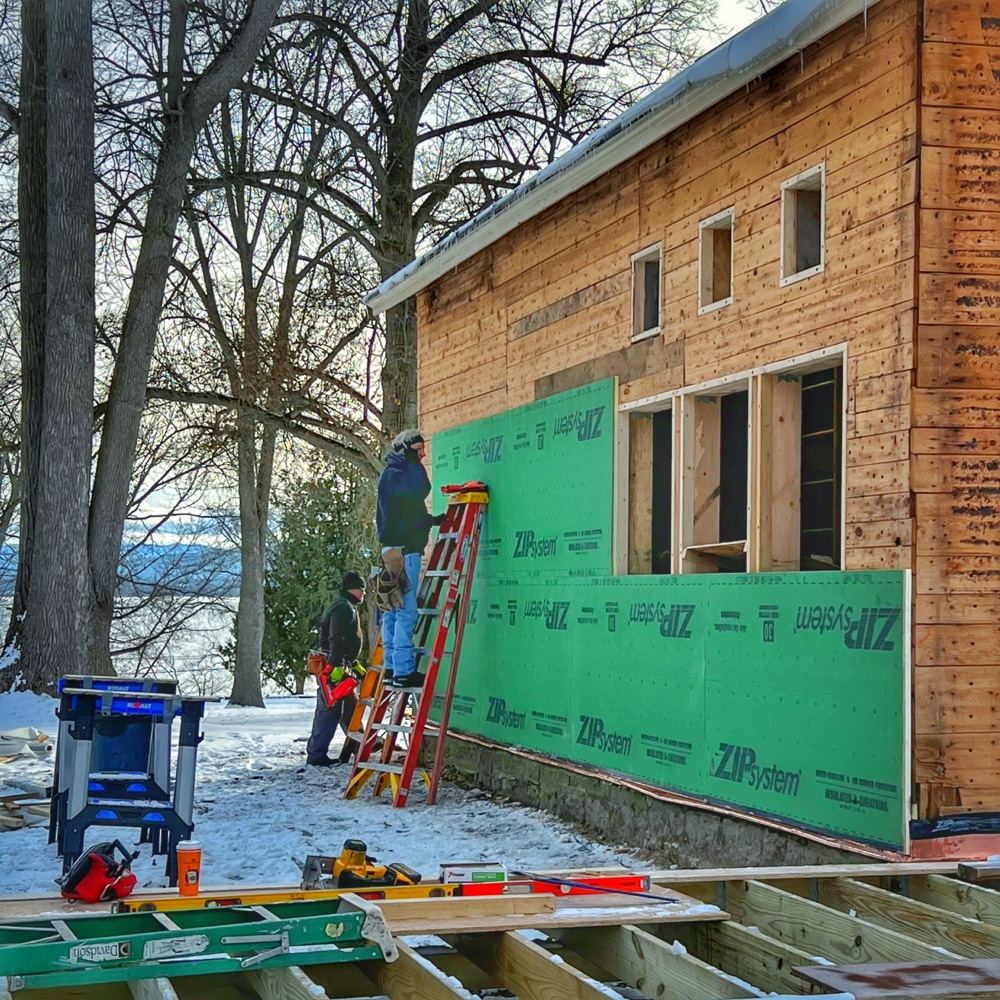
    The north and south facades were completely installed approximately two weeks (see “Zipping up the Icehouse” for a gallery and overview), so tackling the south and east elevations at once brings the project to completion. In the photo below Tony’s own weatherproofing gives a hint to how cold it was as the team raced the weather toward the finish line.

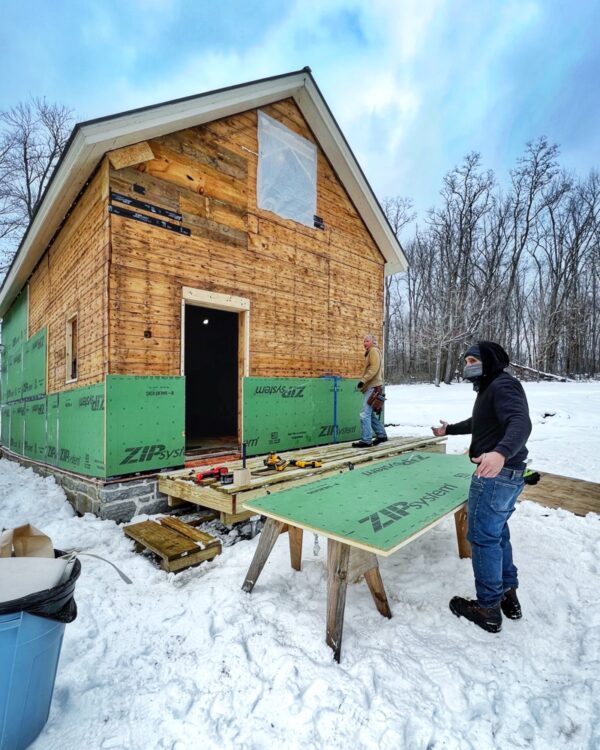
    Tony and Hroth installing ZIP System insulated panels on east and south elevations of icehouse (Photo: R.P. Murphy)
    Tony and Hroth installing ZIP System insulated panels on east and south elevations of icehouse (Photo: R.P. Murphy)

    Panel-by-panel, Hroth and Tony zipped up the south and east elevations, knitting together the corners to ensure that the trim be be perfectly aligned and plumb.

    ZIP System installation on south and east elevations (Photo: R.P. Murphy)
    ZIP System installation on south and east elevations (Photo: R.P. Murphy)

    Below, Hroth (foreground) and Tony (torso-less legs on ladder behind Hroth) finish nailing and taping the south facade Zip panels.

    Hroth and Tony installing ZIP System insulated panels on east and west elevations of icehouse (Photo: R.P. Murphy)
    Hroth and Tony installing ZIP System insulated panels on east and west elevations of icehouse (Photo: R.P. Murphy)

    With the south side complete it was time to load up the nailgun and finish up the east side. In addition to the slightly blurry action shot of Hroth rebooting for the final push, the photo below offers an intriguing look both inside and outside the icehouse, inviting contemplation of how this same perspective might look early this summer.

    Hroth 2/3 complete with ZIP System installation on east elevation (Photo: R.P. Murphy)
    Hroth 2/3 complete with ZIP System installation on east elevation (Photo: R.P. Murphy)

    Once the panels are fully secured, it’s critical to seal all of the seams with ZIP tape to fully weatherproof the sheathing.

    Tony tapes ZIP System panels on east elevation (Photo: R.P. Murphy)
    Tony tapes ZIP System panels on east elevation (Photo: R.P. Murphy)

    Tony is ensuring that the sealing tape properly laps upper-over-lower seams to ensure proper water shedding both during the build and into the future once the building is redlaw in clapboard.

    Tony tapes ZIP System panels on east elevation (Photo: R.P. Murphy)
    Tony tapes ZIP System panels on east elevation (Photo: R.P. Murphy)

    Getting close, Tony!

    Hroth fitting final ZIP System panels on east elevation (Photo: R.P. Murphy)
    Hroth fitting final ZIP System panels on east elevation (Photo: R.P. Murphy)

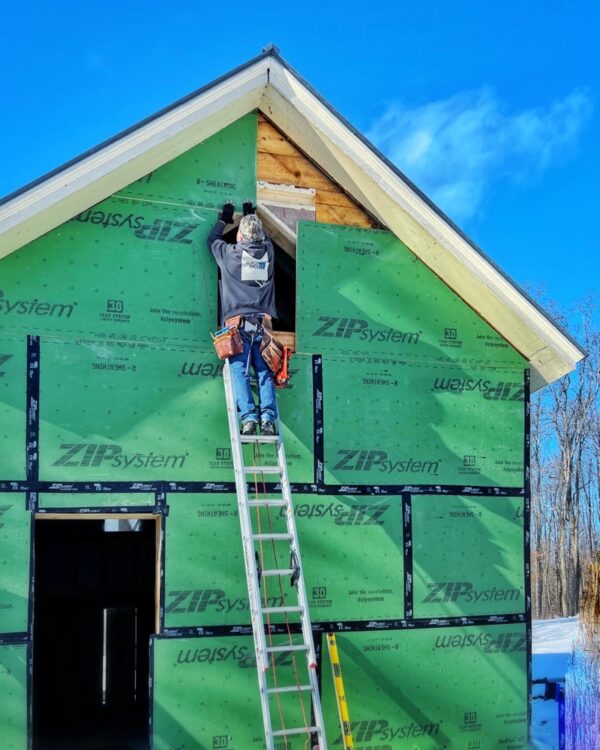
    Hroth is scribing and installing the final triangular panels at the gable end on the east elevation. So close…

    Hroth finishes ZIP System installation on east elevation (Photo: R.P. Murphy)
    Hroth finishes ZIP System installation on east elevation (Photo: R.P. Murphy)

    You can almost hear the Paslode nailer sinking those final nails through the paneling and into the icehouse’s street timbers.

    Hroth puts the finishing touches on the ZIP System installation. All four elevations of icehouse are now weathered in! (Photo: R.P. Murphy)
    Hroth puts the finishing touches on the ZIP System installation. All four elevations of icehouse are now weathered in! (Photo: R.P. Murphy)

    I’ll wrap up this bittersweet installment with heartfelt thanks to the team for seeing this critical project through to completion to ensure that increasingly inclement weather (we are after winter solstice, after all) spares the icehouse AND similarly heartfelt regrets that Hroth has been stranded at Rosslyn, unable to join his family for the holiday.

    That last photo above offers a fun glimpse from my future loft study, capturing Hroth as he concludes the ZIP System installation.

    Zip-up Mashup

    And, for good measure, a quick video commemorating this chapter.

    https://www.instagram.com/reel/CmjmDZbhETV/?utm_source=ig_web_copy_link

  • Zipping Up the Icehouse

    Zipping Up the Icehouse

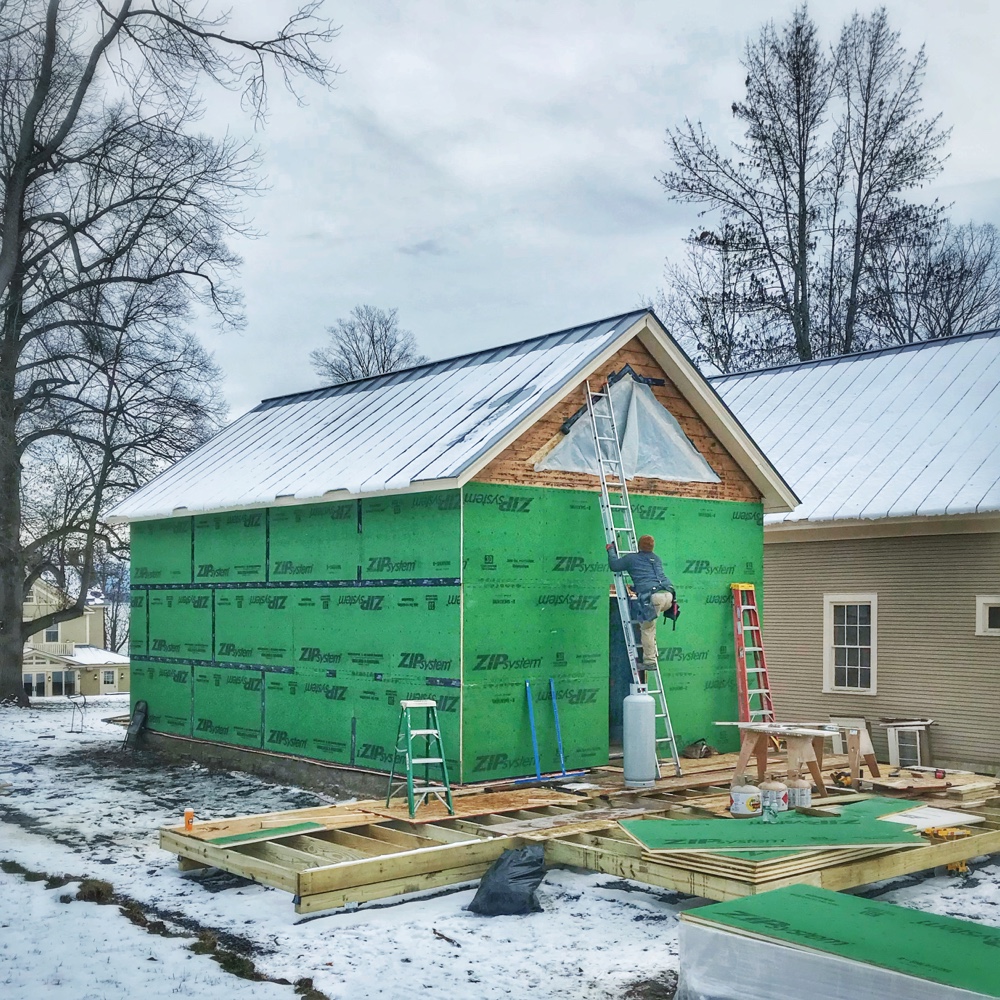
    Zipping Up the Icehouse (Photo: R.P. Murphy)
    Zipping Up the Icehouse (Photo: R.P. Murphy)

    Nothing like a region-wide winter weather system barreling down on you to accelerate winter-proofing the construction site, right?!?! But racing the arrival of a pre-Christmas blizzard isn’t the only motivation for the sudden transformation from 100+ year old T&G sheathing to green ZIP System insulated panels though. We’ve been working toward this goal for weeks. Zipping up the icehouse is actually accomplishing several objectives at once.

    Okay, let’s start with the most obvious, short term, practical objective of installing the insulated panels on the exterior of the building. But first, I should qualify what I meant by transforming “100+ year old T&G sheathing to green ZIP System insulated panels.” In this case, transformation does not imply replacing the existing sheathing with the SIPs. Instead, these insulated panels are being installed over top of the existing sheathing. And, as explained previously, the existing sheathing for the icehouse exterior walls is actually two layers of 3/4” T&G sheathing separated by perpendicular furring strips that accommodate ooolllddd school insulation that appears to have been made from shredded newsprint.

    Given midwinter construction, adding the ZIP panels efficiently creates a building envelope around the entire structure, allowing interior climate control. Windows and doors will not be delivered and installed until springtime, so this cocoon will stabilize the temperature and humidity for construction while significantly improving the work environment.

    Zipping Up the Icehouse (Photo: R.P. Murphy)
    Zipping Up the Icehouse (Photo: R.P. Murphy)

    That’s the short term, practical objective.

    There are some structural benefits as well, augmenting the existing structure (which predates our modern building codes) by creating a structural exoskeleton, that, among other things, dramatically improves sheer strength.

    We’re using ZIP System 1-1/2“ thick R-6 insulated panels from Huber Engineered Wood. In addition to insulation and structural objectives, these panels also provide a moisture and air barrier between interior and exterior environments.

    ZIP System Insulated R-sheathing is the simple all-in-one structural panel with built-in exterior insulation. Featuring integrated moisture, air and thermal protection, ZIP System R-sheathing completely reimagines traditional wall assemblies by streamlining exterior water, air and thermal management.

    Huber Engineered Wood
    Zipping Up the Icehouse (Photo: R.P. Murphy)
    Zipping Up the Icehouse (Photo: R.P. Murphy)

    And there are some aesthetic benefits specific yo the icehouse. Preserving the original mortared stone foundation created meant working around inconsistencies such as spots where the framing was proud of the foundation and others where the foundation actually extended out beyond the framing. Aside from the visual incongruities, this has created moisture penetration and rot issues over the building’s many years of service. When we stabilized the structure in 2006-7 it was necessary to replace large sections of the rotten sill. Additional rehabilitation was necessary this fall as well. By adding an extra 1-1/2” skin around the exterior of the icehouse (and integrating a copper drip edge / flashing that isolates wood from masonry) the entire build now overhangs the foundation enough to manage moisture, snow, etc. for another 100+ years.

    But wait… There’s more!

    The panels are permitting us to tune up some of the geometry — wall planes and trim lines that have deviated and deflected, sagged and bowed over the years — so that the rehabbed icehouse stands proud next summer.

    https://www.instagram.com/reel/CmO3j84ALdQ/
  • Icehouse Rehab 7: Window Apertures

    Icehouse Rehab 7: Window Apertures

    Icehouse Apertures and Transparency: Matt and Justin framing double hung windows. (Photo: Hroth Ottosen)
    Icehouse Apertures and Transparency: Matt and Justin framing double hung windows. (Photo: Hroth Ottosen)

    It sure is fun to see the three double hung windows emerging on the north elevation of the icehouse. And the three fixies above. And the three fixies on the south elevation. And the freshened up window aperture in the southeast corner, opposite the new bathroom in the small anteroom (once framing, well, and everything else, is complete.)

    I’m talking about window apertures. And the transparency that all of the new windows (and doors) will bring to Rosslyn’s icehouse. The transformation will be dramatic!

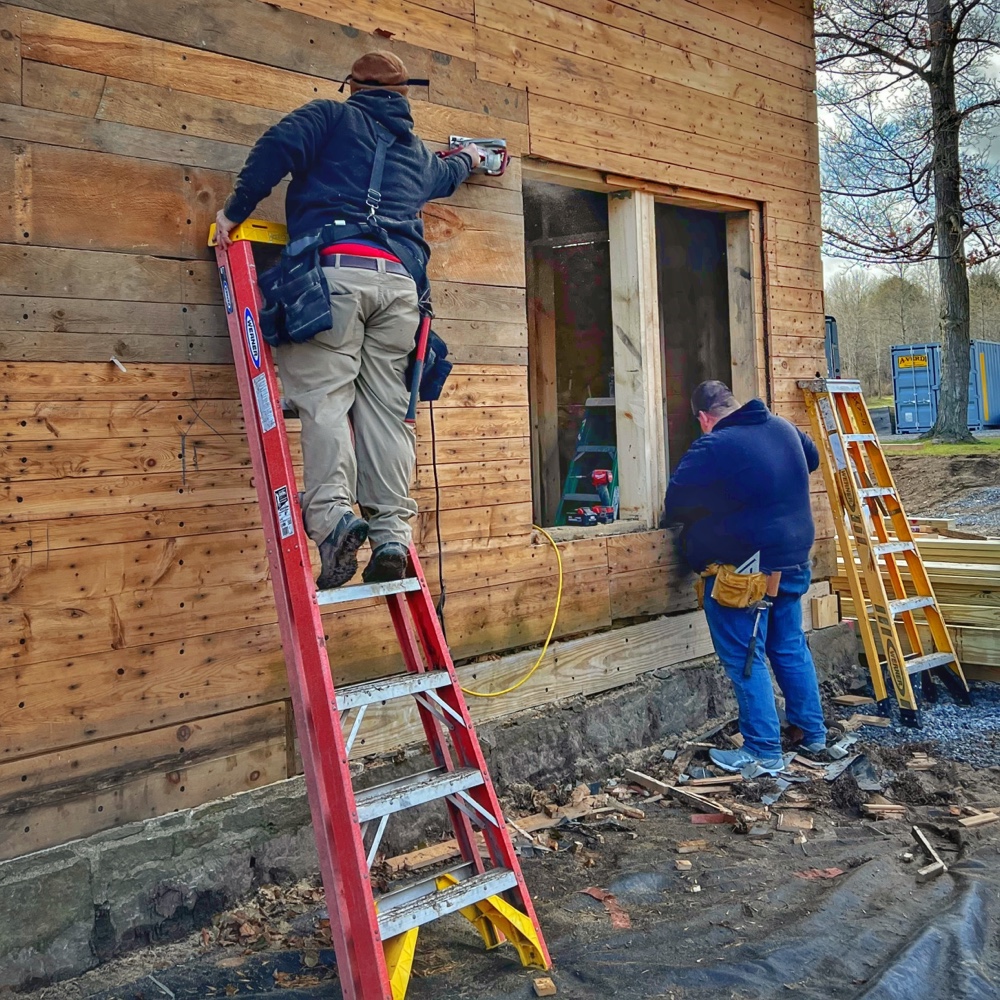
    Icehouse Apertures and Transparency: Matt fine-tuning framing for "fixies" (Photo: R.P. Murphy)
    Icehouse Window Apertures: Matt fine-tuning framing for “fixies” (Photo: R.P. Murphy)

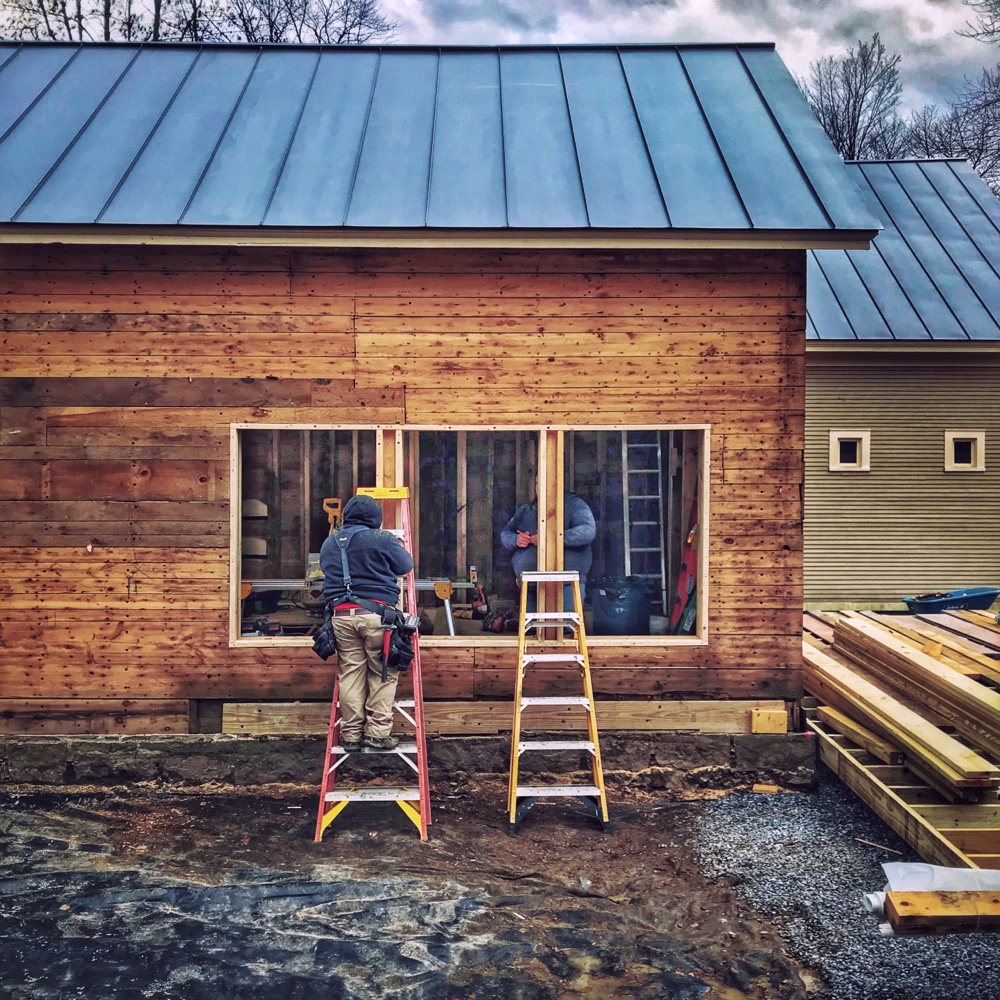
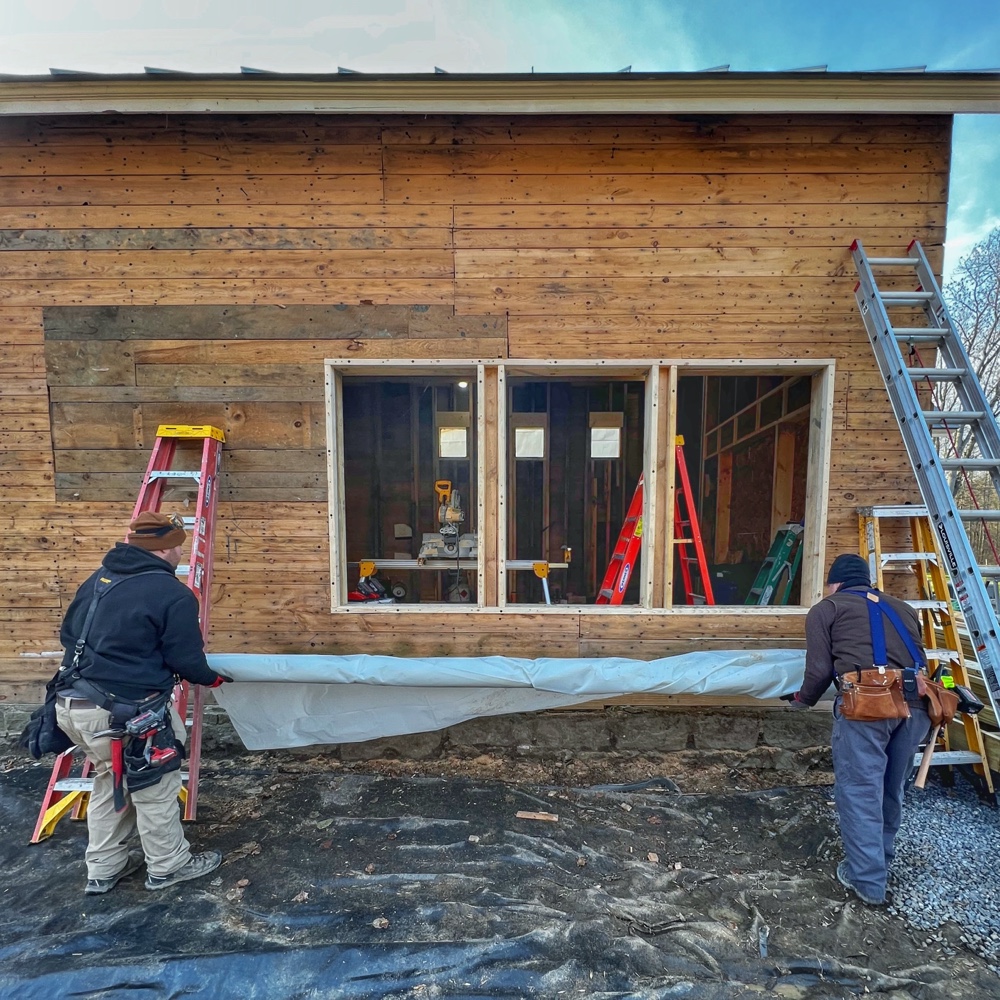
    With the north elevation becoming so porous, the team added plastic weatherproofing to ensure that an early December storm doesn’t punish us. In the photo below, you can see the in-between stage that probably should have appeared before the first and second photos above, the progression from opening up the sheathing for the three double hung windows and the three small fixies above.

    Icehouse Apertures and Transparency: covering up new apertures (Photo: R.P. Murphy)
    Icehouse Apertures and Transparency: covering up new apertures (Photo: R.P. Murphy)

    This time of year we’re working on borrowed time, racing winter, keeping our fingers crossed that temperatures and moisture will remain within a favorable range. But, we’re also realistic. And practical. Better safe than sorry!

    Icehouse Apertures and Transparency: Matt fine-tuning framing for "fixies" (Photo: R.P. Murphy)
    Icehouse Apertures: Matt fine-tuning framing for “fixies” (Photo: R.P. Murphy)

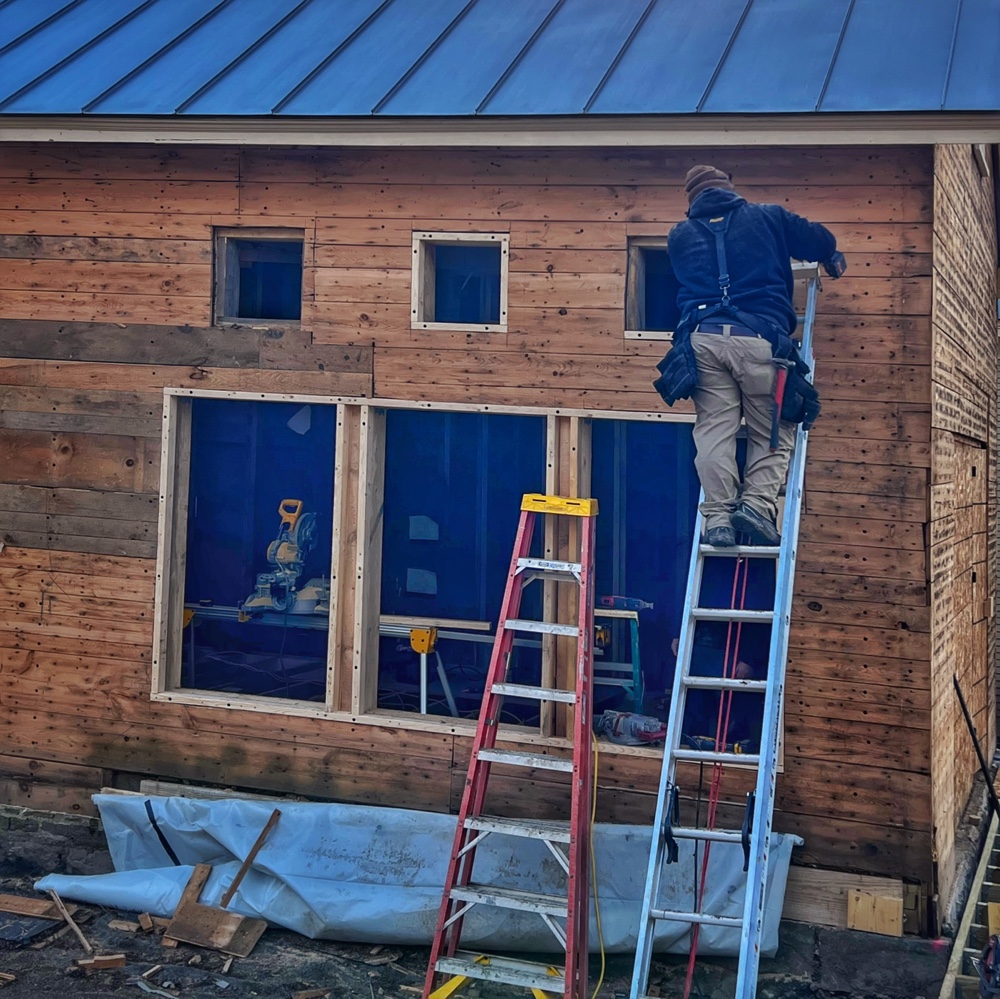
    Keeping with my out-of-sequence chronology, I’ll double back again. This time to Matt putting some of the finishing touches on those upper windows. When everything is said and done, these three small window apertures will echo those in the carriage barn stables visible from the west and northwest, adding a handsome cohesion between the two buildings. And they will augment the transparency that is fundamental to this repurposing project. Just as the west wall is transforming from a solid first story and a small service opening on the second story (ostensibly to help pack in the ice?), to a window-filled, view-filled gable end, we’ve integrated a constellation of windows in the northwest section of the north elevation, dramatically shifting the transparency of the interior.

    Icehouse Apertures and Transparency: Matt and Justin opening up the new double hung windows (Photo: R.P. Murphy)
    Icehouse Apertures and Transparency: Matt and Justin opening up the new double hung windows (Photo: R.P. Murphy)

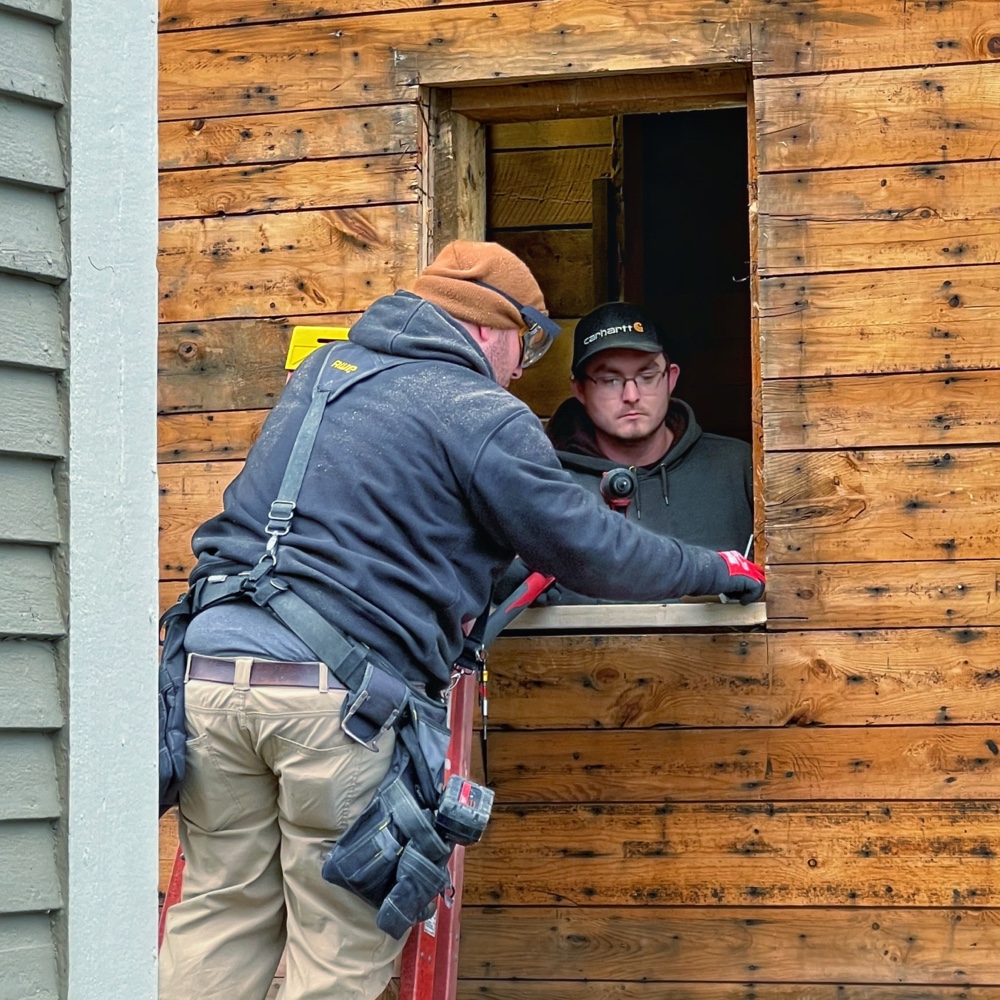
    Again out of sequence, the photo above and the next one below offer some insight into the process. The team first framed in the window bucks from within the icehouse. Once everything was secure, they cut through the two layers of existing sheathing and the “air gap” which is filled with shredded newsprint insulation (all original to the icehouse) to open the apertures.

    Icehouse Apertures and Transparency: Justin tuning up double hung window framing (Photo: R.P. Murphy)
    Icehouse Apertures and Transparency: Justin tuning up double hung window framing (Photo: R.P. Murphy)

    To the right of Justin (in the photo above) you can see the third double hung window and the three small windows (“fixies”) above framed and ready to have the sheathing cut out.

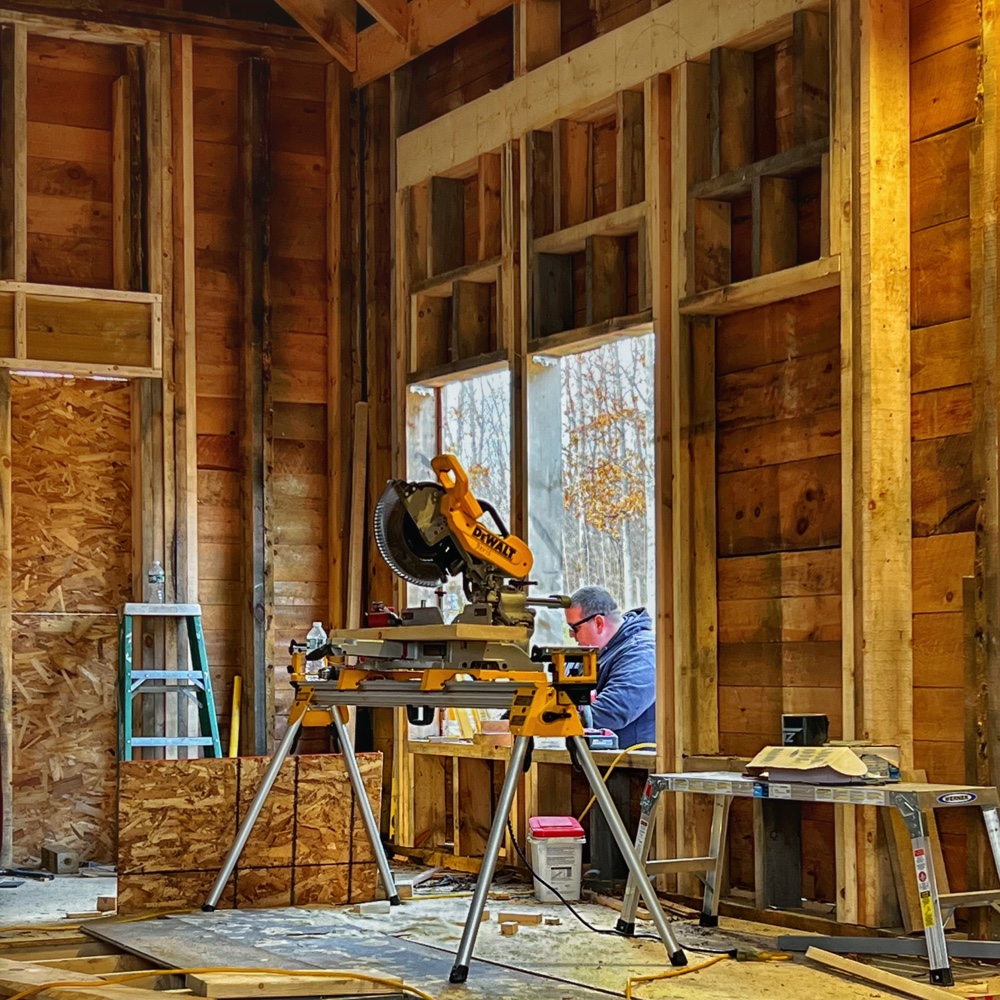
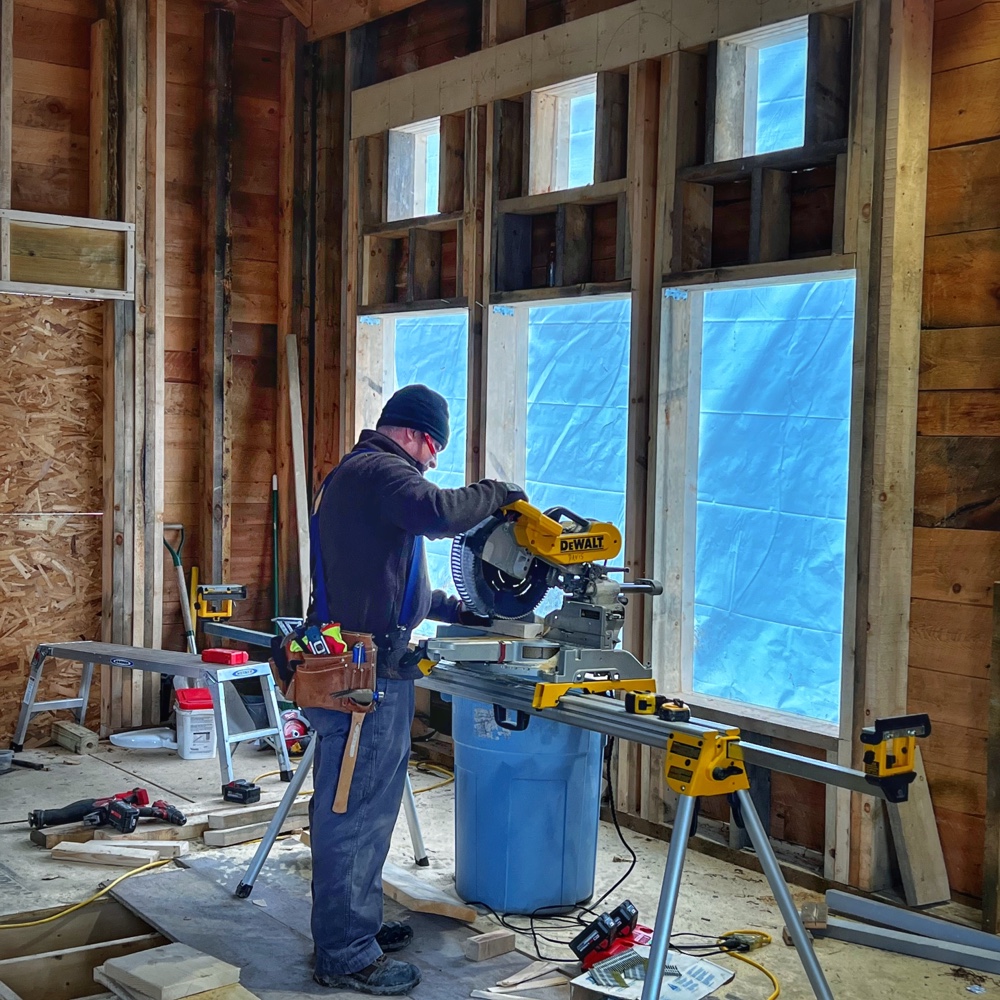
    Icehouse Apertures and Transparency: Matt manning the mitre saw (Photo: R.P. Murphy)
    Icehouse Apertures and Transparency: Matt manning the mitre saw (Photo: R.P. Murphy)

    All six window frames have been cut out in this photo. Jarret, cutting framing material with the mitre saw, is bathed in natural light even though all six apertures are covered in semi-opaque plastic. Try, if your imagination is feeling nimble, to imagine those apertures a few months from now. The large, lower openings will receive six-over-six double hung windows that can be opened to allow a nice breeze to enter on the north side of the building. And the three small windows above are the non-operable square “fixies” that echo the stable windows in the carriage barn.

    Although the drama today — at least in terms of apertures and fenestration — is found on the north elevation of the icehouse, there’s also some headway being made on the south elevation.

    Icehouse Apertures and Transparency: Matt and Jarret fine-tuning new "fixie" (Photo: R.P. Murphy)
    Icehouse Apertures and Transparency: Matt and Jarret fine-tuning new “fixie” (Photo: R.P. Murphy)

    The new fenestration in the western portion (open area of icehouse with vaulted ceiling) repeats the high (clerestory) windows windows from the north façade, albeit with slightly different spacing. This southern exposure will introduce plenty of natural light to the principal space in the icehouse while editing the view of the carriage barn. Although these new apertures will not result in the same elevation transformation as the north side, they will significantly augment the natural light and the transparency.

    Icehouse Apertures and Transparency: Matt cutting out sheafing from new window (Photo: R.P. Murphy)
    Icehouse Apertures and Transparency: Matt cutting out sheafing from new window (Photo: R.P. Murphy)

    Although windows will not be installed until spring, we have the ability in the short term (before exterior paneling is installed) to preview the inside-outside blurring — or would that be, outside-inside blurring?!?! — that we’re hoping to accomplish by introducing so many apertures into this small building.

    And one more window is now ready for temporary paneling and spring installation of new casement. In the southeast corner of the building, directly to the left upon entering from the east, an existing window has been reframed and replaced with a matching but high efficiency Marvin window (that will be installed in duplicate on the north elevation, one in the same location as previously but now located in a bathroom, and another in the new mechanical room).

    Icehouse Apertures and Transparency: shoring up window framing for existing aperture (Photo: R.P. Murphy)
    Icehouse Apertures and Transparency: shoring up window framing for existing aperture (Photo: R.P. Murphy)

    For those of you familiar with the building as it stood prior to this remodel, that aperture is unchanged.

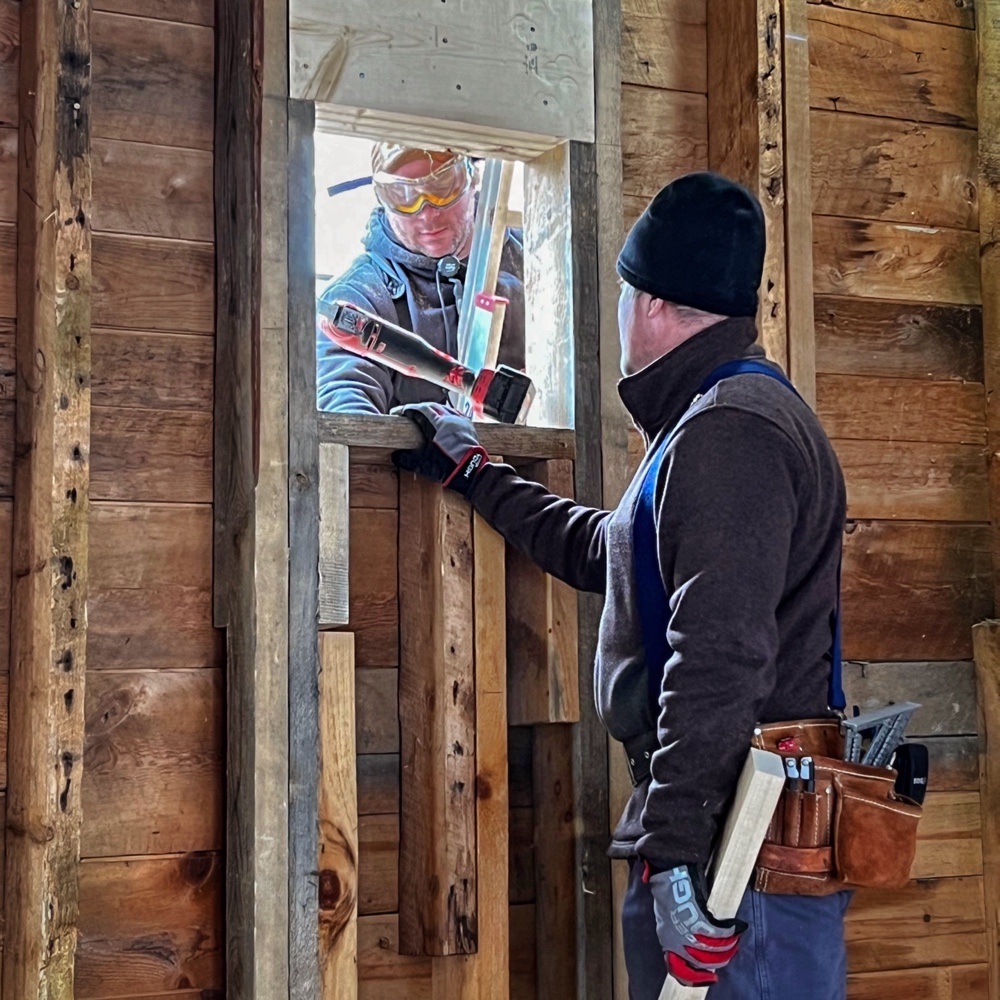
    Icehouse Apertures and Transparency: Matt and Zack framing new window (Photo: R.P. Murphy)
    Icehouse Apertures and Transparency: Matt and Zack framing new window (Photo: R.P. Murphy)

    Although the location (and window design) remains the same, Matt and Zack are fortifying the window buck to ensure exact location and structural integrity.

    In my last icehouse rehab update I caught you up on the internal window framing. Now we’ve taken the full leap!

    There are still two windows in the north elevation the need to be framed and open, and then there are all of the hight level windows in the two gable ends of the icehouse. This latter project will take place after first phase of insulation and subfloor installation (both scheduled for next week) so that staging can be set up to work so high up. Updates will be forthcoming…

    In closing, a heap of gratitude to Pam, Hroth, Tony, Eric, Matt, Zack, Justin, and Jarret. Have a great weekend!