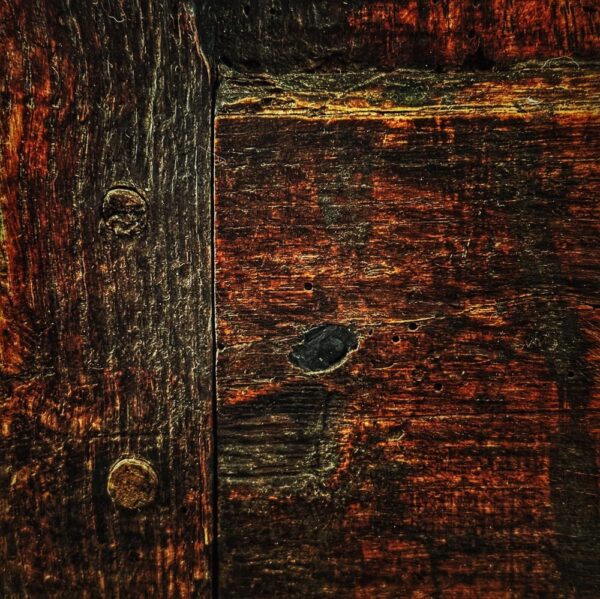
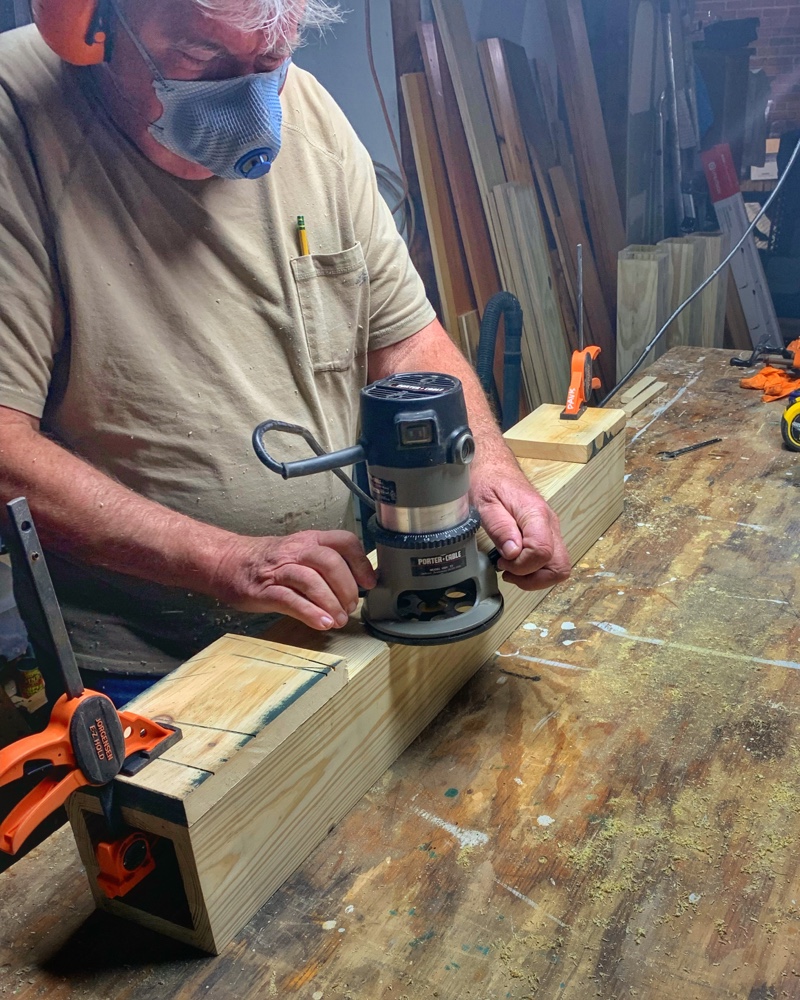
Today’s post is a tribute to our Rosslyn forebear, George McNulty, from whom we inherited a whimsical double sunburst motif on the west façade of Rosslyn’s ell, and Peter Vaiciulis who fabricated a slightly downscaled sister embellishment for the east façade of the icehouse.
Double Sunburst, Rosslyn’s Icehouse, March 2023 (Photo: R.P. Murphy)
This twist on a familiar Essex architectural theme, the sunburst motif that is most prominent on the old firehouse turned art gallery turned tavern (in the middle of town), is perhaps best described as a double sunburst. Or, in the view of Peter, the carpenter who reinterpreted George McNulty’s original with a slightly more diminutive iteration, this is not a sunburst at all, but rather two “sun fans”.
And a haiku is born.
Double Sunburst Haiku
What sunburst motif?
Better two suns than one, and
a pair of sun fans.
Or Sunup, Sundown?
As an unabashed heliocentrist I’m drawn to another possibility. Possibly Peter’s “sun fans” are actually an architectural paean to the rising sun and the setting sun. Sunup. Sundown. Conjoined. Sunup-sundown.
While it’s tempting to conceive of Essex, New York (and maybe even the entire Adirondack Coast) as the point of perennial sunrise, more fitting (and yet similarly flattering) is the more reality based celebration of sunup AND sundown. For both are glorious in this realm.
Afterward
The Essex sunburst has ostensibly been ornamenting our community since the late 18th or early 19th century. Perhaps this 1882 Harper’s Weekly illustration was inspired by a visit to our fair hamlet?
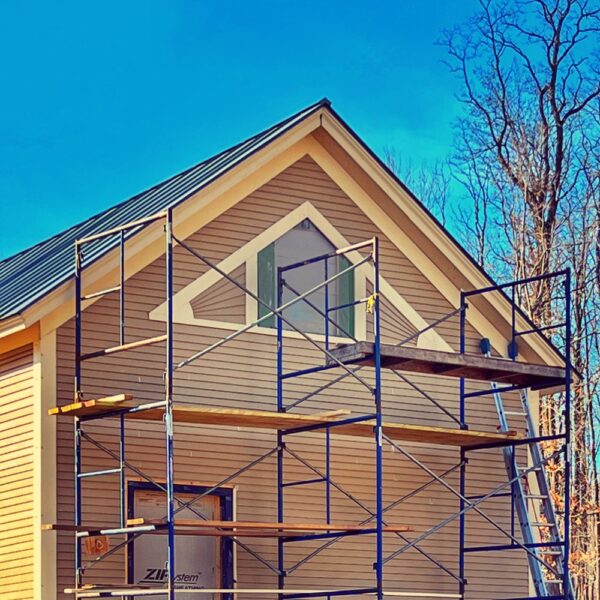
Installation of clapboard is complete! All four façades of Rosslyn’s icehouse are now handsomely clad in cedar, primed and painted before installation, ready for nailhead touchup as temperature rises in the weeks ahead.
Clapboard Complete, March 23, 2023 (Photo: Geo Davis)
Especial accolades are due Supi and Peter who stayed late last night to finish all but the last four boards at the apex of the gable end. And Calvin showed up at the crack-of-dawn this morning to finish up the elevation that he had started about a week ago. Justin has been a big help on this east elevation, and I’m probably overlooking someone. Better dig back through my photos!
To everyone who helped wrap this historic icehouse and clapboard and trim, so that we’re ready when the windows arrive in a month and a half… Thank you, all. Working on clapboard siding off-and-on during these winter months whenever conditions permitted made for an unpredictable workflow. But you persisted, and now we can all appreciate the rewards. Congratulations!
Clapboard Complete, March 23, 2023 (Photo: Geo Davis)
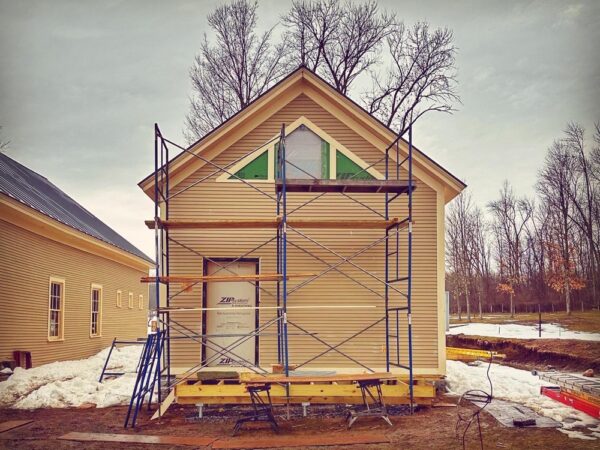
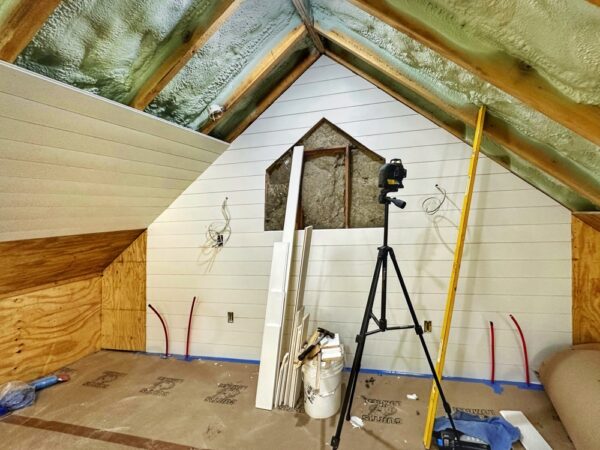
Peter is prepping the clapboard sunburst motif elements that will infill the two triangles flanking the gable end window. The entrance door will be delivered shortly, and the garapa decking material will be ordered next week. Little by little this building is starting to resemble the plan…
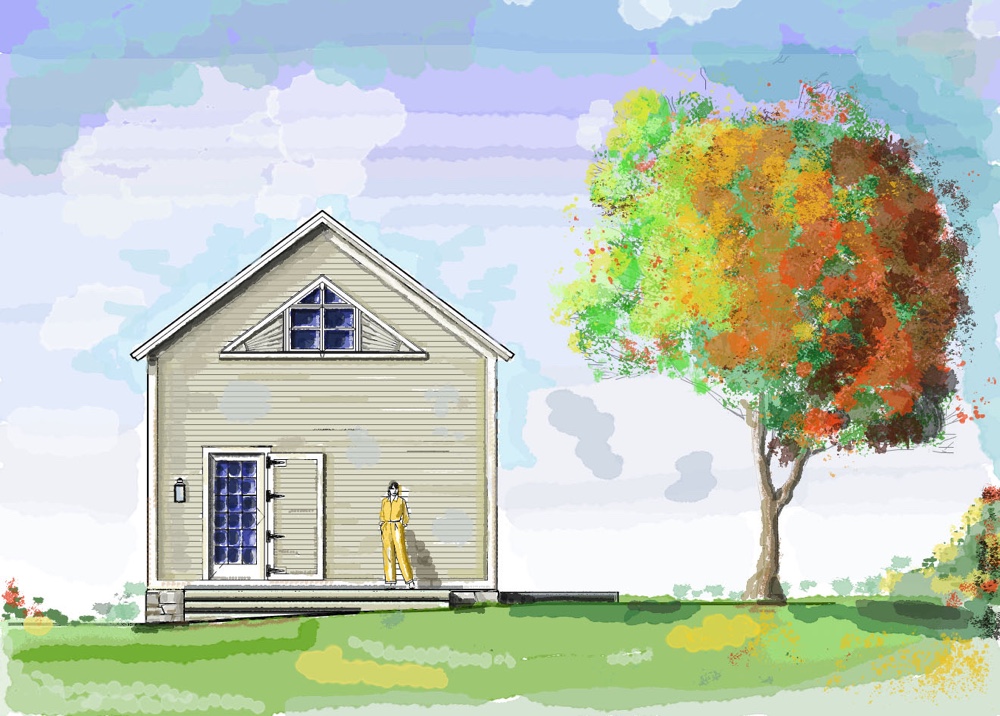
Rendering for Icehouse Rehabilitation, East Elevation (Source: Tiho Dimitrov)
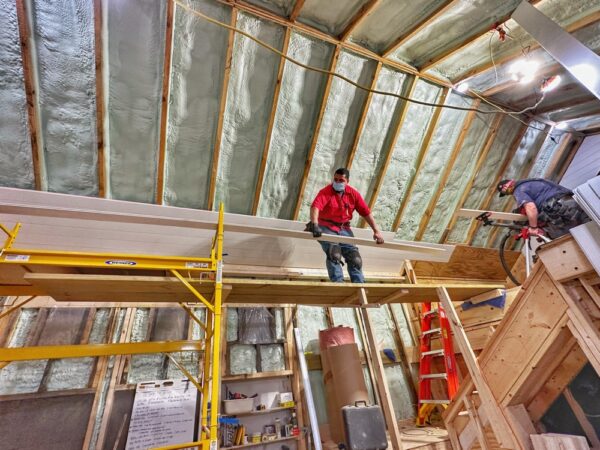
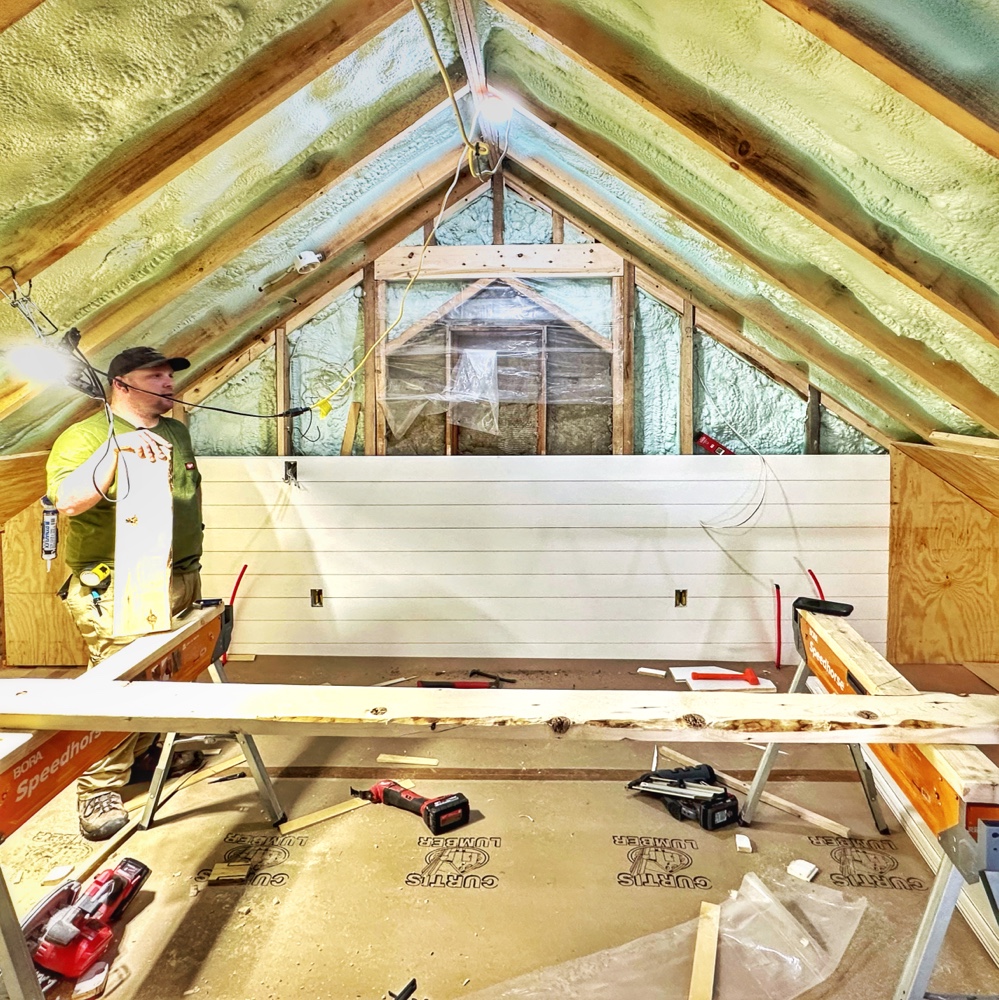
Matt and Jarrett Installing Nickel Gap on Icehouse Ceiling (Photo: Geo Davis)
Time for a nickel gap progress report. But first let’s backfill slightly. As you may recall, we decided to finish the icehouse interior in T&G nickel gap instead of shiplap. We estimated and re-estimated material, ordered it from of T&G from Haselton’s, waited a couple of weeks for milling and delivery, and then offsite material preparation began.
Supi and Matt Installing Nickel Gap on Icehouse Ceiling (Photo: Geo Davis)
We’ve been fortunate to have two offsite heated garage-workshops serving as paint shops for all of this material because we wanted to pre-finish the lumber and had no viable space on site. Our prep and finish has included 1) shellac-based primer or equivalent on all knots, etc., 2) two coats of rolled primer, and 3) two brushed coats of finish paint.
T&G Nickel Gap Progress on Icehouse Ceiling (Photo: Geo Davis)
T&G Installation
We started by coordinating our installation plan to ensure 100% consistency across weeks of installation with rotating team members. We’re using 16-gauge brad nailers with 2” nails through the tongues, into the 2” studs and rafters. On sloped and flat ceilings T&G is being doubled up and “scissor nailed” as follows:
maximizing the nailing angle of fasteners as close to 90° as possible to ensure maximum holding,
taking advantage of the full width of the 2” rafters,
driving the fasteners through the shoulder of the tongues into the framing at a 45° angle to improve retention against gravity, and
shimming if/as necessary to ensure full contact of T&G with rafters and to eliminate waviness.
Nickel Gap Progress on Icehouse Ceiling (Photo: Geo Davis)
When installation began, we transported material into the icehouse in sufficient amounts calibrated to speed of progress. We still need a little more trial-and-error to perfect our flow while trying balance multiple considerations:
enough material needs to be onsite for ongoing/continuous installation,
material flow should anticipate enough acclimatization time so that we don’t experience expansion or shrinkage after installation,
and, just to keep things challenging, we need to avoid having excess material in the icehouse at any given time because it gets in the way of other projects.
In short, three challenges baked into one!
Nickel Gap Progress on Icehouse Ceiling (Photo: Geo Davis)
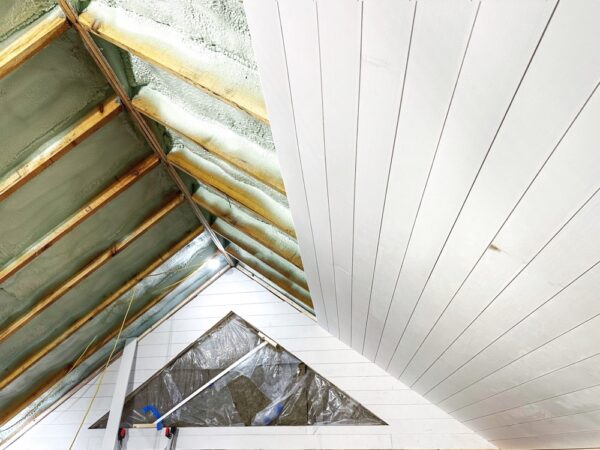
Nickel Gap Progress
As you can see, we started out with the two gable end walls per Peter’s prudent recommendation. Now we’ve moved onto the north ceiling, with close to 2/3 complete including the challenging integration where loft built is are being installed.
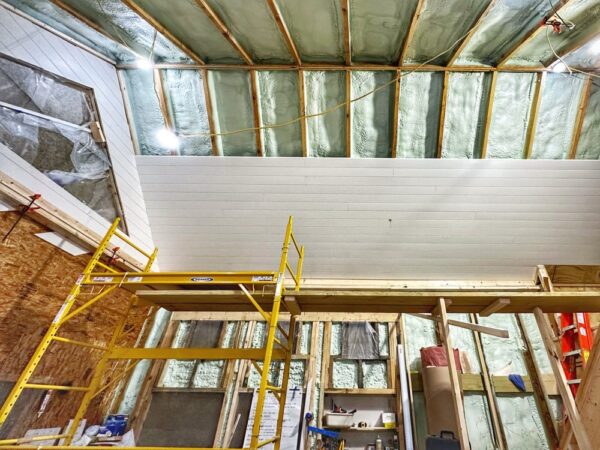
T&G Nickel Gap Progress in Icehouse (Photo: Geo Davis)
Matt, Jarrett, Supi, and Eric have been focusing on the T&G nickel gap installation, and the progress is really starting to add up. The coming promised to be another visual leap forward as the ceiling gets closed up. I promise to post photos as soon as significant headway has been made!
Nickel Gap Progress Video
Let’s wrap up with a little moving picture to show you what’s happened so far…
Consider that word parade fair warning for where I’m headed. From dovetails to team dynamics, in the twinkling of an eye. At least, that was my plan in revisiting a flood of field notes. Instead my errand evolved into a meandering meditation on admittedly abstract, fairly freestyle associations between durable joinery and team dynamics.
So, if you’re the A-to-Z git-r-done type, this is a good post for you to skip. Probably. Unless you’ve already burned a cord of calories and you’re surfing a dopamine-endorphin wave, in which case this might be just the departure from your daily that the doctor ordered. (The proverbial doctor, not the real doctor.)
But I’m getting ahead of myself. Let’s rewind a few weeks to my sudden and unanticipated decampment from Santa Fe to Essex.
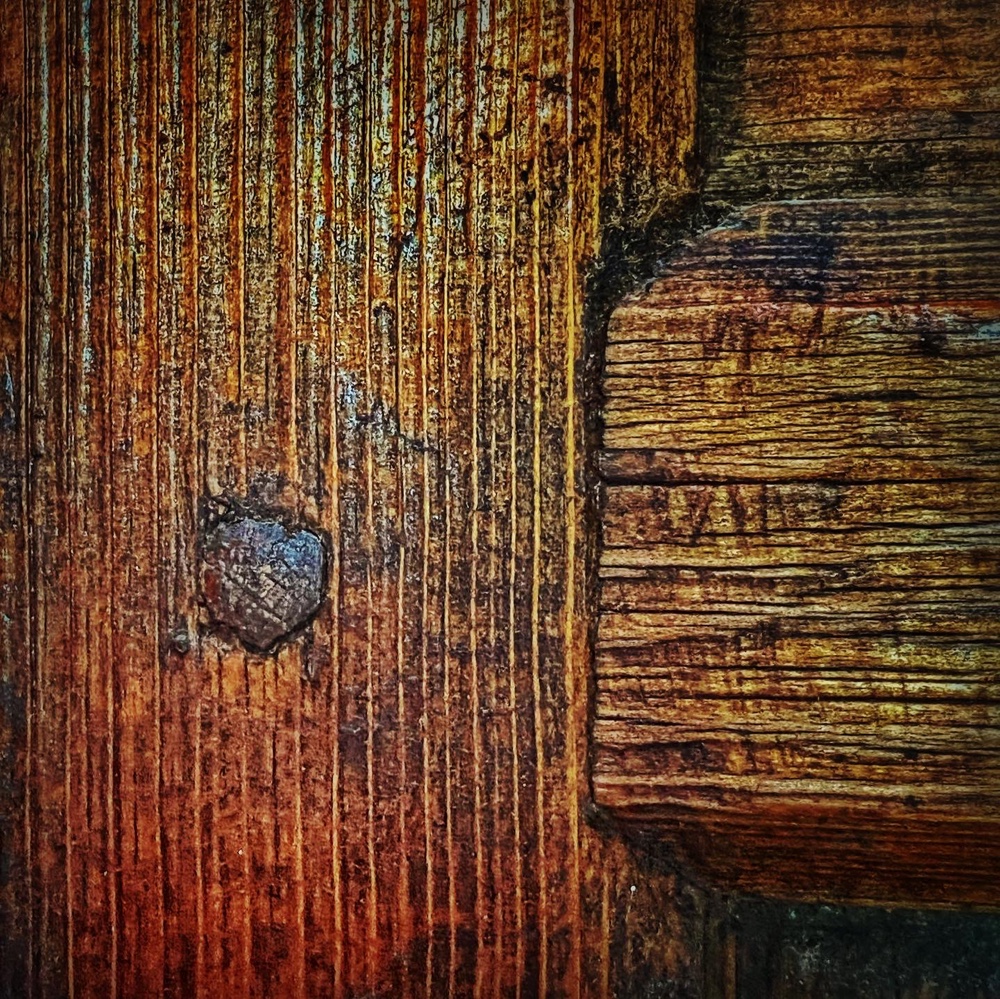
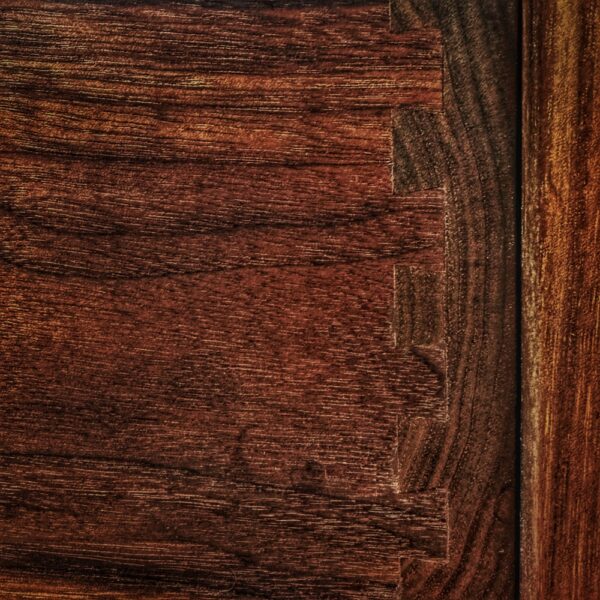
Durable Joinery (Photo: Geo Davis)
Icehouse Intermission
Mission interrupted, more to the point. Icehouse rehab back on ice for a week or two while we regrouped and remapped and, eventually, rebooted. Upon approaching Rosslyn by water — steely skies and surreal snowflakes fluttering occasionally (as if the special effects team had been downsized), an almost empty ferry, a mostly hibernating hamlet hunkering lakeside — mixed emotions roiled within me.
There was a wellspring of anticipation upon returning to inspect firsthand the team’s progress on the icehouse rehab, boathouse gangway, and some painting and tiling maintenance inside our home. There was also the poignant pique of a visit precipitated not by plan or passion but by infelicitous necessity. (Source: Snow Falling on Homecoming)
Three weeks ago this past Wednesday. The following days were invigorating. Encouraging.
By in large, this impromptu return to Rosslyn has been profoundly positive…
[“On the Level“, a poem drafted during my visit, reflects] the reassurance that I’m encountering, the confidence and conviction that are flowing back in after ebbing…
[…]
On the level, there’s plenty of optimism, despite inevitable setbacks. (Source: On the Level)
The progress was grounding, familiarizing myself physically with what I’d been living virtually, witnessing in person the dramatic transformation of this long-held vision into tangible, well built, inviting spaces and floors and walls and stairs and windows and doors. The volumes and the vessel that contains them, defines them, that had been gestating for almost two decades, was at last becoming believable due to the collaboration and teamwork of many.
Durable Joinery (Photo: Geo Davis)
A furtive foray into the curious coalescence of still tender fractures and ruptures that drew me back to Rosslyn (and that continue to disclose themselves each day of my stay, reminders of quaking in recent weeks) but also the durable bonds and the abiding beauty that hold it all together. (Source: Bowtie & Broken Memento)
While it is indeed Rosslyn’s abiding beauty that beckoned us to this property in the first place and her abiding beauty that has buoyed us through years of historic rehabilitation (and personal rehab!), there are times when the border between broken and unbroken blurs and faultiness become fractures. In such cases it is the durable bonds that prevail, that steady the proverbial ship, that hold it all together.
Rarely, I find, does the journey tidily delineate between clear victories and clear setbacks. Ours is a nonbinary and highly subjective adventure, and this midwinter, mid-project hiatus is no exception. Disheartening and challenging, yes, but also an opportunity to acknowledge and to celebrate accomplishment, a notable benchmark on the quest to reinvent a 19th century utility building as a 21st century lifestyle hub on a par with Rosslyn’s gracious home, waterfront, and generous grounds.
In short, there was — and there is — far more to fête than to lament at this juncture.
Durable Joinery (Photo: Geo Davis)
Back to Work & Field Notes
In what’s become a familiar pattern, today’s post was an orphaned draft, initiated as field notes during my recent Essex sojourn, and then adapted into a readout for the team to catalyze our onsite meetings into an actionable scope of work. That part happened. Practical. Necessary. Timely. Now, with the benefit of sufficient remove (for tempering tone and shifting perspective) I’m revisiting those field notes from a more meditative perspective. And yes, my reflection has been fueled in no small part by an obsession with joinery.
Before I go there, guiding you into the mesmerizing maze of my imagination (bread crumbs advised), let’s ground this soon-to-be-ungrounded stream of conscious in the days we spent together as a team. Here are a few excerpts recapping my extended site visit.
We met as a big group and as multiple smaller groups over more than a week. Much was rehashed, brainstormed, problematized, and decided during these encounters, so I’d like to follow up with a readout from our main meeting as well as some of the items that came out independently in my one-on-one followups. Please understand that some of what I’m including may feel like micromanaging or second-guessing skills, expertise, experience, etc. Please accept my apologies in advance, and understand that neither are among my objectives. However the last month has illustrated the downside to having direction and decision-making silo’ed up. By “flattening” the team, I am hoping to shift the focus toward a more collegial, more ensemble oriented approach. We have ample resources in our team (an almost embarrassing abundance of skill, passion, and work ethic!), and I want to make sure that everyone has an opportunity to contribute, to catch problems before they materialize, to learn from one another, and to avoid the bottlenecks and logjams that we can’t afford at this halfway point.
We will continue to rely on Pam, Peter, and Eric as the three leads or “co-captains” with the objective of streamlining on-site decision-making and progress. But I strongly encourage everyone to study the plans, to ask questions, to make suggestions, and to contribute to the collaborative success of the icehouse rehabilitation as we cartwheel toward the finish line.
Although we covered an expansive scope of work during our meetings, I gathered the gist into a detailed outline for everyone to review, edit, and augment prior to our team meeting the following week. In addition to onboarding everyone as a contributing and valuable member of the team while reaffirming a commitment to transparency as we move forward, I also hope to encourage the sort of cross pollination that has consistently defined the high point of this and previous projects.
Our follow-up team meeting fleshed out the scope of work and cemented the near term benchmarks and timeline. We will be able to revisit weekly with an eye to efficient project management, clear expectations, and an emphasis on incubating the sort of collaborative environment that yields the best results and ensures the most enthusiastic comradely. Goals set. Updates as we advance upon these goals.
So that sets the stage in a dry, rearview mirror sort of way.
What it overlooks is the morale, outlook ,and commitment of everyone with whom I met. Shuffling the team and shifting responsibilities midstream is unsettling and disruptive at best. The way this team came together, processed the change, stepped up to new responsibilities, and immediately, resolutely refocused on the new map and timelines was astounding. Confident and optimistic, proud of their accomplishments heretofore, eager to restore forward motion, and laser focused on the tight timeline, elevated expectation, and bountiful challenges. Unwavering. And hopeful that the full team might be reconstituted in the home stretch to finish up strong together, and to collectively commemorate their accomplishments come June.
And this is part of what takes me to the woodworking, and specifically joinery, as a metaphor. Heck, it’s not even just the sorts of joining and conjunction that are foundational to joinery and even carpentry. It’s the millennia old art and artisanry committed to joining, conjoining, and even mending that fascinates me. I’ve waxed on aplenty about wab-sabi, so I’ll sidestep a tangential deep dive now (ditto for Kintsugi.) A tidy touchstone will suffice.
Wabi-sabi (侘寂) is a world view centered on the acceptance of transience and imperfection. The aesthetic is sometimes described as one of appreciating beauty that is “imperfect, impermanent, and incomplete” in nature. (Source: Wikipedia)
Joining, conjoining, and reconjoining. No false disguise, no pretense, no faux facade. Bringing together. Bringing back together. I’m clearly still ill equipped to wordsmith my ideas into articulate or persuasive prose. But I’m working on it. And I’m hurling this half-baked post into the world with the unrestrained wish that it will settle on fertile soil, that it will germinate, and that I will be able to observe and learn how to communicate what it is that I’m discovering, this groundswell of insight that I’m experiencing without yet fully comprehending what it is. Bear with me, and I’ll do my best to interpret the lessons as they are learned.
In the mean time, I will draw in two compelling perspectives that may well shed some light.
Durable Joinery (Photo: Geo Davis)
Joinery as Metaphor
Allow me a moment to weave in a consideration that deftly approaches the idea of woodworking as metaphor.
I am building a file cabinet for my office. It strikes me an apt metaphor for what we do as teachers in the classroom. I begin with a vision, followed by making a clearly developed plan. I gather the materials I will need – examining them for grain, quality, and fit. Each piece is cut just over the requisite length. I use a variety of joinery techniques to assemble the parts. The finished piece begins to take form. From the rough construction, wood is slowly and strategically removed, rounding edges and corners, sanding rough edges and surfaces, slowly revealing the finished shape. I stand back to see what continues to require attention. Final details are attended. Stain is gently rubbed in; varnish is brushed on – rubbed smooth between coats. I stand back and smile, satisfied with a pleasing, useful piece of furniture. — Bill Lindquist, January 3, 2012 (Source: The Purple Crayon)
Teaching. Yes. And team building. Team rebuilding.
Perhaps the following is only tangentially related, though it feels germane.
But I know full well that many woodworkers don’t want to hear about philosophy. What practical value can there possibly be in sitting around thinking about work? Isn’t it better just to roll up your sleeves and get to it?
I believe that this temptation to leave our brains at the door of the shop is rooted in a fundamental misunderstanding of human nature that separates our thinking from our doing…
We are whole beings, and although we have inner and outer aspects (mind/soul and body), we are essentially unities, not dualities… you cannot separate your mind from your body. You can’t put your thoughts and beliefs in one category and your practices in another.
So, why so much thinking and theory from a woodworking publication? Because, reader, you have a mind inextricably connected to those hands. And I am convinced that if we want our work to reflect the fullness of who we are, the why will be just as important as the how. — Joshua A. Klein, September 28, 2021 (Source: What’s With This Woodworking Philosophy Stuff? – Mortise & Tenon Magazine)
Absolutely. (And, as an aside, this reminds me that I’ve been ignoring another orphaned draft about Rosslyn’s 5w’s. Back on the punch list!)
Durable Joinery (Photo: Geo Davis)
At present I’m endeavoring to unweave our recent Rosslyn narrative just enough to re-braid the threads that anew, mending the challenges that have arisen, as if braiding a bridge over troubled water… (Or a bridge graft at the base of a partially girdled tree in Rosslyn’s orchard… Yikes! Mixed metaphors. And so long as I’m hoarding metaphors, what about kintsugi?)
Kintsugi is an ancient Japanese art in which broken pottery is mended with glue and gold honoring and highlighting the cracks rather than hiding them. The belief is the pottery is stronger and more valuable after the breakage and mending. Kintsugi is a powerful metaphor and physical art practice to explore layers of meaning of broken, to look at the pieces in new ways, and notice the ‘glue’ in our lives that assist us to mend, navigate challenging times and keep on going. — Kristin Pedemonti (Source: Mending What’s Broken | Steer Your Story)
The writhing winds are pulling my mind hither and yon, and I find myself too, too deep into this meandering meditation to abandon it. If I’ve lost you, I apologize. Know that we are lost together. But as fellow sojourners we are not idle, waiting for the illumination of morning. Perhaps we’ll stumble upon or quarry in the darkness.
In closing, and I promise you I am, allow me to apologize for this untethered and unedited runaway. More soon, I hope, on mortise and tenons and dovetails, joyful joinery, rejoinery and durable bonds. My imagination is conjuring an intricate scarf joint that conjoins by gathering, by honoring, by encouraging, a meticulously crafted union where stresses are distributed in all directions and resilient when forces challenge. My imagination is ringing with the melody of strengthen, even repairing a strained or failing joint. Join, conjoin, reconjoin…
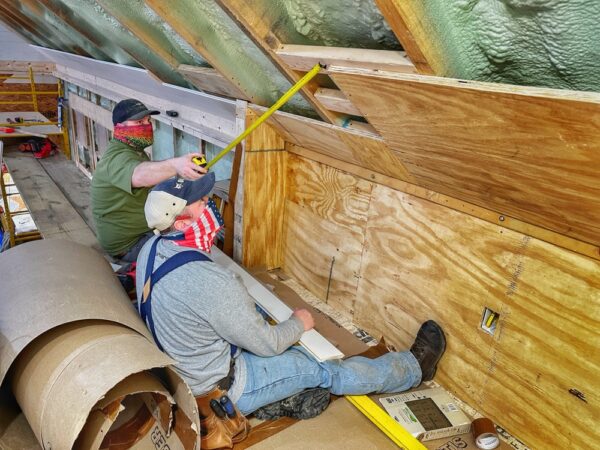
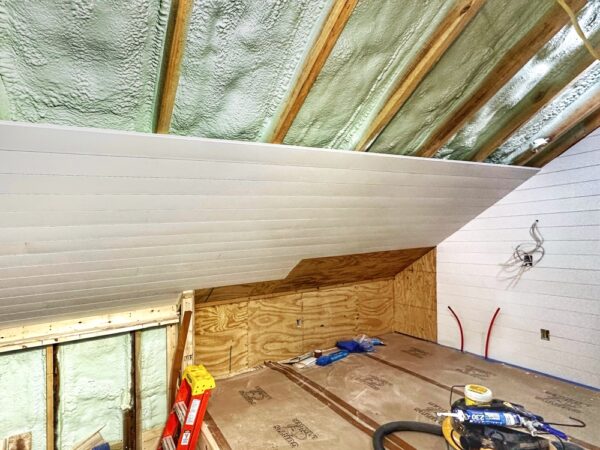
Hurrah! As of today we’ve begun installing tongue and groove nickel gap (aka “nickel gap” T&G) in the icehouse loft.
Installing tongue and groove nickel gap in the icehouse loft (Photo: Geo Davis)
Kudos to Matt Sayward for initiating tongue and groove nickel gap installation in the icehouse today. With Peter Vaiciulis guiding (and weeks’ worth of prepping, priming, and painting the paneling almost complete) we’ve launched a new chapter in our rehabilitation project. An exciting and long anticipated chapter because it marks the metaphorical skinning in of the preparatory work — sooo much structural and mechanical accomplishment — underpinning the transformation of Rosslyn’s late 1800s icehouse into a 21st century work+play hub.
Tongue and Groove vs Shiplap
Why did we decide to install tongue and groove nickel gap paneling inside the icehouse instead of shiplap as originally envisioned?
Credit goes first and foremost to Eric Crowningshield whose team collaborated on many, many, many linear feet of shiplap during the ADK Oasis Lakeside renovation, a couple of years ago. He encouraged us to consider switching to tongue and groove instead. By milling the paneling with a nickel gap, the finished results are indistinguishable from shiplap but the installation process is improved (and I believe that the structural integrity is also superior.)
In many respects, Matt took the lead installing the paneling on that project as well, so it’s feels fitting to witness him inaugurating this new chapter today. and the results are handsome. I’m looking forward to another day’s progress tomorrow.
Brushed vs Rolled Finish
In related news, Pam salvaged, four cut-offs from Matt’s work to experiment with re-painting solutions to the problem I broached yesterday. One cutting was preserved, as-is with the dimpled (i.e. orange peel) finish resulting from roller nap. The other samples received three different applications: a third coat with stiff bristle brush, a fourth coat with stiff bristle brush, and a preliminary sanding followed by a third coat with stiff bristle brush.
Although my photo failed to capture the textural differences, applying two additional brushed coats of Benjamin Moore White Dove (OC-17) made a significant improvement. So once Matt finishes installing the tongue and groove nickel gap on the east wall of the loft, we will apply to additional coats. Hoping it will look great!
I started an update a couple of weeks back that never made it out of the nest. An unfledged fledgling… At issue? Heat and humidity stabilization in the icehouse to properly acclimatize lumber pre-installation.
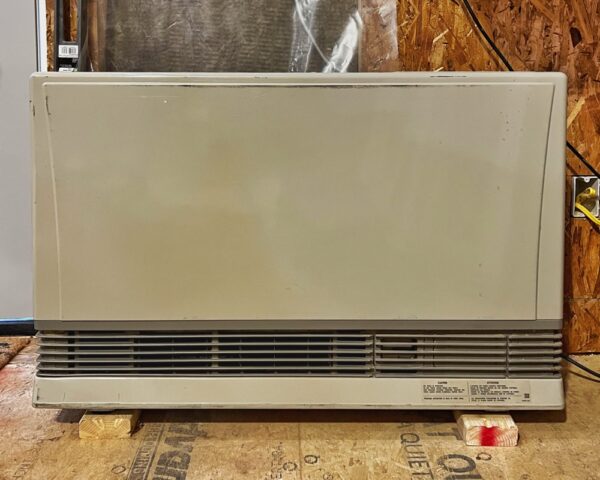
Temporary LP Monitor Heater (Photo: R.P. Murphy)
Given a few savvy questions about how we planned to install finish woodwork (flooring, paneling, etc.) in the icehouse — which until recently still had no heat and still had leaky apertures where windows and doors won’t be installed until May — I had initiated a quick explanation for how we planned to temporarily stabilize the temperature and humidity to ensure predictable, effective lumber acclimatization. Initiated but then neglected. The questions have continued, mostly from carpenters a others savvy to the expansion and contraction of wood. So I’m returning to the topic, better late than never?!?! The silver lining? Our plan for stabilizing the heat and humidity was implemented a couple of weeks ago. And it’s working well.
Stabilizing Heat & Humidity in Icehouse (Photo: R.P. Murphy)
After my last visit Eric and Peter coordinated, source, installed efficient LP monitor heater that is thermostatically controlled and piped temporarily to an external propane tank. This setup, in conjunction with well insulated apertures, has effectively enabled us to stabilize the interior of workspace for the coming months, creating a heat and humidity controlled “envelope” where temperature and moisture are stable so that finish lumber can be properly acclimatized.
Another positive twist of fate: Eric was able to source an oversized monitor heater (more than satisfying our BTU needs for the small space) that had been previously but lightly used at a discounted price. Win, win. Hurrah, Eric!
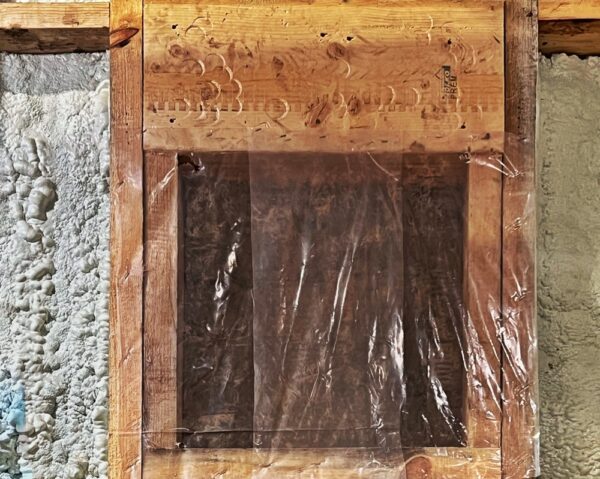
Stabilizing Heat & Humidity in Icehouse (Photo: R.P. Murphy)
The photo at the top of this post is the monitor heater, and the next two photographs show examples of interior vapor/air barriers (plus rock wool insulation) that were added to the apertures. Window and door framing was undertaken prior to installation of the ZIP System paneling, so there was already a decent barrier in place for these apertures. But we needed to further improve thermal and moisture barriers, especially on the north and west elevations where ample fenestration made it more challenging to control the interior work environment 24×7.
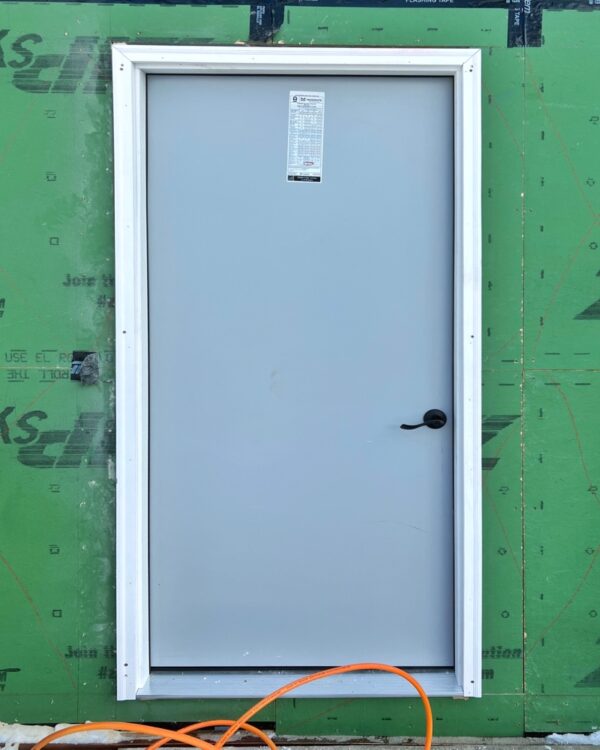
With the monitor installed and working well and the interior/exterior barrier effectively controlled, there remained one additional temporary-but-important complement: a secure, functional access for day-to-day work. Ad-hoc closure systems had been adequate early on, but it was time to install a convenient but lockable, well insulated, pre-hung exterior door.
Temporary Exterior Door (Photo: R.P. Murphy)
Kudos to Peter and Eric buttoning up the space to ensure forward progress over the last couple of weeks. I’m looking forward to witnessing firsthand tomorrow afternoon the hardwood flooring (beech) in the loft, for example, an accomplishment that was possible only once the heat and humidity stabilization was complete and the materials had acclimated on site for a couple of weeks.
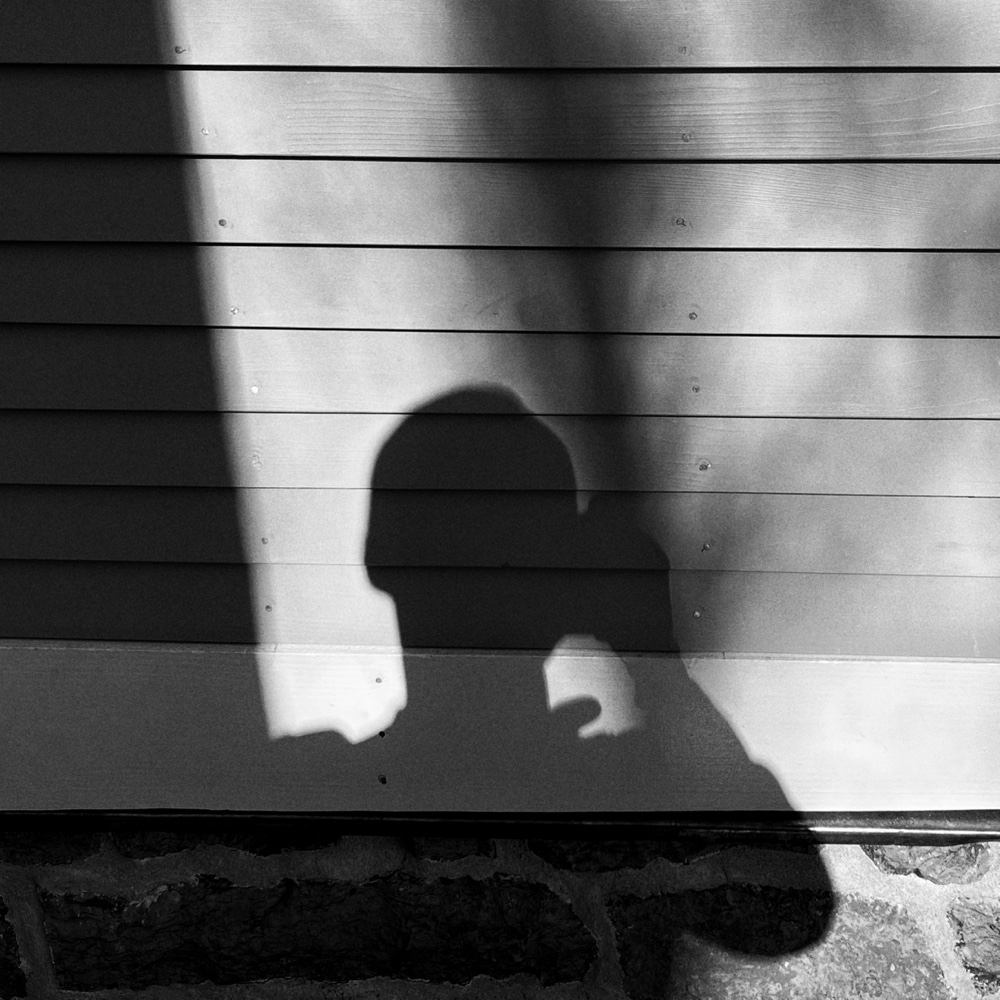
I’m grateful when progress is captured and conveyed by members of the team. Pam is especially mindful to keep me abreast of daily changes. Today several helpful snapshots popped up from a Peter. Yesterday several helpful visual updates arrived from Tony Foster including several color captures of clapboard siding.
Hidden in one, an accidental portrait of the photographer. Transformed into black and white, adjusted for contrast, and the image above emerges from the clapboard. As well, a haiku, like the blink of an eye…
Parenthetical Portrait
Documenting days
fortuitous photograph
documenting self
There are so many personal moments, so many parenthetical portraits inadvertently woven into Rosslyn’s narrative. Thank you, Tony, for another.
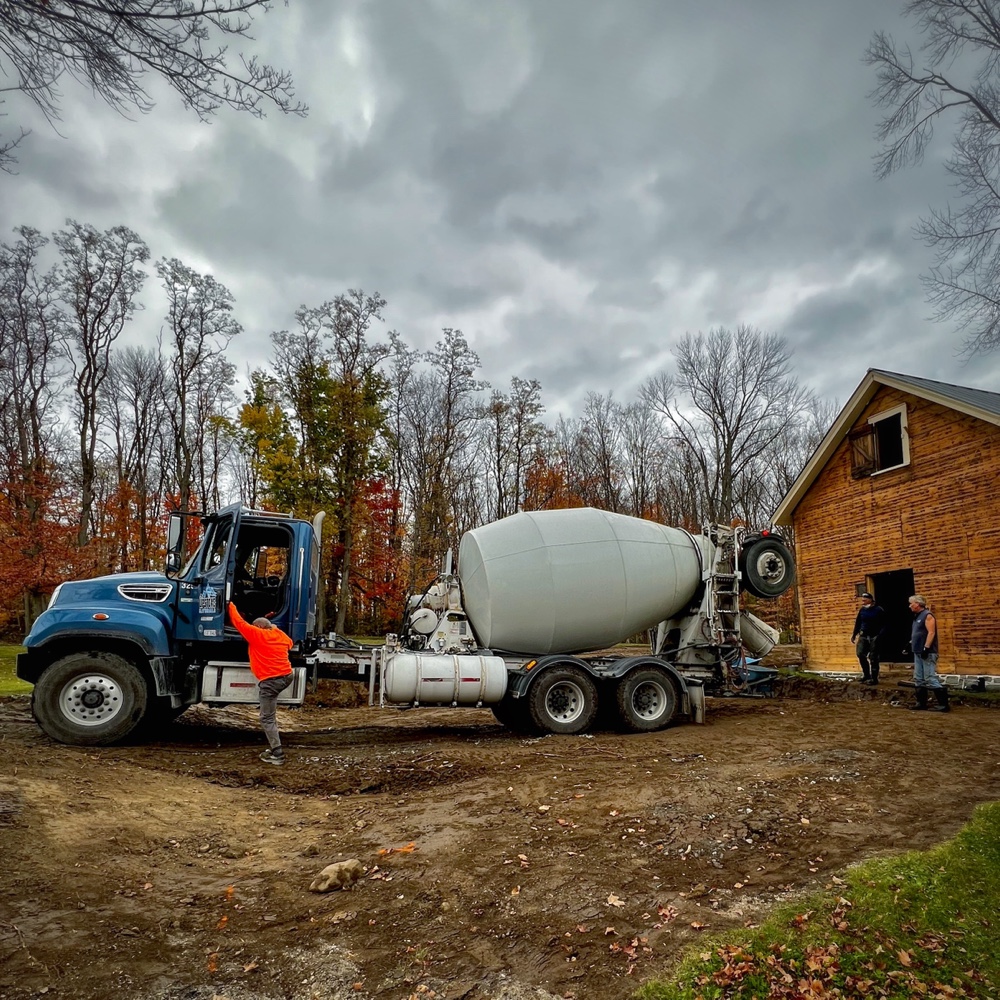
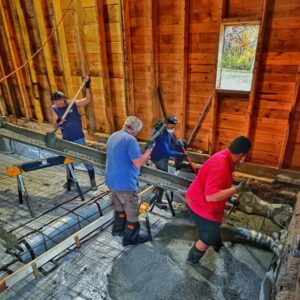
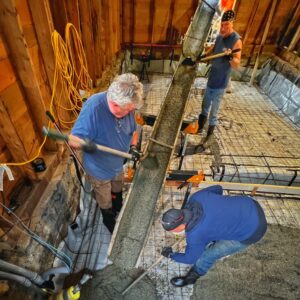
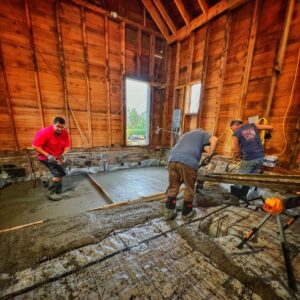
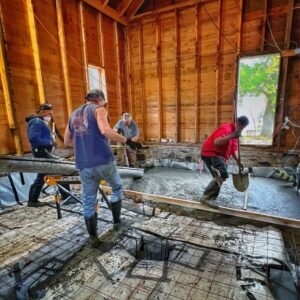
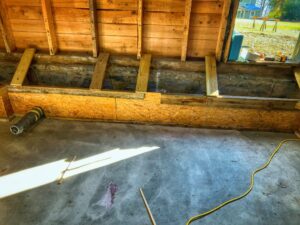
Icehouse Foundation Collaboration: concrete truck arrives
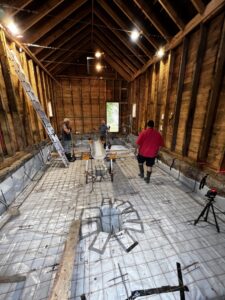
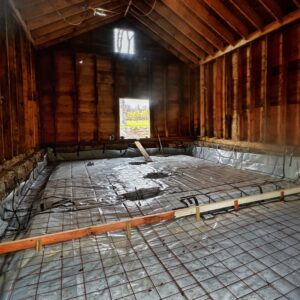
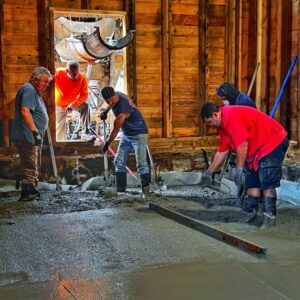
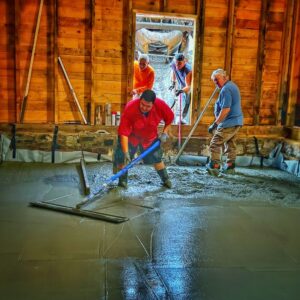
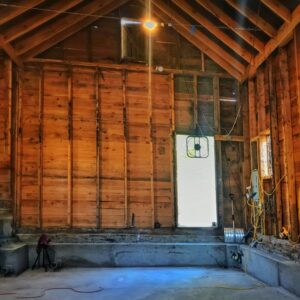
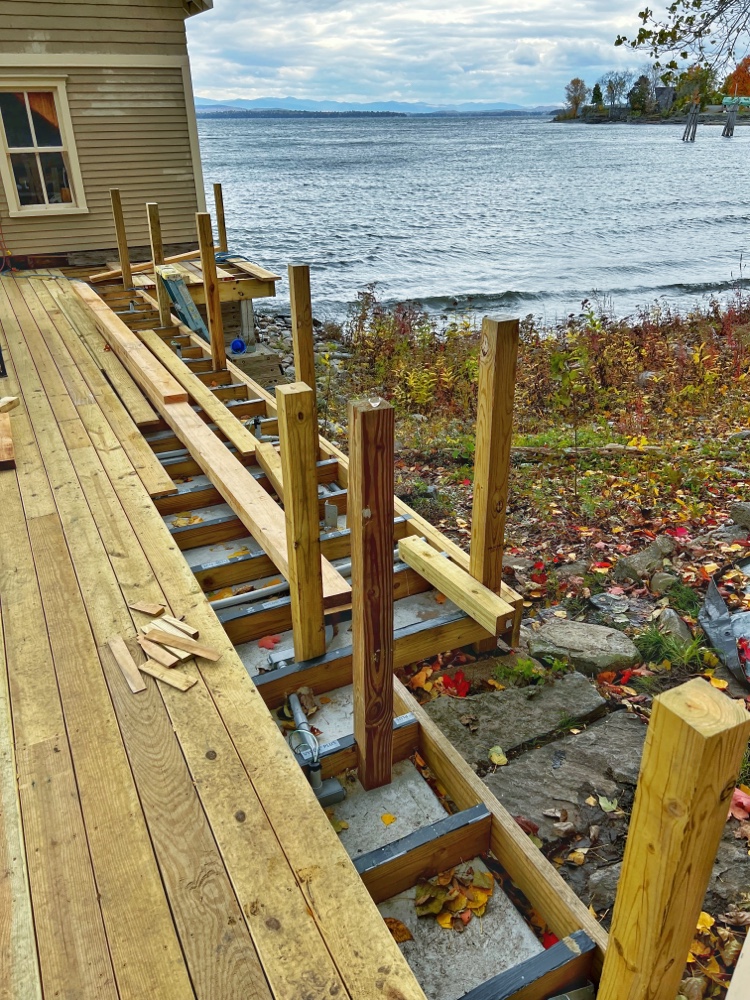
Last Friday I gushed that it’d been a monumental week. No hyperbole. Tackling (and completing) Rosslyn’s icehouse foundation was an epic accomplishment, a concrete collaboration conjoining two separate teams to rescue the foundering concrete project. And while Friday’s post was brief, timely-but-abbreviated recognition for the indefatigable individuals who pulled off this remarkable feat, today I’ll show you the step-by-step process from prep work and two separate concrete pours to completion of the icehouse foundation and crawlspace floor. I see this accomplishment as an enduring testament to (and foundation for, excuse the pun) the unique energy fueling Rosslyn’s icehouse rehab, an intrinsically collaborative and transformative revitalization and adaptive reuse project.
Rising from the Ashes
After repeatedly failing to produce a verifiable estimate, timeline, and definitive commitment (ie. a contract), the concrete subcontractor imploded mere days before starting work on the icehouse.
“Bad news,” Pam informed me and then told me she needed to get back to me in a moment. No time for bad news, I thought.
By the time she called me, minutes later, both in-house teams had convened to brainstorm. Given the tight project timeline, they decided to undertake the foundation and slab themselves. This marked a return to the original plan (subsequently discarded in lieu of hiring a concrete contractor in the mistaken assumption that it would streamline and accelerate the project timeline) but with a twist… turning two teams into one. Full pivot!
One team (Pam, Hroth, Tony, Justin, Eric, Matt, Andrew, Bob, Phil, Scott, Brandon, Ben, and others) has been rehab’ing the icehouse, and the other team (Pam, Peter, and Supi) has been rebuilding the boathouse gangway, etc. You read right, Pam is managing both projects. And several other Rosslyn initiatives including our master bedroom balcony re-decking, master bathroom shower tile tune-up, overall property management at Rosslyn, ADK Oasis Highlawn, ADK Oasis Lakeside, and multiple other properties. (Since I can hear you wondering, yes, she’s that good!)
The combined concrete collaboration would be Pam, Peter, Hroth, Supi, and Tony. With everyone coalescing around one specific goal — completing the icehouse concrete as well or better than a dedicated contractor without blowing up the budget or timeline — the objectives were obvious, but so was the potential for challenges and setbacks. Imagine a metaphorical pressure cooker. Top clamped tight. For a week. With zero room for mistakes. And yet, collaboration prevailed despite the inevitable stress.
From layout to excavation to vapor barrier to pinning the old foundation to setting rebar to wiring mesh to pouring initial footings and slab to forming curbs and setting rebar to final pour and stripping… these five came through delivered in a big way. Together they’ve guaranteed a sound, well constructed foundation for Rosslyn’s circa 1889 icehouse rehabilitation. I can report with profound pride and pleasure that it was a total success.
Most of the crew was able to gather on Saturday evening to celebrate their accomplishment, an end result that is in all likelihood superior to what we would’ve wound up with in the first place. Sometimes setbacks are actually the inspiration to regroup, reboot, and outperform original expectations. Sometimes fiasco fans the fires of triumph. Sometimes the phoenix rises from the ashes.
Video Mashup of Concrete Collaboration
If you’d prefer the quick zip through, then this video mashup is for you.
Thanks to Pam, Hroth, and Tony for recording the photos and videos featured in this video mashup!
Photo Essay of Concrete Collaboration
Okay, now it’s time for the photo essay chronicling the step-by-step progress and the series of accomplishments made possible by the collaboration of Pam, Peter, Hroth, Supi, and Tony.
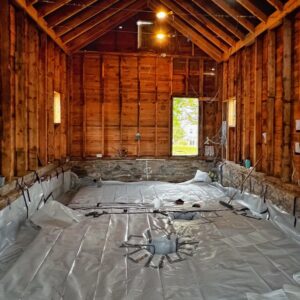
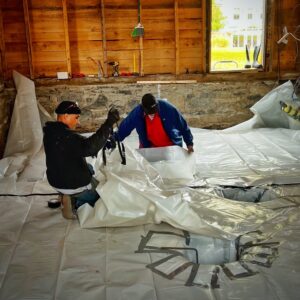
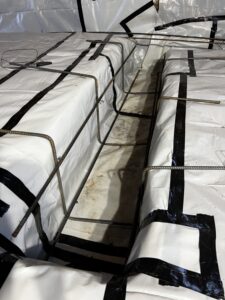
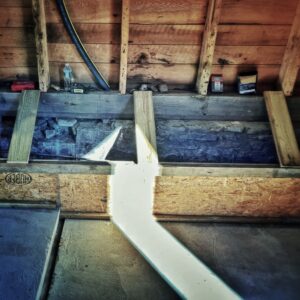
Icehouse Foundation: installing vapor barrier
Icehouse Foundation: Supi and Tony install vapor barrier
Icehouse Foundation: Supi and Tony install vapor barrier
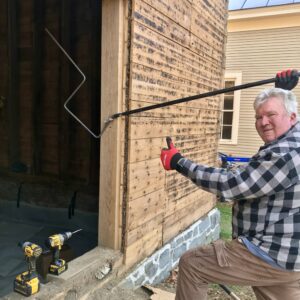
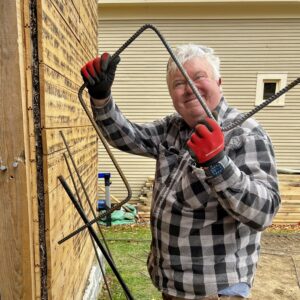
Icehouse Foundation: Peter bending rebar
Icehouse Foundation: Peter bending rebar
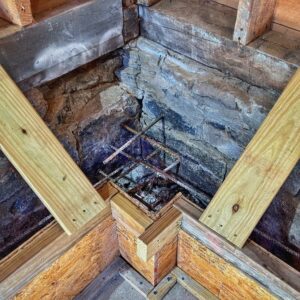
Icehouse Foundation: installing rebar for footers
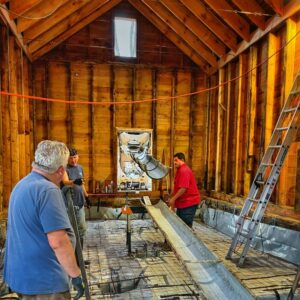
Icehouse Foundation: Hroth, Peter, and Supi awaiting concrete
Icehouse Foundation: rebar and remesh ready for concrete
Icehouse Foundation: Peter, Hroth, and Supi ready for concrete
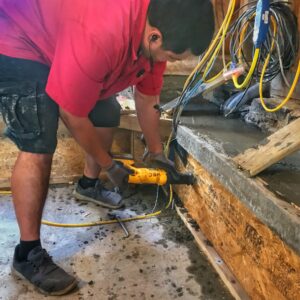
Icehouse Foundation: Hroth, Peter, Tony, and Supi pulling concrete
Icehouse Foundation: Hroth, Peter, and Tony pulling concrete
Icehouse Foundation: Supi screeding concrete, Hroth and Peter pulling concrete
Icehouse Foundation: Tony, Hroth, Peter, and Supi pulling concrete
Icehouse Foundation: Supi screeding concrete; Peter, Hroth, and Tony pulling concrete
Icehouse Foundation: Supi floating concrete; Peter pulling concrete; Hroth supervising
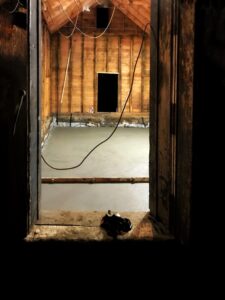
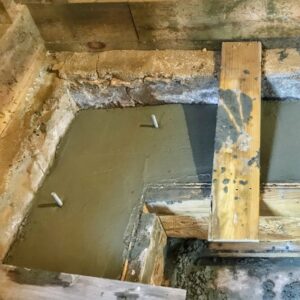
Icehouse Foundation: first pour curing
Icehouse Foundation: Supi doweling curb rebar into green slab
Icehouse Foundation: building forms for second pour
Icehouse Foundation: building forms for second pour
Icehouse Foundation: building forms for second pour
Icehouse Foundation: building forms for second pour
Icehouse Foundation: forms ready for second pour
Icehouse Foundation: forms ready for second pour
Icehouse Foundation: forms ready for second pour
Icehouse Foundation: dowels, rebar, and forms ready for second pour
Icehouse Foundation: Peter and Supi pouring curb
Icehouse Foundation: Supi vibrating concrete
Icehouse Foundation: green concrete setting up; j-bolts installed
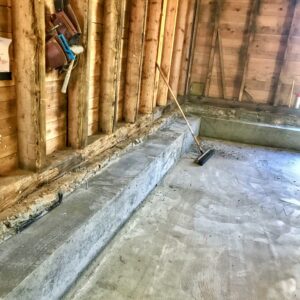
Icehouse Foundation: foundation stripped and curing
Icehouse Foundation: foundation stripped and curing
Icehouse Foundation: foundation stripped and curing
Icehouse Foundation: foundation stripped and curing
Icehouse Foundation: concrete curing
Thanks to Pam, Hroth, and Tony for recording the photos featured in this photo essay
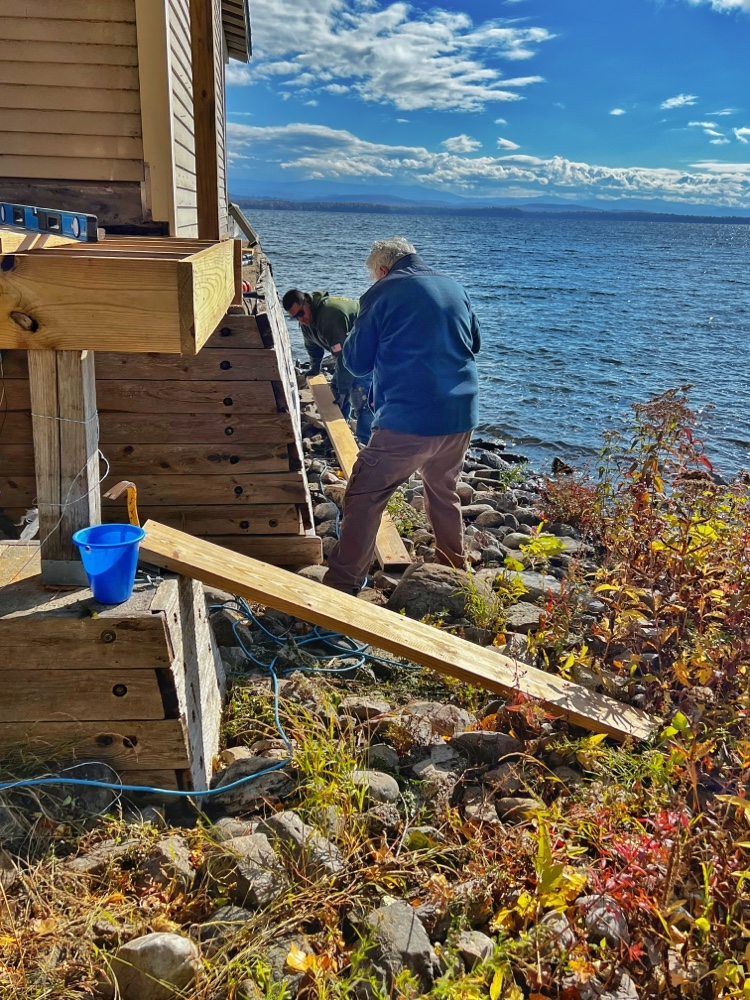
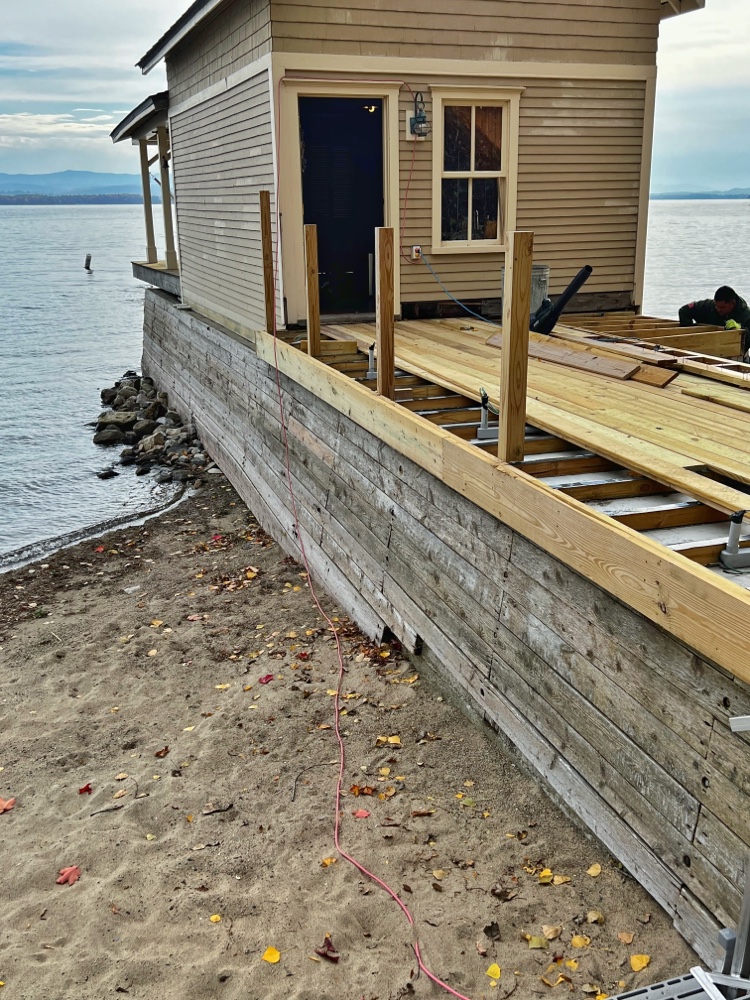
Peter Vaiciulis and Sia Supi Havosi Repairing Boathouse Pier Cladding (Photo: R.P. Murphy)
This week promises challenges (and hopefully progress) aplenty, so I’ll quickly recap progress on Rosslyn’s boathouse repairs made Peter Vaiciulis and Sia Supi Havosi with a photo essay. I’ll try to step aside and let the photos do the talking with respect to replacing the gangway posts and recladding the pier where old hemlock timbers have worked themselves free over the years.
In the photo above Peter and Supi are tackling the south side of the boathouse pier. Unlike Opud (aka “over promise, under deliver”), the fellow who got in way over his head on this project last year, Peter and Supi have been monitoring the lake conditions and opted to fast-track the cladding before lake level, temperature, etc. made it unpleasant and unsafe. This level of planning and organization certainly is refreshing after the series of miscalculations and delays last year.
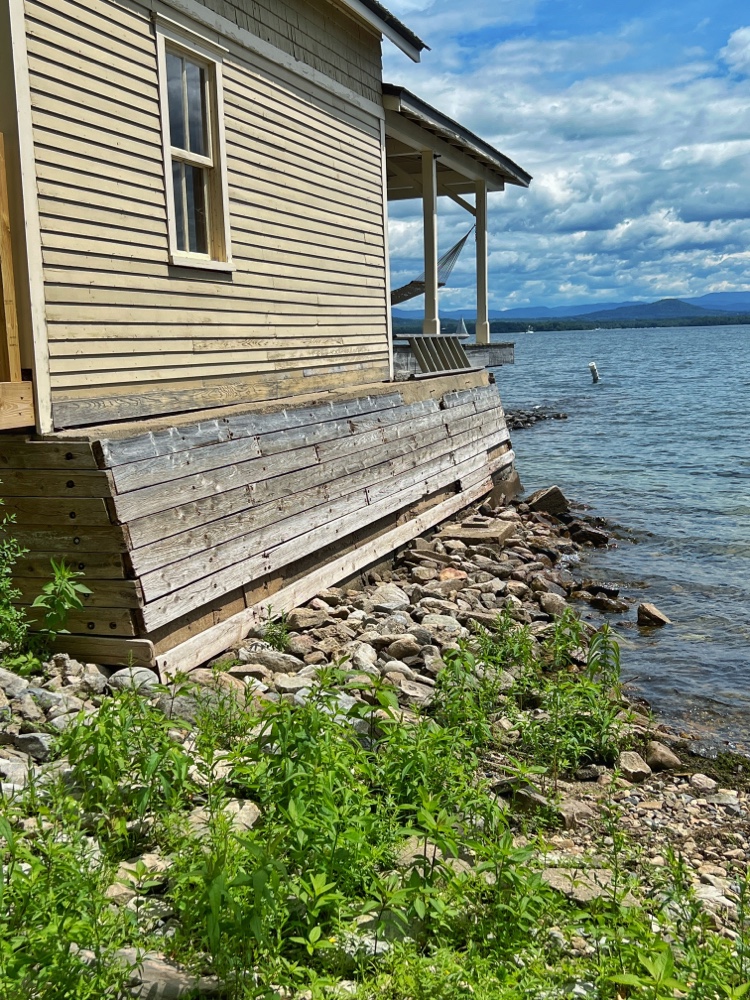
In the photo above you can see missing hemlock timbers in the south side of the boathouse pier, and in the photo below you see the newly installed, locally milled 2×6 hemlock timbers after installation.
Similar patching was necessary on the north side of the boathouse and gangway piers as well.
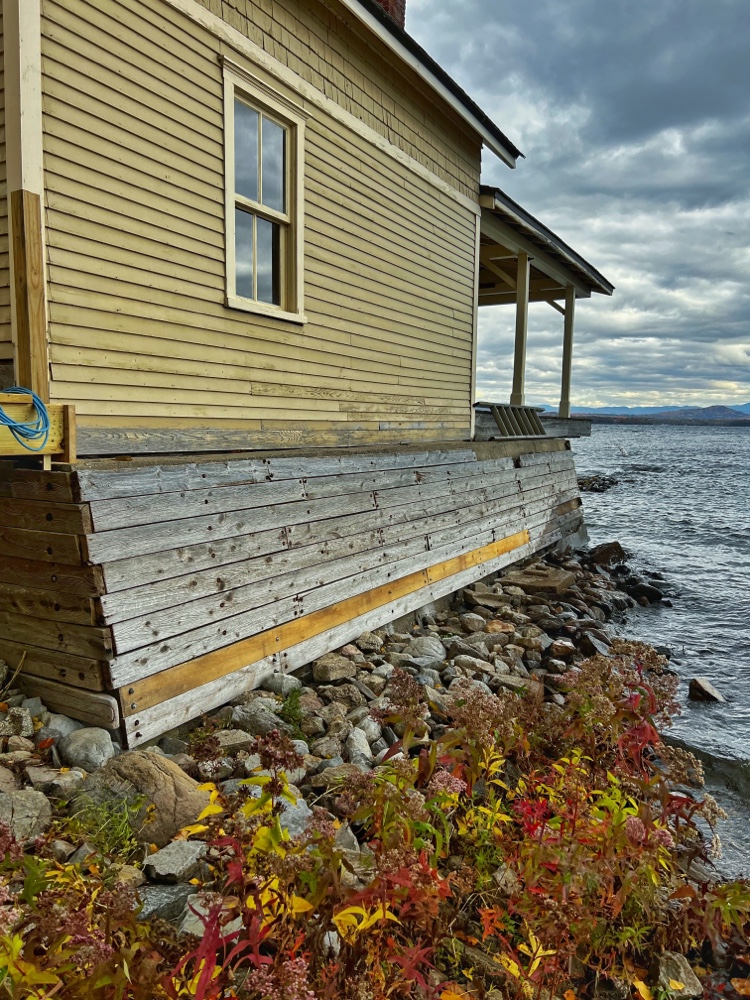
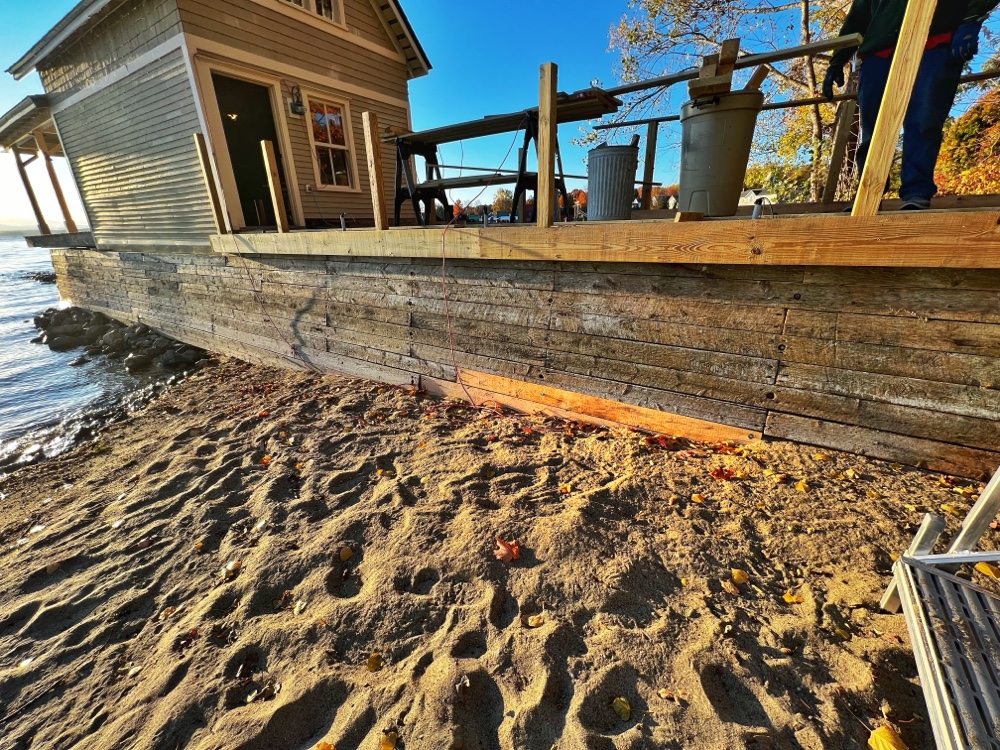
Replacing Boathouse Gangway Posts and Pier Cladding (Photo: R.P. Murphy)
Missing Timbers down low near the beach are evident in the image above. Below they e been replaced.
Replacing Boathouse Gangway Posts and Pier Cladding (Photo: R.P. Murphy)
Also visible are some of the newly replaced posts. All of the posts and the majority of the substructure repairs made last year had to be removed and replaced due to miscalculations in safety / structural integrity as well as subpar workmanship. Although we have tried to focus on forging a positive path forward rather than dwelling on setbacks, we did document the missteps now being rectified, and I will most likely dedicate a post to them in the future in the hopes of illustrating for others how to avoid similar mistakes. For now I would prefer to celebrate progress and quality workmanship rather than dwelling on a fortunately fading fiasco.
Posts on the south side of the gangway have been re-engineered and replaced as well. Multiple posts from which the gates were previously mounted — mysteriously overlooked and skipped during installation by Opud’s team despite Pam catching the mistake and reminding them that they needed to be replaced as they originally were — are now back in place as necessary. And electrical changes unfortunately had to be made as well in order to accommodate the proper relocation and installation of the missing and misplaced posts.
Replacing Boathouse Gangway Posts and Electrical (Photo: R.P. Murphy)
The photo above indicates an example of the electrical changes. Once the erroneous posts were removed, substructure re-engineered properly, new posts relocated to their correct locations, and missing posts added back as per original, the wiring for LED lighting was no longer correct and had to be updated. New conduit, new wiring, etc.
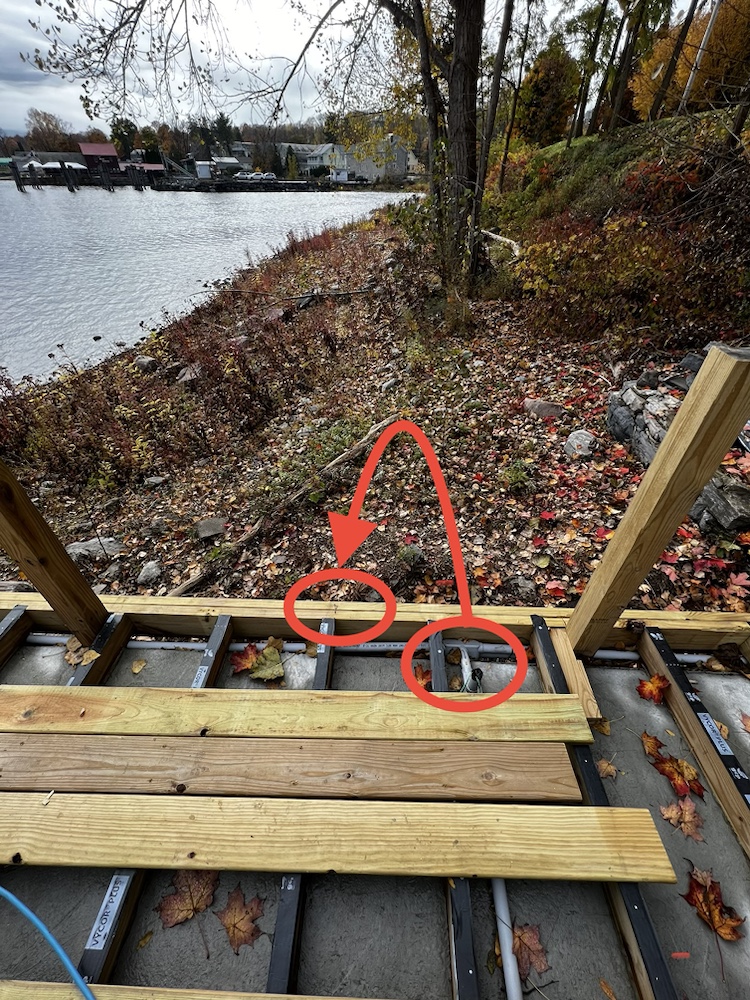
One of the interesting discoveries made by Peter while reinstalling the gangway posts is apparent in the photo above (and even more evident in the photo below.)
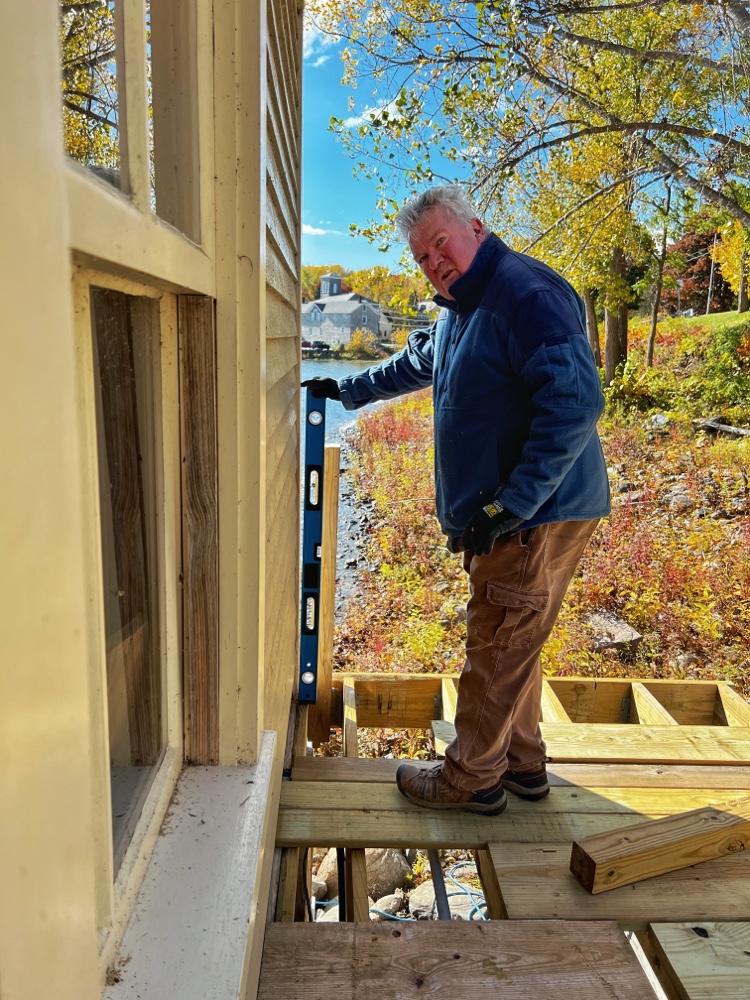
Peter Vaiciulis Replacing Boathouse Gangway Posts (Photo: R.P. Murphy)
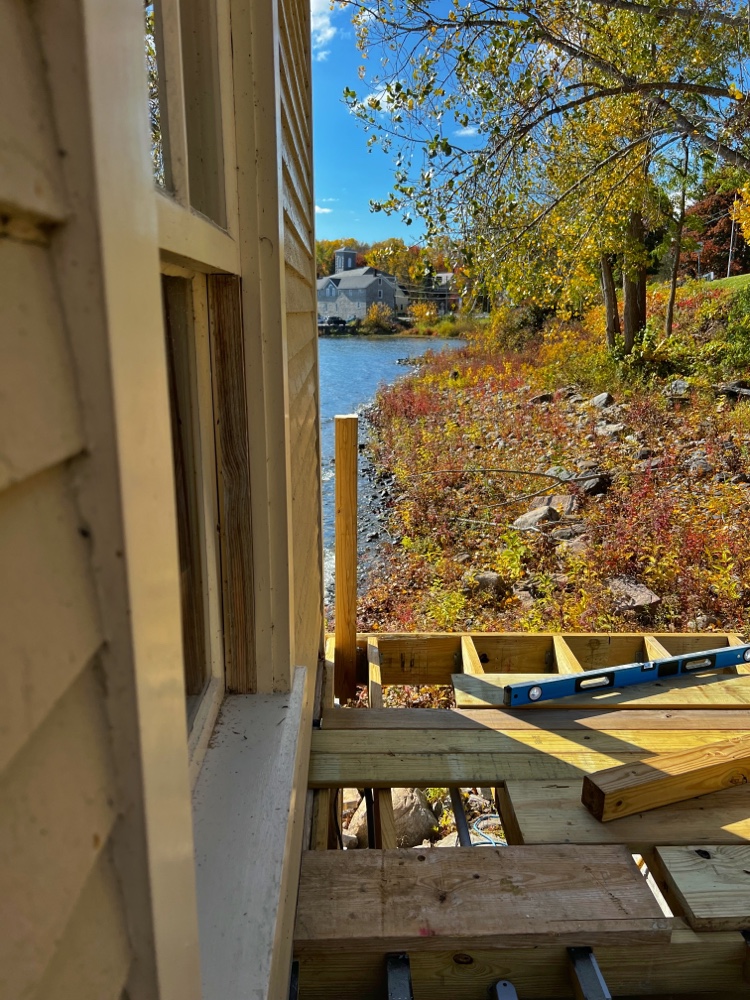
Peter is holding a level next to the post closest to the southwest corner of the boathouse emphasizing the discrepancy between the plumb post and the out-of-plumb corner of the circa 1889 building. These are the sorts of interesting challenges confronted all of the time when rehab’ing old buildings. And finding suitable, even optimal solutions is perennially rewarding!
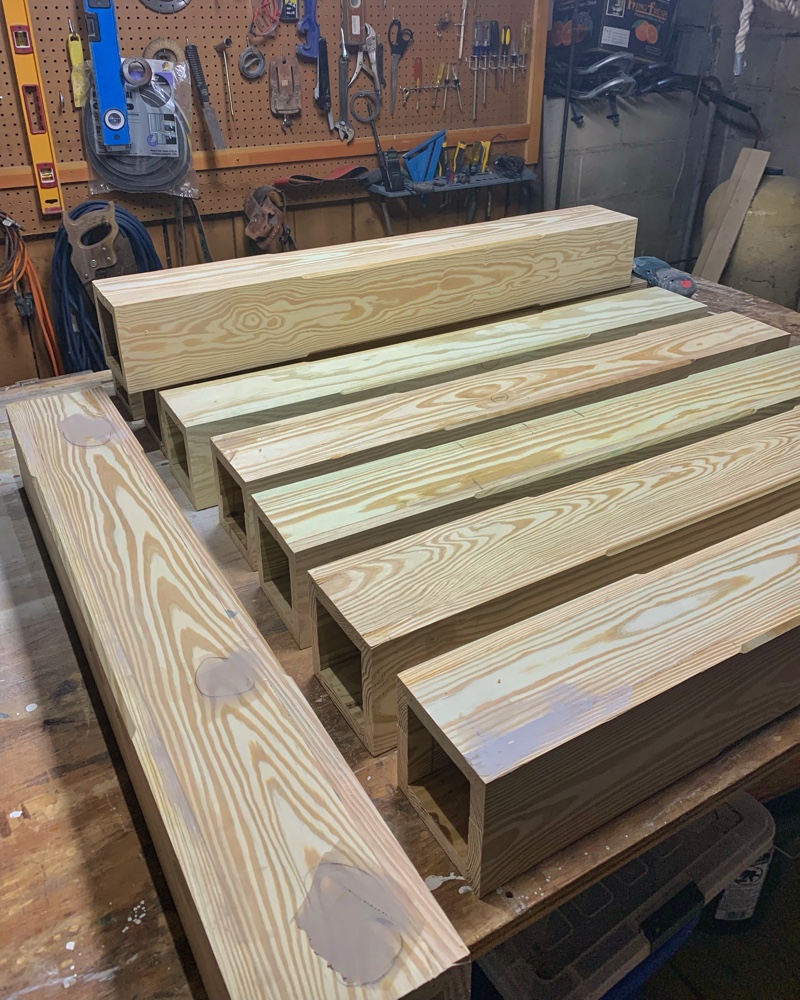
Fabricating Boathouse Post Wraps (Photo: Peter Vaiciulis)
It’s time for a progress report on Rosslyn’s boathouse post fabrication. Peter Vaiciulis and Sia Supi Havosi have been beavering away lakeside as autumn blurs into winter. Unfortunately, their decking progress has been stalled because the moisture content of the lumber is still too high. In contrast to the previous contractor whose work required extensive remediation, Peter is prudently allowing the decking sufficient acclimatizing and drying time to rnsure stabilization (and to ensure that we don’t once again wind up with inconsistent gaps ranging from 1/8” to 7/8”). In the mean time, Peter and Supi headed inside to shop-fabricate components for the post and railing system.
Successful repair of the boathouse posts and railings started with dissecting and documenting the existing conditions, deciphering the *how* and *why* of the existing conditions, and executing a meticulous rebuild with discreetly integrated improvements to function, structure, and endurance ensuring safety and longevity despite the challenging location and harsh environment.
Supi Sanding Boathouse Post Wraps (Photo: Peter Vaiciulis)
Supi is sanding a post wrap that will get installed over the structural posts that have already been integrated (correctly this time!) into the substructure.
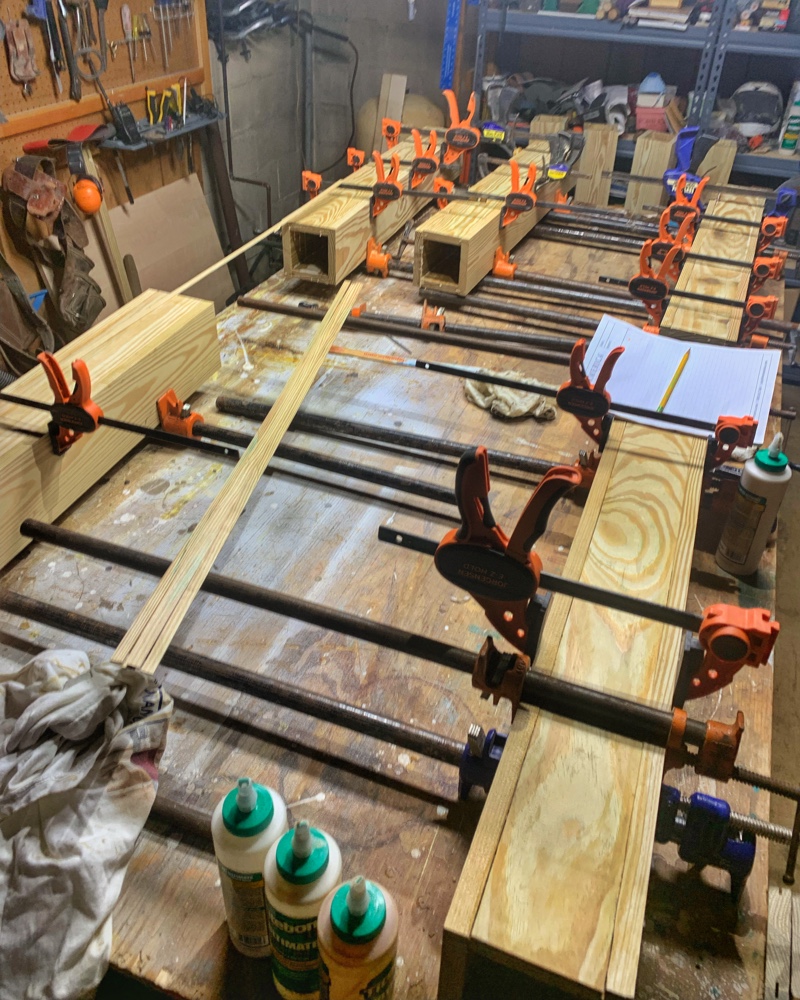
Peter Chamfering Boathouse Post Wraps (Photo: Sia Supi Havosi)
Chamfering edges along the midsection of the post wraps, Peter has clamped stops on either end to standardize the offsets. He’s replicating the design that we developed about fifteen years ago during our original rehabilitation of the boathouse, gangway, and waterfront access stairway. This subtle but comely detail that we included in similar situations elsewhere in Rosslyn’s four historic buildings, offers a practical benefit in this waterfront location where waterskis, surfboards, windsurfers, etc. are quick to nick sharp corners. The eased edge is also friendlier to shins and knees usually protected with little more than bathing suits in this area.
Chamfered Boathouse Post Wraps (Photo: Peter Vaiciulis)
Up close and personal with the post wraps. Note the chamfered midsections and wood filler curing for Peter and Supi to sand.
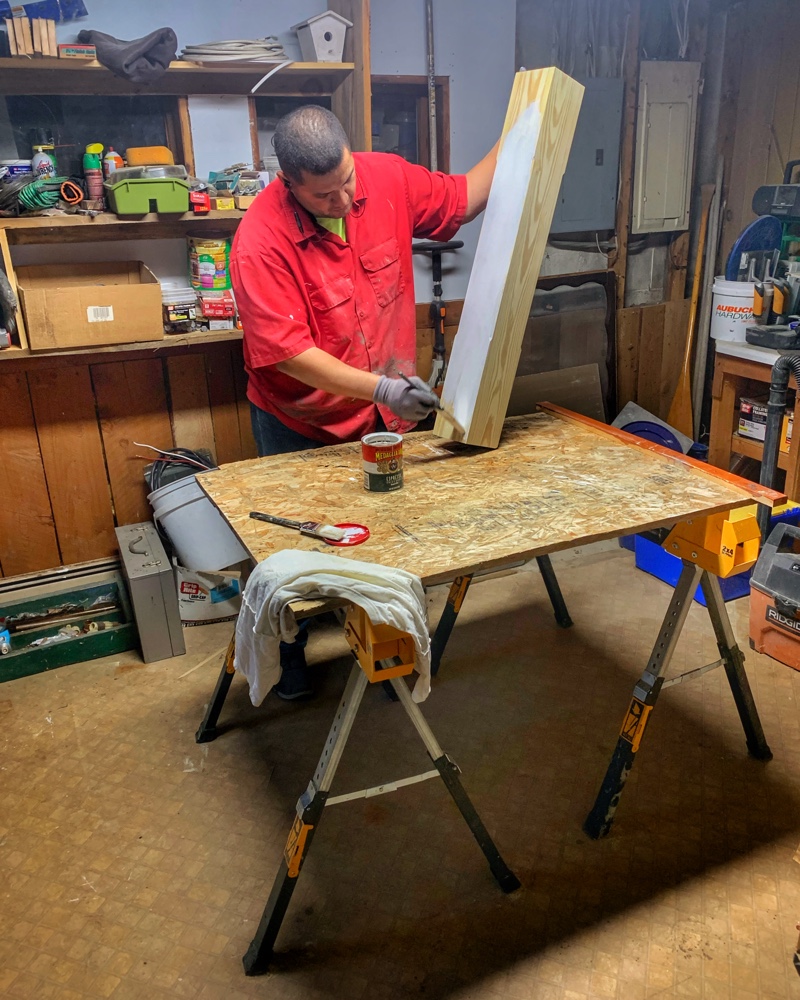
Supi Priming Boathouse Post Wraps (Photo: Peter Vaiciulis)
After wood filler cures and sanding is complete Supi begins priming the post wraps. Because of the intense weather changes — from rainstorms and dramatic temperature fluctuations in the summertime to snow, ice, and deep freezing in the winter — that the boathouse gangway posts and railing will endure, two coats of primer (including concealed end grain, etc.) and two coats of exterior paint will be installed in the shop. Although some touchups will be necessary during and after installation, this will streamline the late season installation and improve long term weatherproofing.
Although historic rehabilitation took place a decade and a half ago, the lakeside location accounts for the accelerated deterioration of Rosslyn’s boathouse gangway, posts, and railings. This go-round we’ve been able to tweak a few mechanics based on previous performance, hopefully improving performance and extending the useful life of these repairs to 20+ years. Even though Opud’s disastrous attempt last year cost us dearly in time, expense, safety, and usability over the summer, Peter and Supi’s rebuild is superior through and through, ultimately affording us solace after a year of headaches.
Let’s wrap up with a mashup of the dissected, well documented prototype guiding Peter and Supi’s repairs.
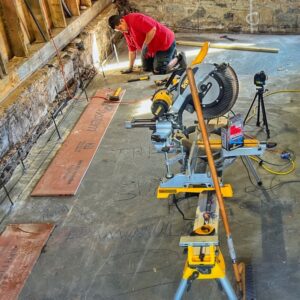
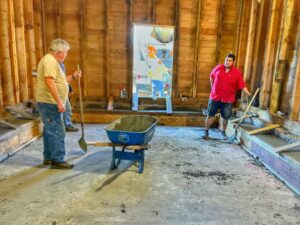
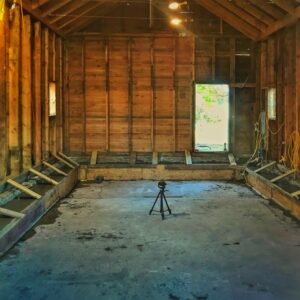
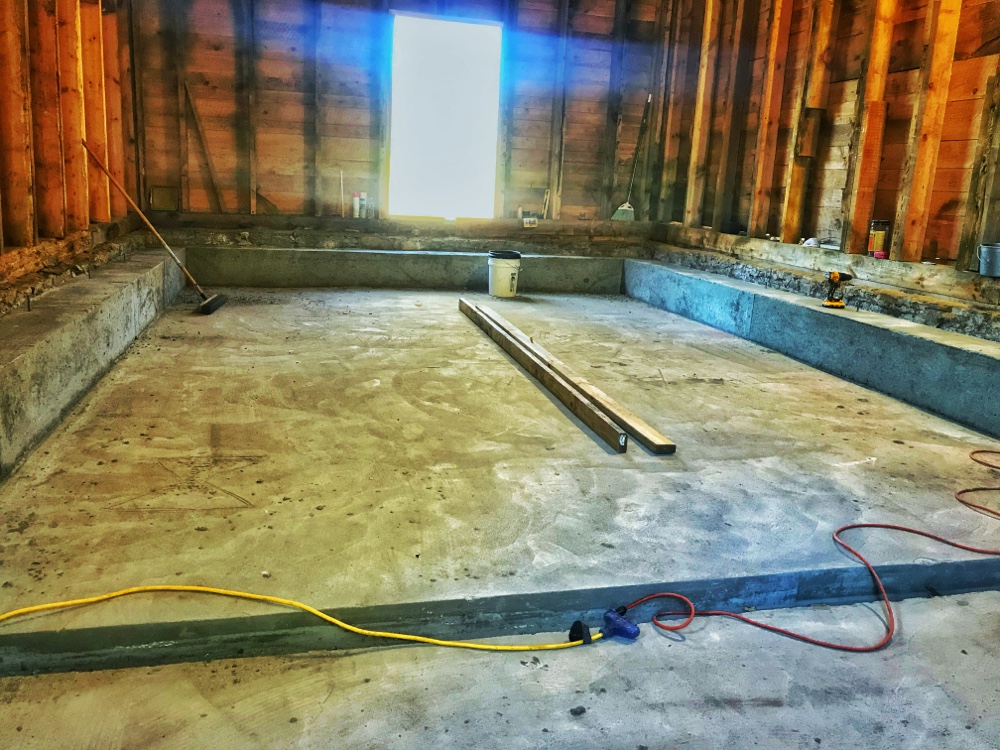
Icehouse Concrete Work Complete (Photo: Hroth Ottosen)
It’s been another monumental week! After the concrete subcontractor melted down a week ago, mere days before starting work on the icehouse, our in-house team decided to undertake the foundation and slab themselves. Today I can report with profound pride and pleasure that it was a total success. The crew is gathering tomorrow to celebrate two exemplary pours and an end result that is — in all candor — most likely superior to what we would’ve wound up with in the first place. Sometimes setbacks are actually the inspiration to regroup, reboot, and outperform original expectations.
Needless to say, it’s been an uber productive but looong week with a staggering level of accomplishment to celebrate, so I’ll keep this update short and sweet. I promise to share a more detailed look at the full court press made by Hroth, Pam, Peter, Supi, and Tony (as well as the concrete collaboration extraordinaire they have to show for their efforts) soon, probably even tomorrow or Sunday.
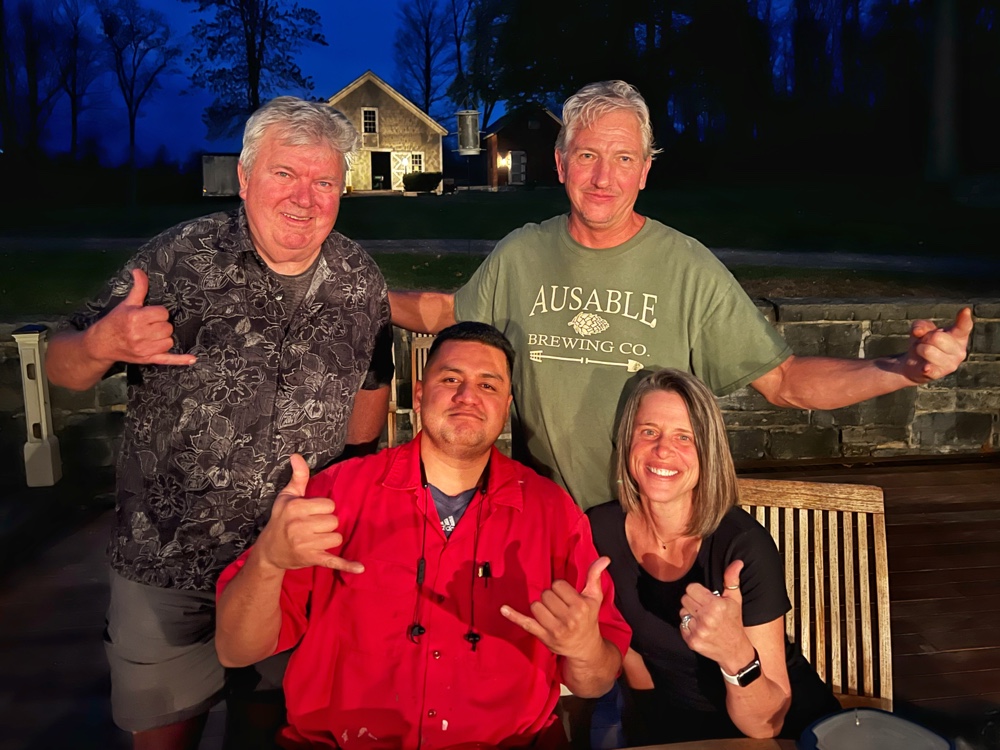
Team Barbecue: Peter, Hroth (back l-to-r), Supi, and Pam Hroth (front l-to-r)
Another short and sweet post to mark the end-of-week team barbecue. With four fifths of the icehouse concrete dream team present (Tony was unable to join), it was a well earned chance to take a break from work and celebrate.
Susan and I are profoundly grateful for the problem solving and priority juggling and camaraderie and diligence and expertise and enthusiasm and accomplishments of this crew. Thank you.