Tag: Patina

  • Horse Stall Haiku

    Horse Stall Haiku

    Carriage house horse stall door (Source: Geo Davis)
    Carriage house horse stall door (Source: Geo Davis)

    Horse Stall Haiku

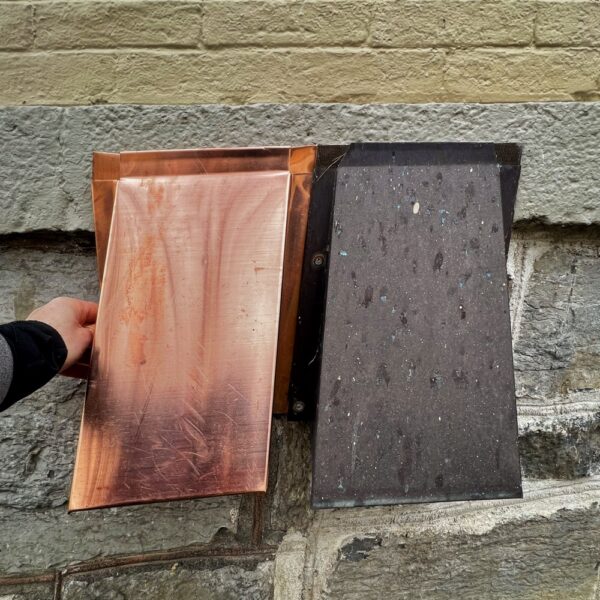
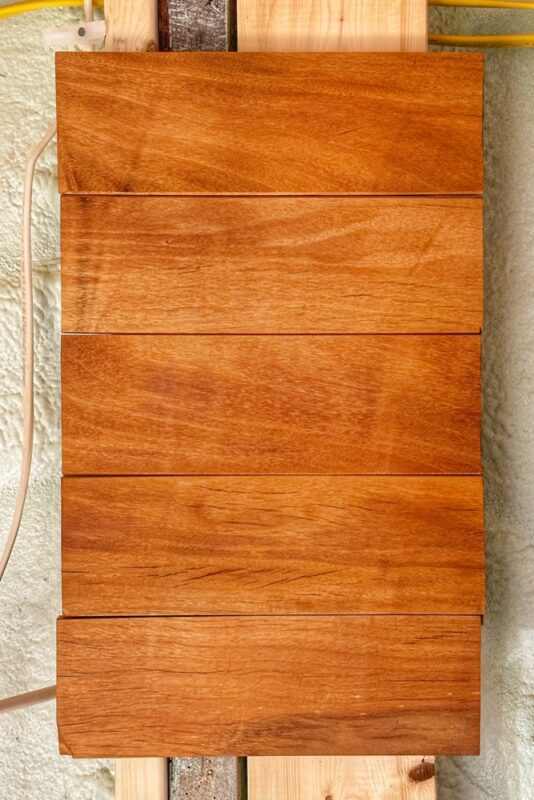
    Carriage house stall door,
    pockmarked, patinated, but hale,
    relates tenants past.

    — Geo Davis

    Wabi-sabi Horse Stall

    Patina. Rust. Wear-and-tear. The horse stall door in the photograph above abounds in visible reminders of imperfection and impermanence. And yet beauty brims. The image, indeed the horse stall and the horse stall door themselves, exude warmth and comfort and reassurance. No frisky filly within. No stately stallion. Yet life has invested this space with memories and, as Donna Baribeau pointed out, “Authentic Beauty”. The bumps and bruises of horses and those who tend them are part of this carriage barn story. But for much of the last 200+ years that Rosslyn has presided over Merchant Row there were no carriages and no horses in this barn. The stables were repurposed for storing firewood, bicycles, lawn mowers, lumber, tools, children’s forts, and possibly briefly even as a bedroom (if firsthand accounts are accurate.) All of this, and more, has left marks and stories. All of this contributes to the wabi-sabi allure of this space (and this photograph of the space.)

    In traditional Japanese aesthetics, wabi-sabi (侘寂) is a world view centered on the acceptance of transience and imperfection. The aesthetic is sometimes described as one of appreciating beauty that is “imperfect, impermanent, and incomplete” in nature… Characteristics of wabi-sabi aesthetics and principles include asymmetry, roughness, simplicity, economy, austerity, modesty, intimacy, and the appreciation of both natural objects and the forces of nature. (Source: Wikipedia)

    Wabi-sabi is at the root of my attraction to time-worn buildings and artifacts. I consider aging utility buildings — barns, boathouses, ice houses, sugarshacks, etc. — to be at least as intriguing as old houses. More sometimes. So many relics, unselfconscious, candid. Less penchant for concealing, fewer makeovers, more concurrently present years and lives. Sometimes it’s the old, banged up subjects and objects that look the best. Thank goodness for that!

  • Custom Copper Covers

    Custom Copper Covers

    Kudos to Troy for knocking out three custom copper covers for the icehouse vents plus a copper sleeve for the boiler exhaust. Bravo!

    New & Old Copper​ Covers (Photo: R.P. Murphy)
    New & Old Copper​ Covers (Photo: R.P. Murphy)


    In the photo above Pam is holding one of the new copper covers (on the left) next to one of the old copper covers (on the right). This is a design we created about a decade and a half ago for the house, and, in an effort to maintain consistency with the icehouse, we templated the new vent covers off the originals. But, time has patinated the old copper covers leaving us with a dilemma.

    Accelerate the aging process or allow them to age naturally?

    I definitely want to accelerate the weathering/oxidation process. I’ve used several different products in recent years to patina copper, and the first consideration is how to approximate the hue of the old copper covers. Ranging from verdigris to brown/bronze, the key is to favor the latter. Although the copper will eventually pick up some green and gray tones, we’ll opt for a patinator in the brown/bronze range so that it looks more like the earlier example we templates.

    We’ll need to buff the new copper covers with fine steel wool and then clean them up with acetone before applying the darkening solution with a sprayer (rather than a brush, resulting in a more consistent, natural finish) slowly allowing the metal to change into a less salmon colored, less shiny patina. We’ll likely need to repeat the patina solution repeatedly until the copper covers darken sufficiently.

  • Garapa Roundover: Easing the Edge

    Garapa Roundover: Easing the Edge

    Time for a progress report on the garapa paneling that will soon embellish the icehouse bathroom. We started out gently easing the edges, but several iterations later we’ve settled on a full roundover. Here’s why…

    Garapa Edge Profiles v1.0 (Photo: Geo Davis)
    Garapa Edge Profiles v1.0 (Photo: Geo Davis)

    Roundover Rewind

    Because the garapa upcycling backstory helps illuminate the decision to edge these boards with a diminutive roundover, let’s rewind the time machine. The garapa we’ll be installing in the icehouse bathroom as paneling began service at Rosslyn back in 2008 as decking, and it served admirably for almost a decade and a half, enduring summer feasts and foot stomping fêtes, winter snow and ice, and all manner of wear-and-tear. Last summer we deconstructed the deck, not because it was failing, but because the TimberSIL substructure was kaput.

    Grading Garapa for Upcycling (Photo: Tony Foster)
    Grading Garapa for Upcycling (Photo: Tony Foster)

    After dismantling the old deck we sorted out the best garapa decking boards for upcycling; “cherry picked” and inventoried the best-of-the-best material to ensure sufficient linear footage for adaptive reuse in the icehouse; and then began the painstaking process of trimming, re-dimensioning, planing, and grooving the edges that will be conjoined with garapa splines during installation.

    A little over a month ago Peter experimented with several profiles. He started by just barely breaking/easing the edge two ways: sand paper and a single pass with a hand plane at 45°. Too subtle. He eased slightly more and then a little more. He also tried a subtle v-groove (two micro-chamfers), and we finally settled on a full roundover. Both the chamfer and round over details were achieved with a handheld trim router and a super small round over bit.

    Garapa Edge Profiles v2.0 (Photo: Geo Davis)
    Garapa Edge Profiles v2.0 (Photo: Geo Davis)

    Why Roundover?

    Why did I make this decision? Because the garapa is repurposed, it is charactered and irregular. Preserving this patina is important to the finished look we’re endeavoring to achieve. A subtle wabi-sabi story is being told not only in the varied lustre and texture of these boards, but also the handworked (ergo slightly irregular) dimensions. When installed there will be some variability in the thickness of the boards. The roundover will create a shadow line while accommodating the slight inconsistency from board to board, and the quarter round profile will be less severe than the 45° chamfer would have been. I’m hoping that it will all come together with a a subtle horizontal linearity that creates cohesion for the well worn wood.

    Tony Roundover​ Edging Garapa (Photo: R.P. Murphy)
    Tony Roundover​ Edging Garapa (Photo: R.P. Murphy)

    Well Worn & Well Worked

    It’s worth noting that the age and patina were showcasing with this upcycled lumber has only been made viable through the guidance of Hroth, Peter, and Pam and Tony’s devoted attention and immeasurable hard work over many months. I joke with Tony that he’s investing lots of love into transforming this material. From debris to centerpiece. In the photo above he’s roundover edging boards that he’s literally been working and reworking since last September or October. That’s a LOT of love!