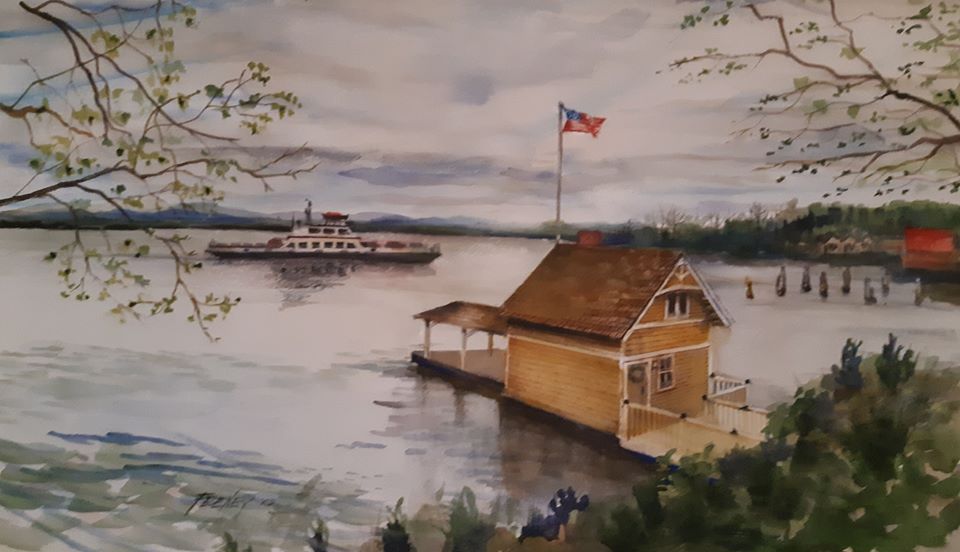
Rosslyn Boathouse, circa 2019 (watercolor painting by Ric Feeney)
Watercolor artist Ric Feeney shared this beautiful painting on Facebook recently, and of course it caught my eye as it featured Rosslyn’s whimsical boathouse/dock house.
Feeney captioned the post: “Finished this 17 x 26 watercolor of early spring with the Champlain Ferry approaching the Essex dock.”
There’s something almost cinematographic about the Essex-Charlotte ferry approaching the Essex ferry dock from the north-northeast. Our boathouse, centered in the foreground, appears jollier (color saturated and slightly vignetted with a hint of sunlight) than the ferry boat, the Old Dock Restaurant (red roof near right hand side of the image) and Begg’s Point, both visible behind the ferry dock.
Over the years we’ve collected many artists’ interpretations of the boathouse, each a fresh perspective, a new chapter in the timeless tale we call Rosslyn Redux. Much as I have attempted to narrate the property’s story, an inspiring retinue of painters, photographers, and artists drawn to other media (i.e. Mary Wade’s wood and stone creations) have curated and showcased their own experiences with Rosslyn, especially Rosslyn’s boathouse.
You can enjoy more of Ric Feeney’s watercolors at ricfeeney.com.
Today was one of *those* days. One step forward, two steps back. Setbacks. Not crises. So we are reminding ourselves…
Dishwasher Delay
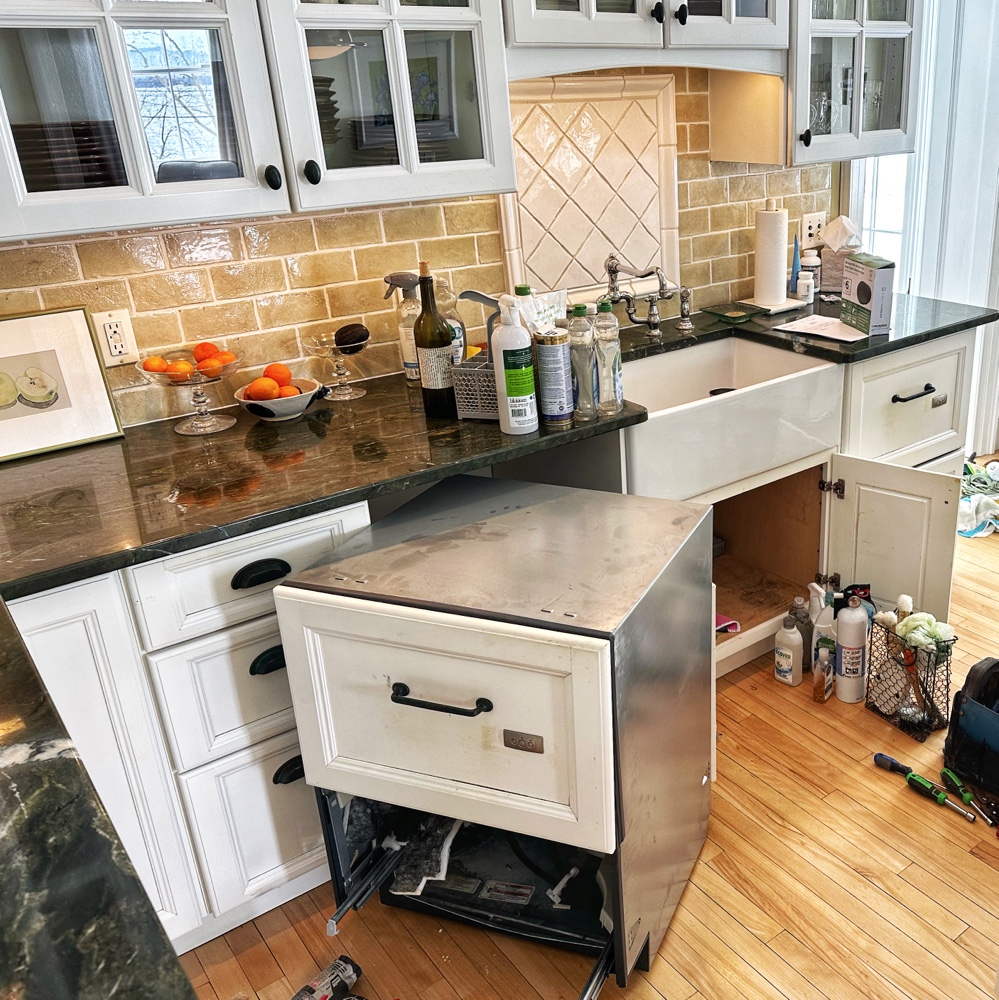
Replacement dishwashers were halfway through installation when Susan walked into the kitchen and discovered that they were the wrong units. She was replacing two Fisher and Paykel DishDrawer units (that had started to fail) with Café Dishwasher Drawers.
One Step Forward, Two Steps Back (Photo: Geo Davis)
The service techs were as nice as could be, and their removal of the old units proceeded smoothly enough. Installation of one of the new units proceeded smoothly as well. Except it was stainless steel. The units Susan had ordered were white enamel. Full stop.
One step forward, two steps back.
They removed the new unit and rescheduled for the beginning of next week. Until then, two gaping holes in the kitchen and plenty of hand washing. Which, strangely enough, has been working out quite well.
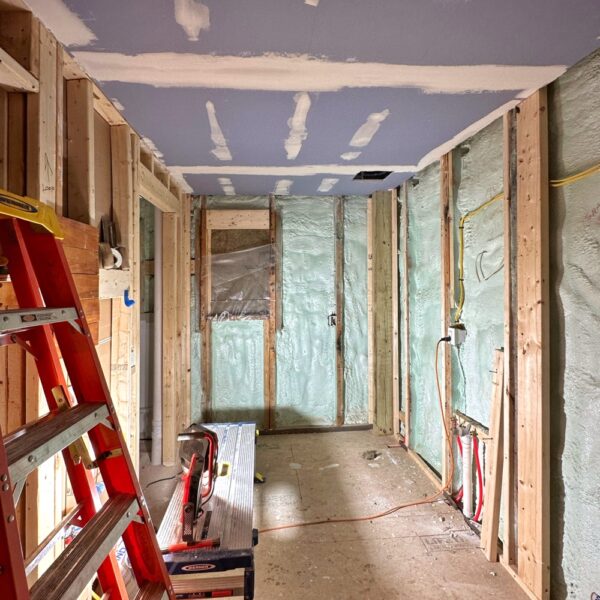
Ceiling Sheetrock Complete (Photo: Geo Davis)
Shower Stem Setback
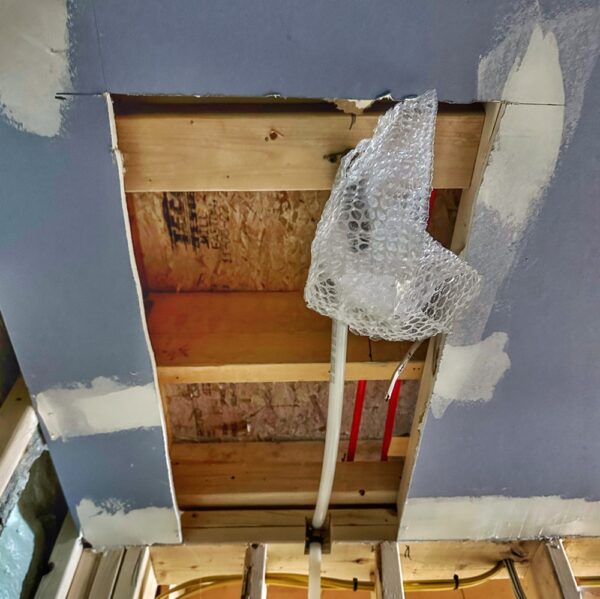
In a classic “cart before the horse” scenario, we got out ahead of ourselves with bathroom drywall installation. We actually have very little sheetrock (bathroom ceiling and mechanical room) in the icehouse, and so I’ve been pushing hard to get it off the to-do list in order to move forward with plumbing and tiling and…
Ceiling Sheetrock Incomplete Again (Photo: Geo Davis)
Long story short, today we had to cut out newly installed, taped, and plastered sheetrock in the icehouse bathroom to provide plumbing access for the plumbers to complete installation of the ceiling mounted rain shower.
One step forward, two steps back.
Plumbing complete we can now reinstall sheetrock, etc. And then we can actually cross it off the list.
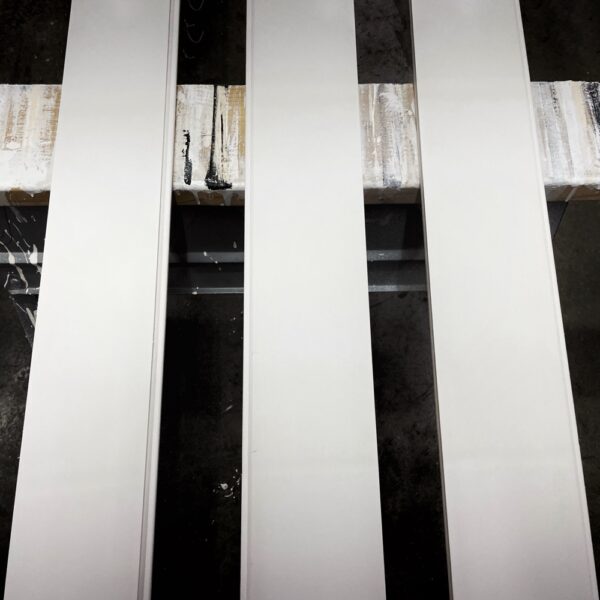
Paneling Paint Hiccup
Tomorrow we’re excited to begin installing T&G “nickel gap” paneling in the loft. After a couple weeks of offsite preparation — and plenty of anticipation — the first delivery of material arrived from one of the offsite “paint shops” this evening. (We’ve been fortunate that two members of the team have been willing to temporarily prime and paint the lumber in their garages/workshops to help work around on-site space limitations.)
T&G Nickel Gap (Photo: Geo Davis)
Sadly we discovered that the hand brushed finish looked like a rolled finish. Think, texture of an orange peel. For many people that would be fine, ideal even. But given the 1800s historic building we’re rehabilitating, I opted to finish the “nickel gap” paneling with two hand brushed coats of Benjamin Moore paint. Unfortunately we made a compromise to improve efficiency: after hand brushing a stain sealer on knots, we rolled two coats of primer onto the wood before hand painting the finish. Some miscommunication and/or misunderstanding may have gotten baked into the mix, but I’m mostly frustrated not to have made offsite visits to the painting operations earlier on to inspect progress.
T&G Nickel Gap (Photo: Geo Davis)
Tomorrow we’ll install the first wall and then experiment with re-brushing another coat of White Dove onto the wall in the hopes of improving the results. Fingers crossed!
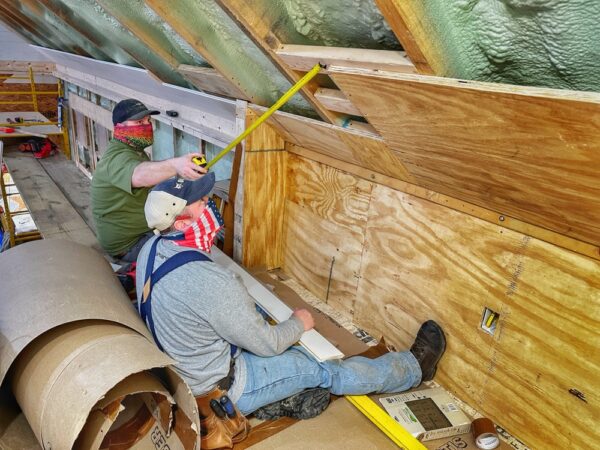
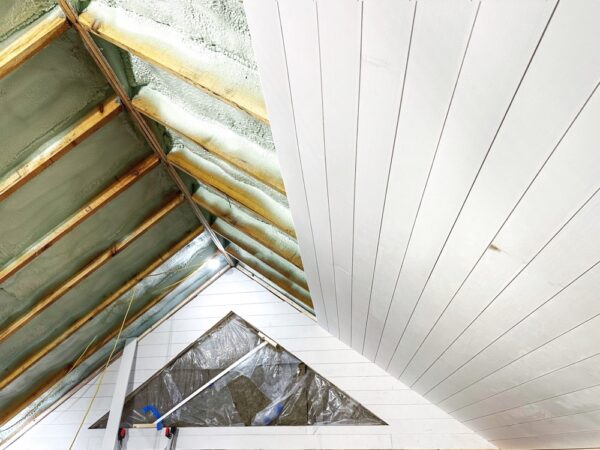
Matt and Jarrett Installing Nickel Gap on Icehouse Ceiling (Photo: Geo Davis)
Time for a nickel gap progress report. But first let’s backfill slightly. As you may recall, we decided to finish the icehouse interior in T&G nickel gap instead of shiplap. We estimated and re-estimated material, ordered it from of T&G from Haselton’s, waited a couple of weeks for milling and delivery, and then offsite material preparation began.
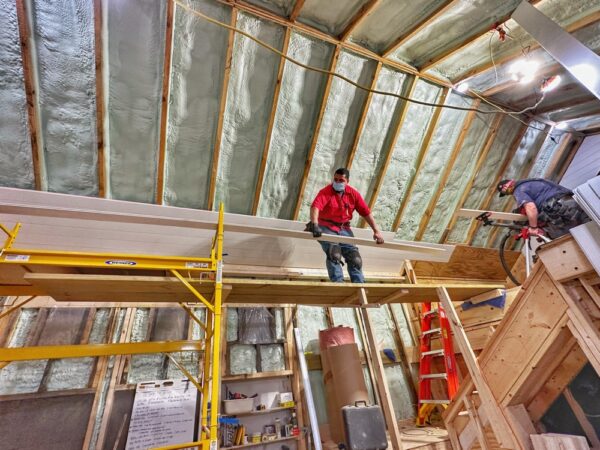
Supi and Matt Installing Nickel Gap on Icehouse Ceiling (Photo: Geo Davis)
We’ve been fortunate to have two offsite heated garage-workshops serving as paint shops for all of this material because we wanted to pre-finish the lumber and had no viable space on site. Our prep and finish has included 1) shellac-based primer or equivalent on all knots, etc., 2) two coats of rolled primer, and 3) two brushed coats of finish paint.
T&G Nickel Gap Progress on Icehouse Ceiling (Photo: Geo Davis)
T&G Installation
We started by coordinating our installation plan to ensure 100% consistency across weeks of installation with rotating team members. We’re using 16-gauge brad nailers with 2” nails through the tongues, into the 2” studs and rafters. On sloped and flat ceilings T&G is being doubled up and “scissor nailed” as follows:
maximizing the nailing angle of fasteners as close to 90° as possible to ensure maximum holding,
taking advantage of the full width of the 2” rafters,
driving the fasteners through the shoulder of the tongues into the framing at a 45° angle to improve retention against gravity, and
shimming if/as necessary to ensure full contact of T&G with rafters and to eliminate waviness.
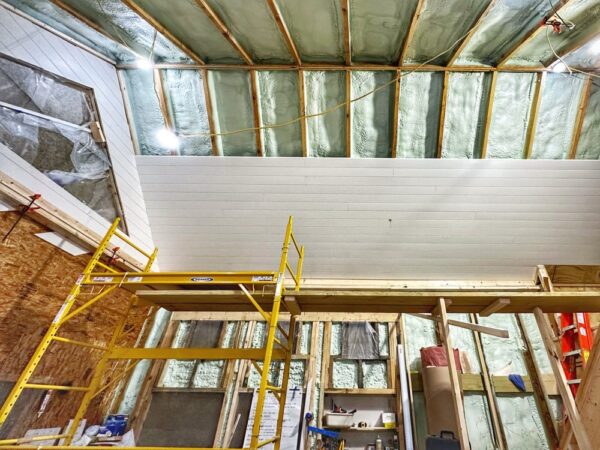
Nickel Gap Progress on Icehouse Ceiling (Photo: Geo Davis)
When installation began, we transported material into the icehouse in sufficient amounts calibrated to speed of progress. We still need a little more trial-and-error to perfect our flow while trying balance multiple considerations:
enough material needs to be onsite for ongoing/continuous installation,
material flow should anticipate enough acclimatization time so that we don’t experience expansion or shrinkage after installation,
and, just to keep things challenging, we need to avoid having excess material in the icehouse at any given time because it gets in the way of other projects.
In short, three challenges baked into one!
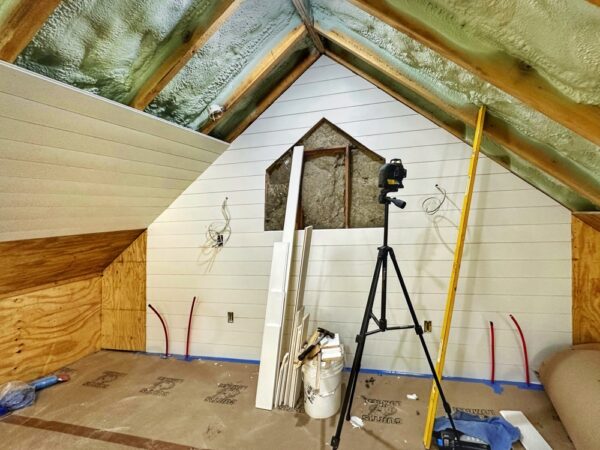
Nickel Gap Progress on Icehouse Ceiling (Photo: Geo Davis)
Nickel Gap Progress
As you can see, we started out with the two gable end walls per Peter’s prudent recommendation. Now we’ve moved onto the north ceiling, with close to 2/3 complete including the challenging integration where loft built is are being installed.
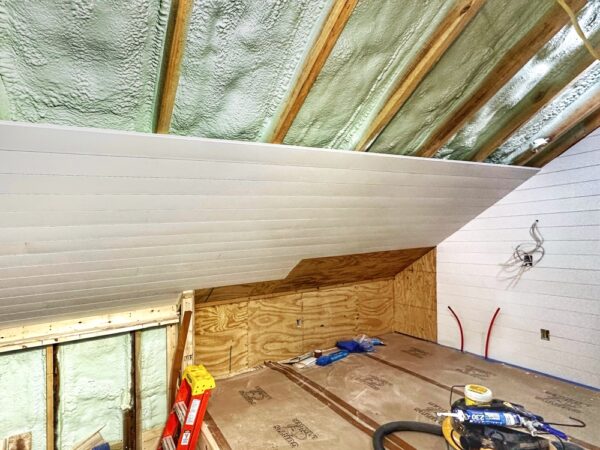
T&G Nickel Gap Progress in Icehouse (Photo: Geo Davis)
Matt, Jarrett, Supi, and Eric have been focusing on the T&G nickel gap installation, and the progress is really starting to add up. The coming promised to be another visual leap forward as the ceiling gets closed up. I promise to post photos as soon as significant headway has been made!
Nickel Gap Progress Video
Let’s wrap up with a little moving picture to show you what’s happened so far…
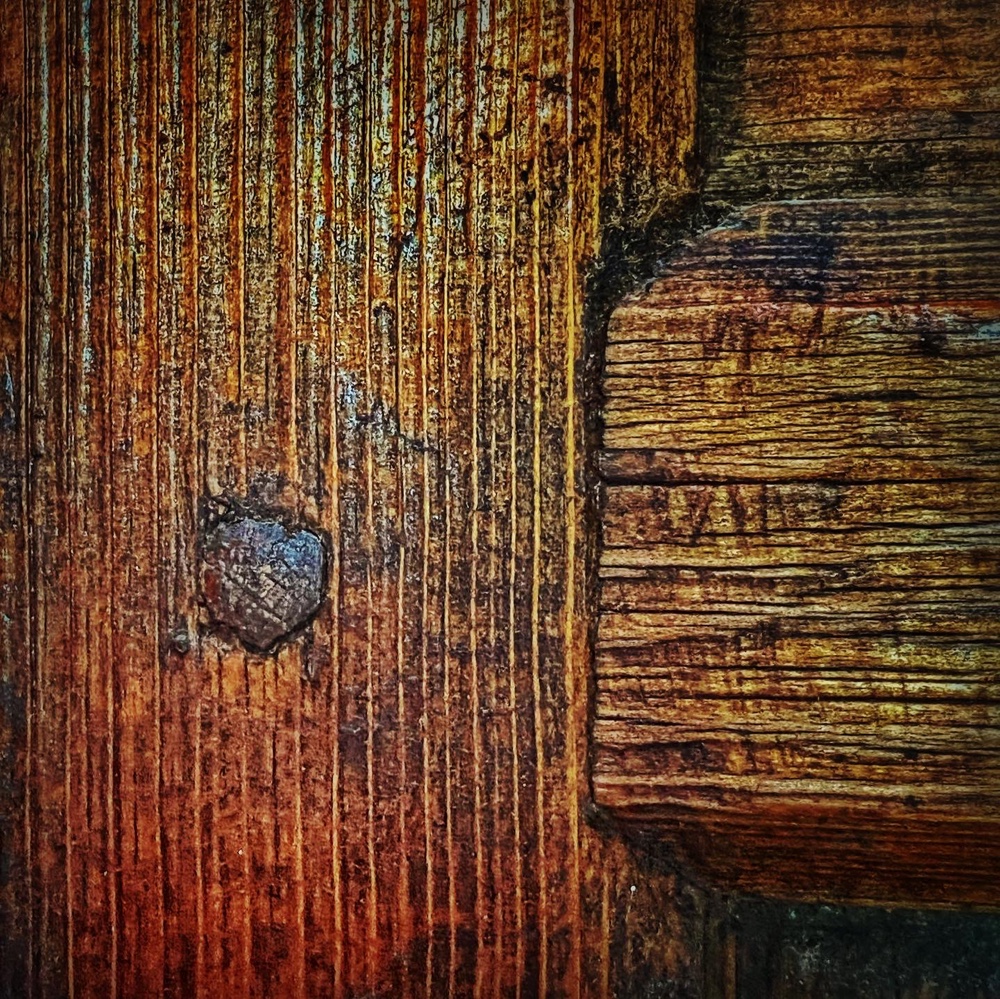
Consider that word parade fair warning for where I’m headed. From dovetails to team dynamics, in the twinkling of an eye. At least, that was my plan in revisiting a flood of field notes. Instead my errand evolved into a meandering meditation on admittedly abstract, fairly freestyle associations between durable joinery and team dynamics.
So, if you’re the A-to-Z git-r-done type, this is a good post for you to skip. Probably. Unless you’ve already burned a cord of calories and you’re surfing a dopamine-endorphin wave, in which case this might be just the departure from your daily that the doctor ordered. (The proverbial doctor, not the real doctor.)
But I’m getting ahead of myself. Let’s rewind a few weeks to my sudden and unanticipated decampment from Santa Fe to Essex.
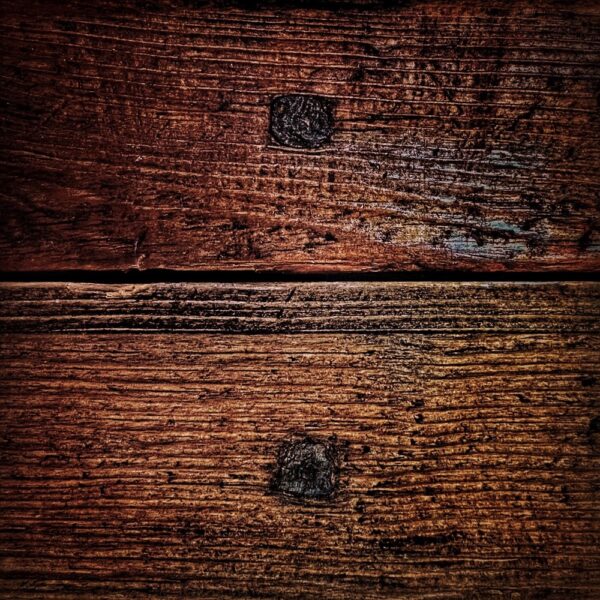
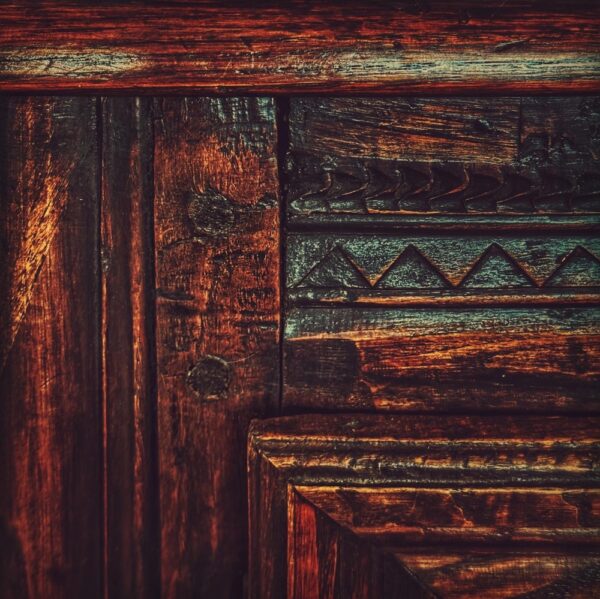
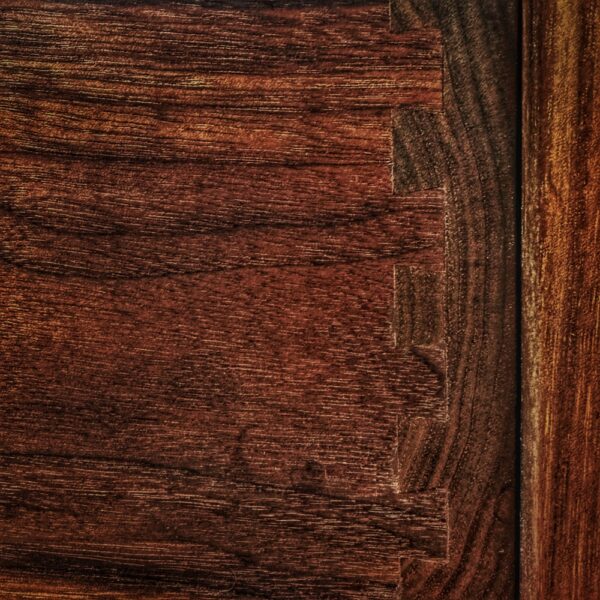
Durable Joinery (Photo: Geo Davis)
Icehouse Intermission
Mission interrupted, more to the point. Icehouse rehab back on ice for a week or two while we regrouped and remapped and, eventually, rebooted. Upon approaching Rosslyn by water — steely skies and surreal snowflakes fluttering occasionally (as if the special effects team had been downsized), an almost empty ferry, a mostly hibernating hamlet hunkering lakeside — mixed emotions roiled within me.
There was a wellspring of anticipation upon returning to inspect firsthand the team’s progress on the icehouse rehab, boathouse gangway, and some painting and tiling maintenance inside our home. There was also the poignant pique of a visit precipitated not by plan or passion but by infelicitous necessity. (Source: Snow Falling on Homecoming)
Three weeks ago this past Wednesday. The following days were invigorating. Encouraging.
By in large, this impromptu return to Rosslyn has been profoundly positive…
[“On the Level“, a poem drafted during my visit, reflects] the reassurance that I’m encountering, the confidence and conviction that are flowing back in after ebbing…
[…]
On the level, there’s plenty of optimism, despite inevitable setbacks. (Source: On the Level)
The progress was grounding, familiarizing myself physically with what I’d been living virtually, witnessing in person the dramatic transformation of this long-held vision into tangible, well built, inviting spaces and floors and walls and stairs and windows and doors. The volumes and the vessel that contains them, defines them, that had been gestating for almost two decades, was at last becoming believable due to the collaboration and teamwork of many.
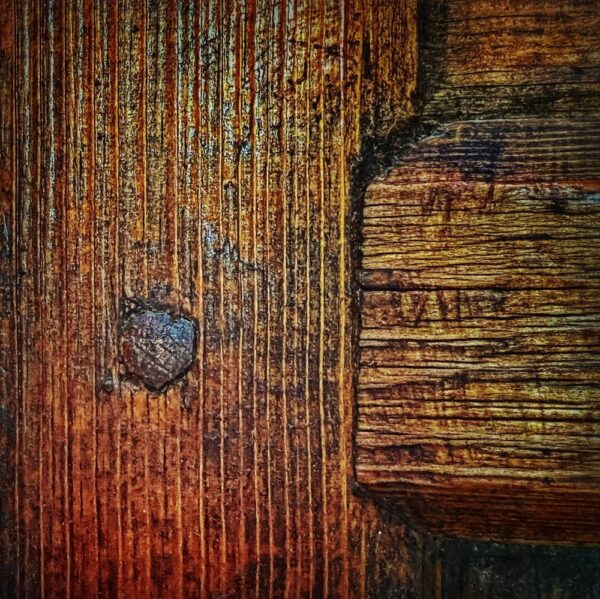
Durable Joinery (Photo: Geo Davis)
A furtive foray into the curious coalescence of still tender fractures and ruptures that drew me back to Rosslyn (and that continue to disclose themselves each day of my stay, reminders of quaking in recent weeks) but also the durable bonds and the abiding beauty that hold it all together. (Source: Bowtie & Broken Memento)
While it is indeed Rosslyn’s abiding beauty that beckoned us to this property in the first place and her abiding beauty that has buoyed us through years of historic rehabilitation (and personal rehab!), there are times when the border between broken and unbroken blurs and faultiness become fractures. In such cases it is the durable bonds that prevail, that steady the proverbial ship, that hold it all together.
Rarely, I find, does the journey tidily delineate between clear victories and clear setbacks. Ours is a nonbinary and highly subjective adventure, and this midwinter, mid-project hiatus is no exception. Disheartening and challenging, yes, but also an opportunity to acknowledge and to celebrate accomplishment, a notable benchmark on the quest to reinvent a 19th century utility building as a 21st century lifestyle hub on a par with Rosslyn’s gracious home, waterfront, and generous grounds.
In short, there was — and there is — far more to fête than to lament at this juncture.
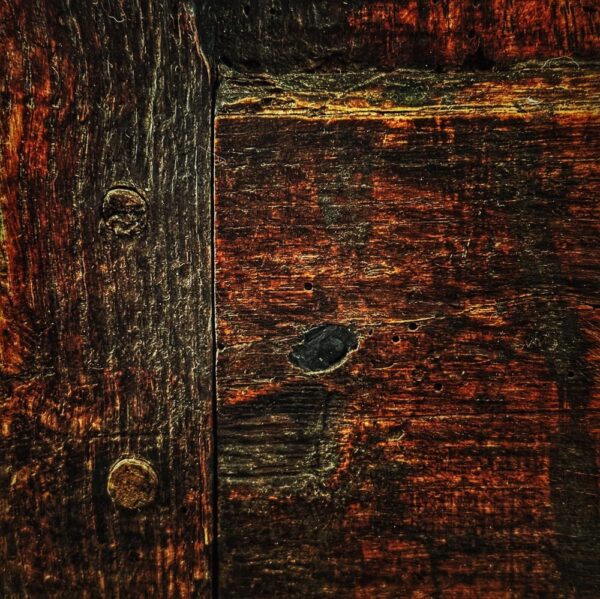
Durable Joinery (Photo: Geo Davis)
Back to Work & Field Notes
In what’s become a familiar pattern, today’s post was an orphaned draft, initiated as field notes during my recent Essex sojourn, and then adapted into a readout for the team to catalyze our onsite meetings into an actionable scope of work. That part happened. Practical. Necessary. Timely. Now, with the benefit of sufficient remove (for tempering tone and shifting perspective) I’m revisiting those field notes from a more meditative perspective. And yes, my reflection has been fueled in no small part by an obsession with joinery.
Before I go there, guiding you into the mesmerizing maze of my imagination (bread crumbs advised), let’s ground this soon-to-be-ungrounded stream of conscious in the days we spent together as a team. Here are a few excerpts recapping my extended site visit.
We met as a big group and as multiple smaller groups over more than a week. Much was rehashed, brainstormed, problematized, and decided during these encounters, so I’d like to follow up with a readout from our main meeting as well as some of the items that came out independently in my one-on-one followups. Please understand that some of what I’m including may feel like micromanaging or second-guessing skills, expertise, experience, etc. Please accept my apologies in advance, and understand that neither are among my objectives. However the last month has illustrated the downside to having direction and decision-making silo’ed up. By “flattening” the team, I am hoping to shift the focus toward a more collegial, more ensemble oriented approach. We have ample resources in our team (an almost embarrassing abundance of skill, passion, and work ethic!), and I want to make sure that everyone has an opportunity to contribute, to catch problems before they materialize, to learn from one another, and to avoid the bottlenecks and logjams that we can’t afford at this halfway point.
We will continue to rely on Pam, Peter, and Eric as the three leads or “co-captains” with the objective of streamlining on-site decision-making and progress. But I strongly encourage everyone to study the plans, to ask questions, to make suggestions, and to contribute to the collaborative success of the icehouse rehabilitation as we cartwheel toward the finish line.
Although we covered an expansive scope of work during our meetings, I gathered the gist into a detailed outline for everyone to review, edit, and augment prior to our team meeting the following week. In addition to onboarding everyone as a contributing and valuable member of the team while reaffirming a commitment to transparency as we move forward, I also hope to encourage the sort of cross pollination that has consistently defined the high point of this and previous projects.
Our follow-up team meeting fleshed out the scope of work and cemented the near term benchmarks and timeline. We will be able to revisit weekly with an eye to efficient project management, clear expectations, and an emphasis on incubating the sort of collaborative environment that yields the best results and ensures the most enthusiastic comradely. Goals set. Updates as we advance upon these goals.
So that sets the stage in a dry, rearview mirror sort of way.
What it overlooks is the morale, outlook ,and commitment of everyone with whom I met. Shuffling the team and shifting responsibilities midstream is unsettling and disruptive at best. The way this team came together, processed the change, stepped up to new responsibilities, and immediately, resolutely refocused on the new map and timelines was astounding. Confident and optimistic, proud of their accomplishments heretofore, eager to restore forward motion, and laser focused on the tight timeline, elevated expectation, and bountiful challenges. Unwavering. And hopeful that the full team might be reconstituted in the home stretch to finish up strong together, and to collectively commemorate their accomplishments come June.
And this is part of what takes me to the woodworking, and specifically joinery, as a metaphor. Heck, it’s not even just the sorts of joining and conjunction that are foundational to joinery and even carpentry. It’s the millennia old art and artisanry committed to joining, conjoining, and even mending that fascinates me. I’ve waxed on aplenty about wab-sabi, so I’ll sidestep a tangential deep dive now (ditto for Kintsugi.) A tidy touchstone will suffice.
Wabi-sabi (侘寂) is a world view centered on the acceptance of transience and imperfection. The aesthetic is sometimes described as one of appreciating beauty that is “imperfect, impermanent, and incomplete” in nature. (Source: Wikipedia)
Joining, conjoining, and reconjoining. No false disguise, no pretense, no faux facade. Bringing together. Bringing back together. I’m clearly still ill equipped to wordsmith my ideas into articulate or persuasive prose. But I’m working on it. And I’m hurling this half-baked post into the world with the unrestrained wish that it will settle on fertile soil, that it will germinate, and that I will be able to observe and learn how to communicate what it is that I’m discovering, this groundswell of insight that I’m experiencing without yet fully comprehending what it is. Bear with me, and I’ll do my best to interpret the lessons as they are learned.
In the mean time, I will draw in two compelling perspectives that may well shed some light.
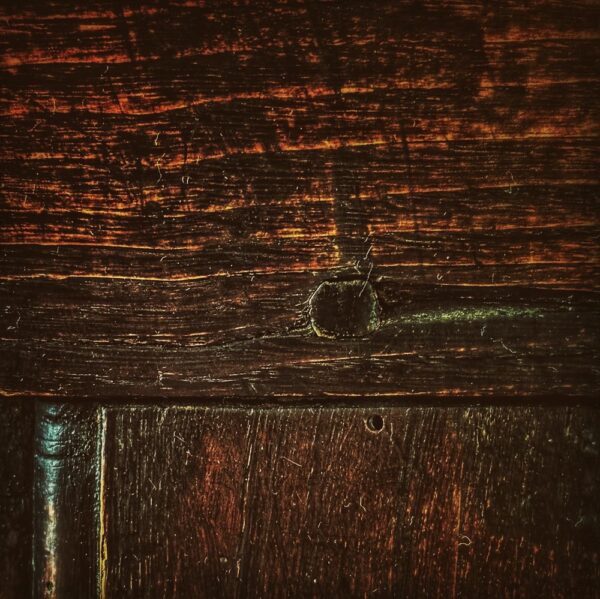
Durable Joinery (Photo: Geo Davis)
Joinery as Metaphor
Allow me a moment to weave in a consideration that deftly approaches the idea of woodworking as metaphor.
I am building a file cabinet for my office. It strikes me an apt metaphor for what we do as teachers in the classroom. I begin with a vision, followed by making a clearly developed plan. I gather the materials I will need – examining them for grain, quality, and fit. Each piece is cut just over the requisite length. I use a variety of joinery techniques to assemble the parts. The finished piece begins to take form. From the rough construction, wood is slowly and strategically removed, rounding edges and corners, sanding rough edges and surfaces, slowly revealing the finished shape. I stand back to see what continues to require attention. Final details are attended. Stain is gently rubbed in; varnish is brushed on – rubbed smooth between coats. I stand back and smile, satisfied with a pleasing, useful piece of furniture. — Bill Lindquist, January 3, 2012 (Source: The Purple Crayon)
Teaching. Yes. And team building. Team rebuilding.
Perhaps the following is only tangentially related, though it feels germane.
But I know full well that many woodworkers don’t want to hear about philosophy. What practical value can there possibly be in sitting around thinking about work? Isn’t it better just to roll up your sleeves and get to it?
I believe that this temptation to leave our brains at the door of the shop is rooted in a fundamental misunderstanding of human nature that separates our thinking from our doing…
We are whole beings, and although we have inner and outer aspects (mind/soul and body), we are essentially unities, not dualities… you cannot separate your mind from your body. You can’t put your thoughts and beliefs in one category and your practices in another.
So, why so much thinking and theory from a woodworking publication? Because, reader, you have a mind inextricably connected to those hands. And I am convinced that if we want our work to reflect the fullness of who we are, the why will be just as important as the how. — Joshua A. Klein, September 28, 2021 (Source: What’s With This Woodworking Philosophy Stuff? – Mortise & Tenon Magazine)
Absolutely. (And, as an aside, this reminds me that I’ve been ignoring another orphaned draft about Rosslyn’s 5w’s. Back on the punch list!)
Durable Joinery (Photo: Geo Davis)
At present I’m endeavoring to unweave our recent Rosslyn narrative just enough to re-braid the threads that anew, mending the challenges that have arisen, as if braiding a bridge over troubled water… (Or a bridge graft at the base of a partially girdled tree in Rosslyn’s orchard… Yikes! Mixed metaphors. And so long as I’m hoarding metaphors, what about kintsugi?)
Kintsugi is an ancient Japanese art in which broken pottery is mended with glue and gold honoring and highlighting the cracks rather than hiding them. The belief is the pottery is stronger and more valuable after the breakage and mending. Kintsugi is a powerful metaphor and physical art practice to explore layers of meaning of broken, to look at the pieces in new ways, and notice the ‘glue’ in our lives that assist us to mend, navigate challenging times and keep on going. — Kristin Pedemonti (Source: Mending What’s Broken | Steer Your Story)
The writhing winds are pulling my mind hither and yon, and I find myself too, too deep into this meandering meditation to abandon it. If I’ve lost you, I apologize. Know that we are lost together. But as fellow sojourners we are not idle, waiting for the illumination of morning. Perhaps we’ll stumble upon or quarry in the darkness.
In closing, and I promise you I am, allow me to apologize for this untethered and unedited runaway. More soon, I hope, on mortise and tenons and dovetails, joyful joinery, rejoinery and durable bonds. My imagination is conjuring an intricate scarf joint that conjoins by gathering, by honoring, by encouraging, a meticulously crafted union where stresses are distributed in all directions and resilient when forces challenge. My imagination is ringing with the melody of strengthen, even repairing a strained or failing joint. Join, conjoin, reconjoin…
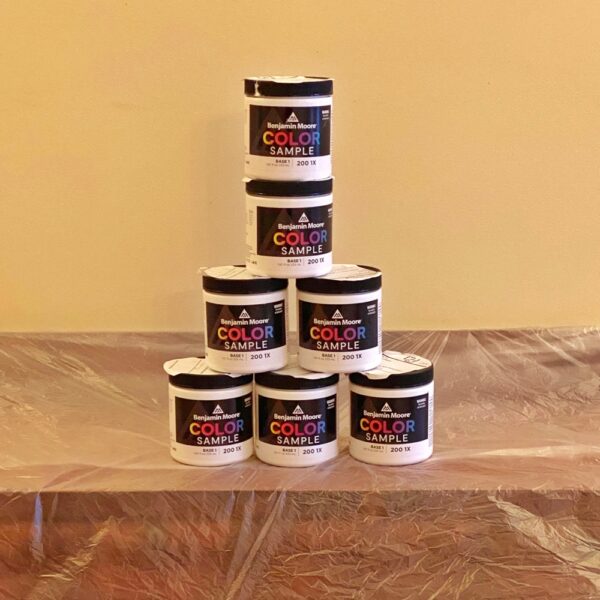
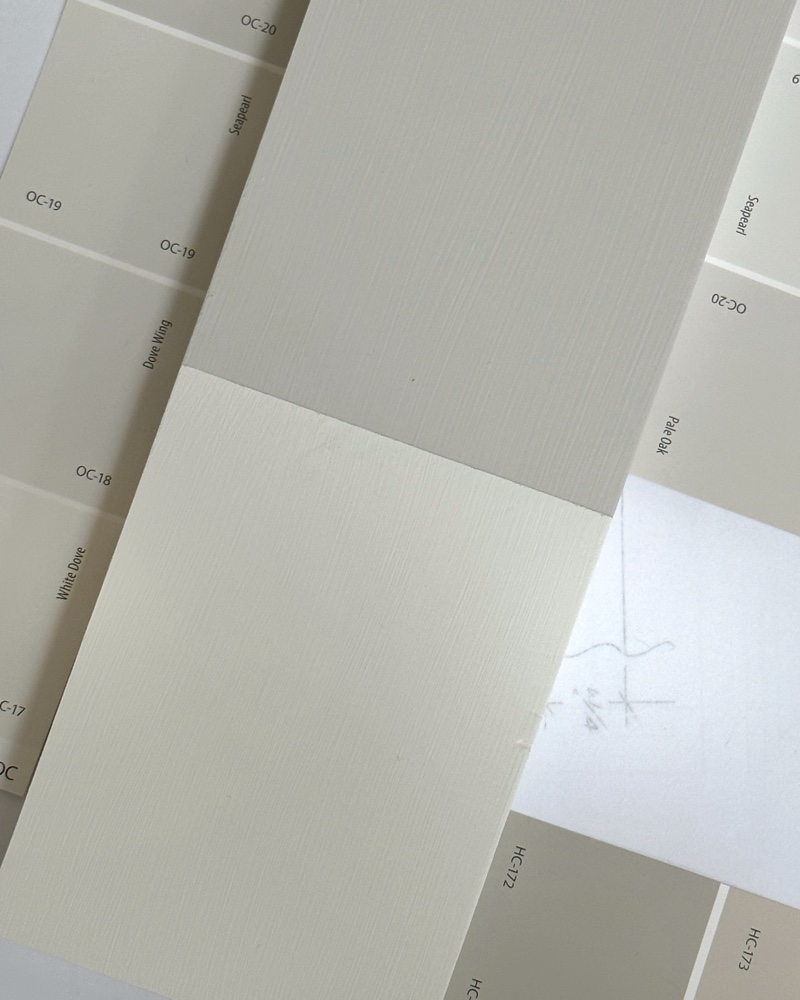
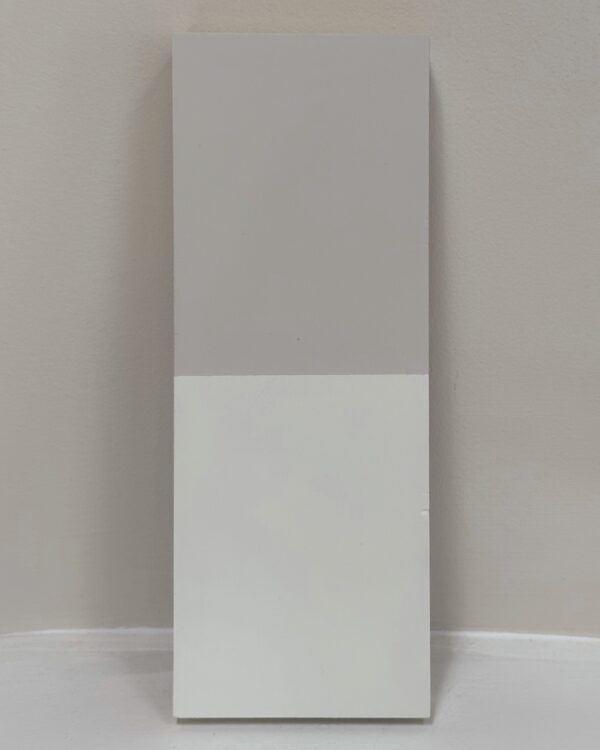
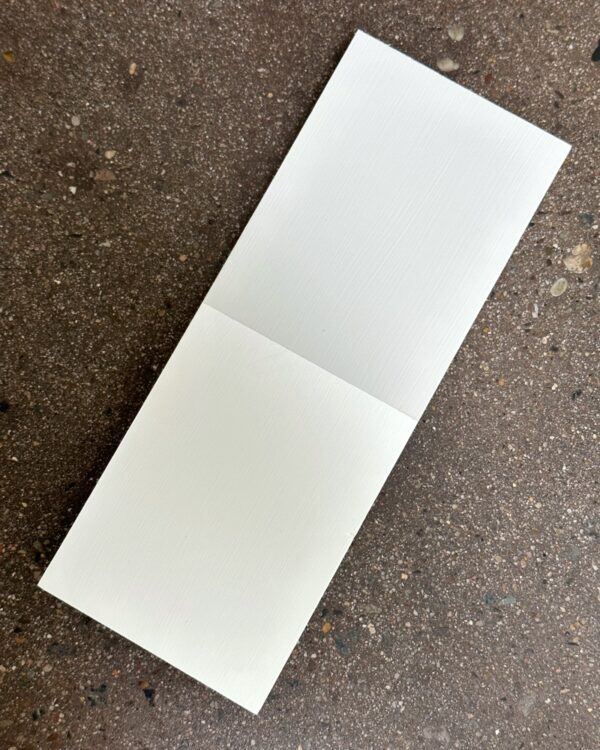
Icehouse Interior Paint: Pale Oak & White Dove (Source: Geo Davis)
We’ve decided on interior paint colors for the icehouse.
Icehouse Interior Paint: Pale Oak & White Dove (Source: Geo Davis)
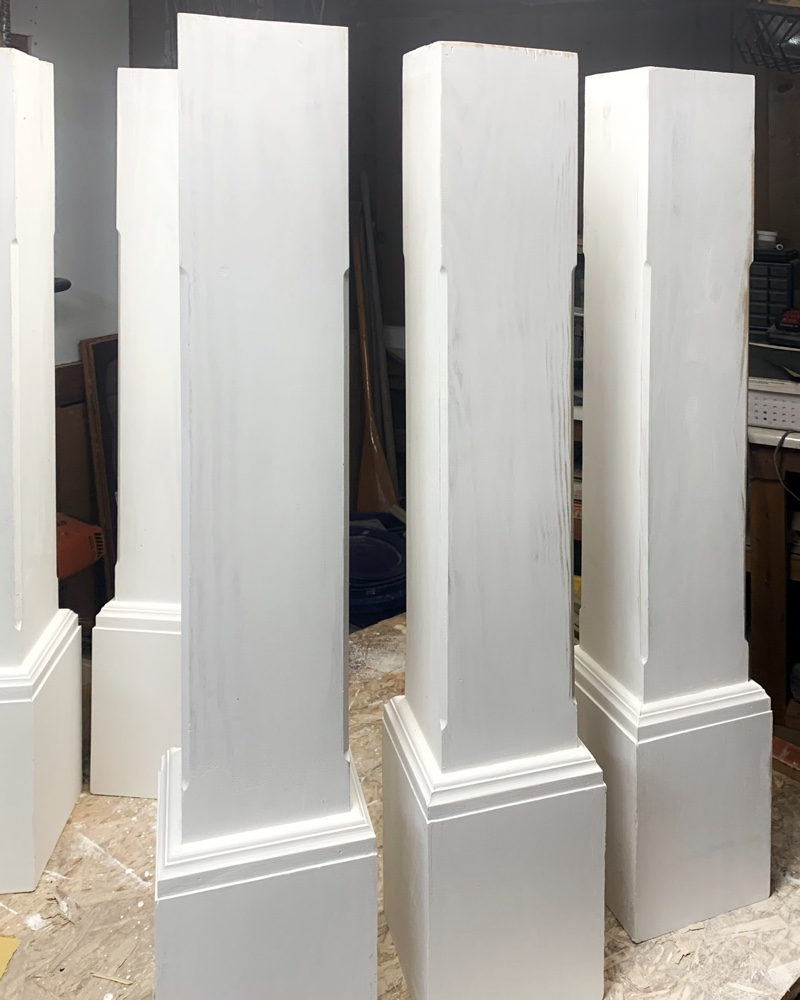
Benjamin Moore Pale Oak (OC-20) for the tongue and groove “nickel gap” wall paneling, and Benjamin MooreWhite Dove (OC-17) for the ceilings, trim, columns, windows, doors, etc.
Icehouse Interior Paint: Pale Oak & White Dove (Source: Geo Davis)
Walls and ceiling will be painted in eggshell, and trim will be satin.
Icehouse Interior Paint: Pale Oak & White Dove (Source: Geo Davis)
It’s an a winning combination that will add a hint of warmth and a subtle contrast.
Icehouse Interior Paint: Pale Oak & White Dove (Source: Geo Davis)
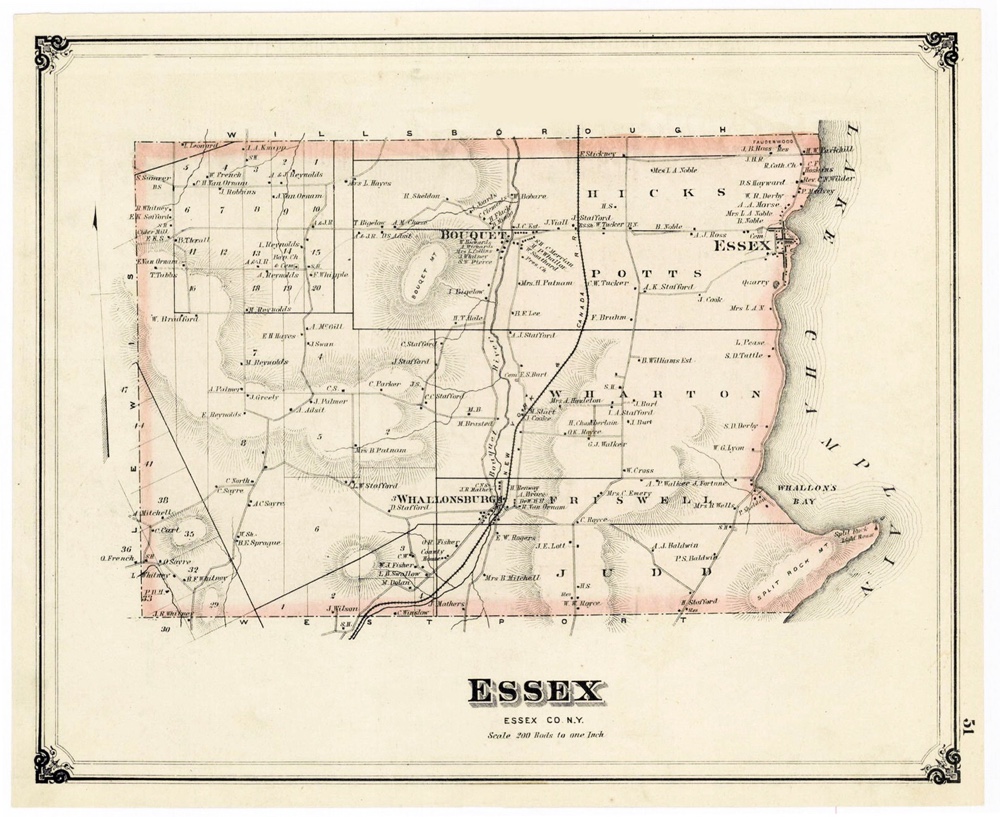
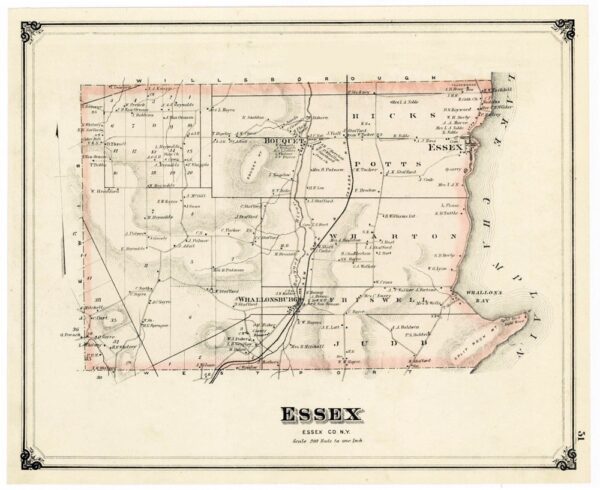
Essex, NY in 1876 (Source: OW Gray Atlas of Essex County)
Where in the world is Rosslyn? If you’re not too terribly averse to a verse, here’s an introduction writ small (wrapped up in a tidy micropoem.)
Up in the Adirondacks
at the foot of the foothills,
where Champlain's sweet waters
refresh, render respite,
and sooth worldweary souls,
a sanctuary sings
welcoming melodies.
(Source: Where's Rosslyn?)
Poetry not your preference? Pity! 😉 Let’s try this.
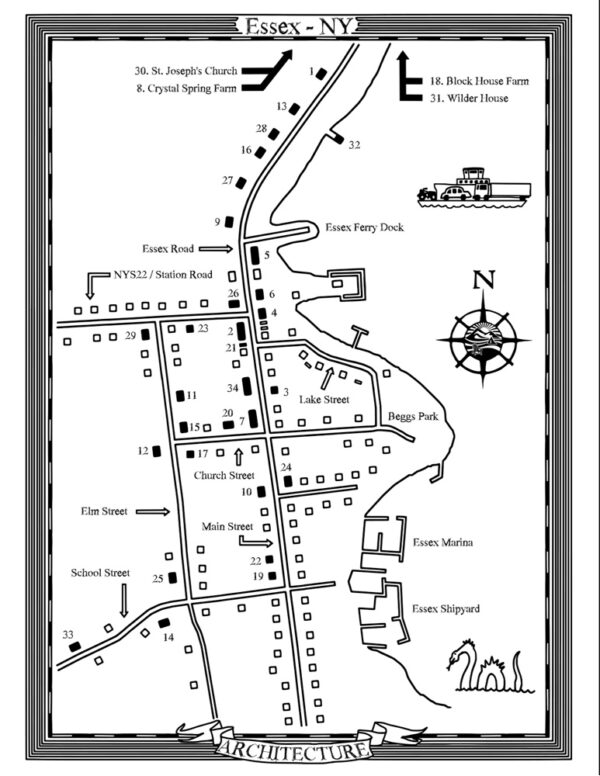
Beginning to zero in on where in the world Rosslyn is? If neither the poetics of place nor encyclopedic brevity are helping much, let’s try a map or two. Maybe I can narrow your focus a little further with this line drawing that I created with Katie Shepard for our community blog, Essex on Lake Champlain back in 2015. (If you click on the map it’ll open a window where you can download the unfuzzy PDF complete with a key explaining each of the numbers in the map.)
Essex Architecture Map, July 2015 (Source: Essex on Lake Champlain)
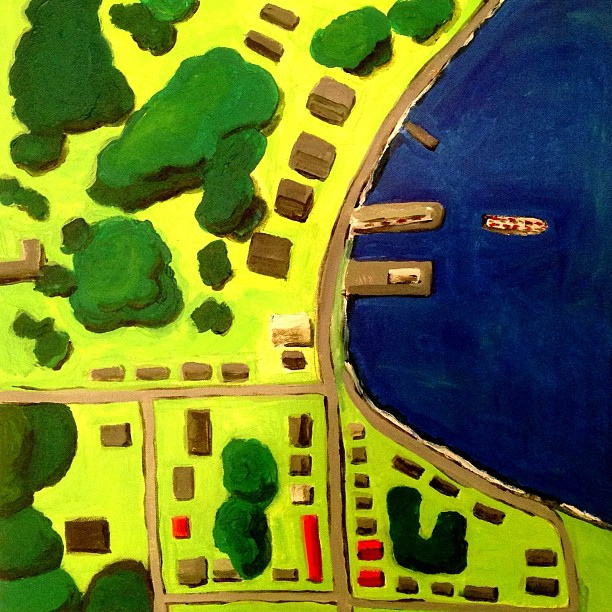
Enough with the old school black and white (and sepia with faint rose highlighting). It’s time for technicolor!
So, where in the world is Rosslyn? Train your eyes on the three docks/piers extending out into Lake Champlain. The middle one is the ferry dock. (See the ferry heading to Vermont?) The smallest of the three man made peninsula’s is Rosslyn’s dock house (aka “boathouse”). Armed with that little insight, perhaps you can find the same property on the two maps above? (Hint: the boathouse wasn’t yet constructed in 1876 when the map at the top of this post was made.)
Heck, it still enchants us despite constant maintenance and seasonal flood worries. And the boathouse hammock is a mini vacation!
Head inland from the boathouse and you’ll discover Rosslyn itself, tucked next to two massive trees, a ginkgo and what I believe is a silver maple (Acer saccharinum). In fact, I’m sitting in the top right room on the second floor right now. Perhaps if you swoop in a little lower you’ll catch me jotting this blog post.
A little further left of the house are the carriage barn (lower) and ice house (upper) which offer up all sorts of mysteries. But those for another day. Unless you remember three curious artifacts I shared with you a while ago… (Source: Essex Aerial View)
Hopefully this helped orient you. Yes, a Google map might be more precise and quicker, but sometimes Rosslyn Redux and the art of homing aren’t particularly precise or quick. Besides, a thin veil of privacy keeps the snoopers away. Or at least adds a little challenge to their quest. But if you’re looking for a little more clarity on where in the world Rosslyn is located, I suggest you check out this hopefully helpful hub: “Where’s Rosslyn?“
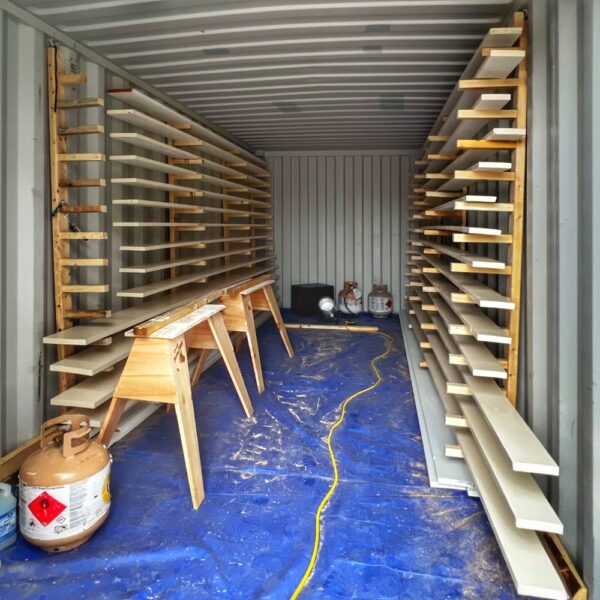
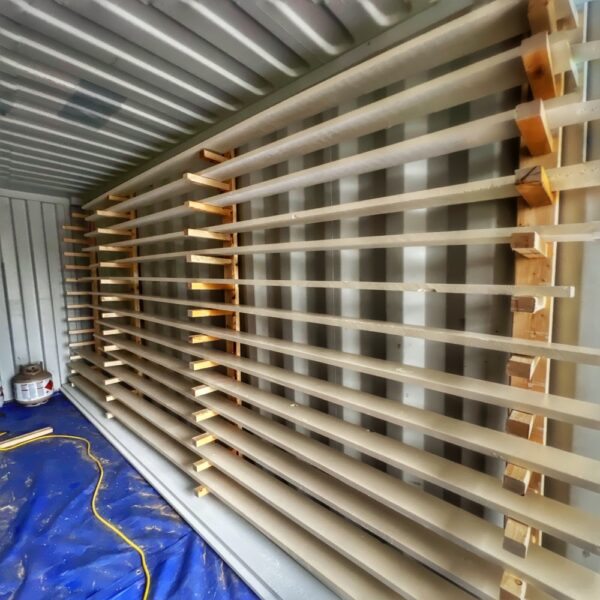
Makeshift Workshop in Storage Container (Photo: R.P. Murphy)
We’ve dealt with some unique challenges during Rosslyn’s icehouse rehab, and today’s post provides an inside glimpse into one of the workaround. The icehouse is a small building offering limited workspace. And while we’ve been able to take advantage of the carriage barn for workflows that aren’t adversely impacted by the cold, priming and painting thousands of linear feet of interior and exterior finish lumber requires temperature and moisture stability not currently available in the unheated carriage barn, nor outside during a North Country winter. The solution? Meet our makeshift workshop in a storage container!
Makeshift Workshop in Storage Container (Photo: R.P. Murphy)
We rented a pair of 20′ storage containers to supplement Rosslyn’s two outbuildings. One storage/shipping container is effectively functioning as a warehouse storing building materials, especially all of the architectural salvage that Pam and Tony inventoried and relocated from the icehouse early last autumn.
Makeshift Workshop in Storage Container (Photo: R.P. Murphy)
And today you get a glimpse inside the second storage container, presently serving as our temporary paint station. Steve and Kevin did an commendable job of setting up a makeshift workshop in storage container number two. Add some heat, dehumidification, and a couple of hardworking painters, and… tada!
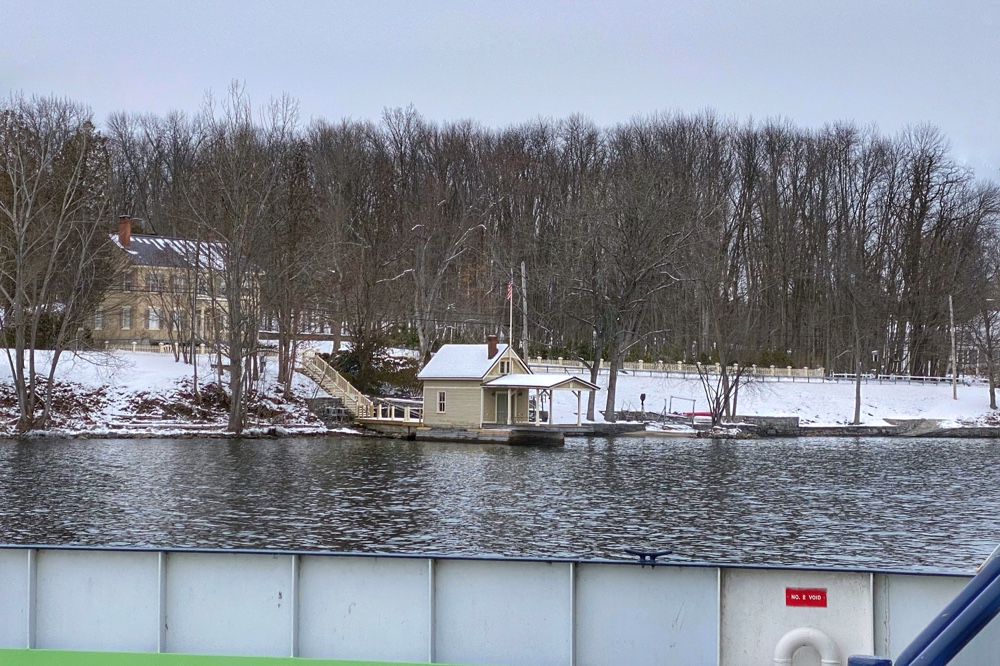
Snow Falling on Homecoming: January 25, 2023 (Photo: Geo Davis)
Today’s ferry ride from Charlotte to Essex — with snow falling on homecoming — tasted bittersweet if vaguely familiar. There was a wellspring of anticipation upon returning to inspect firsthand the team’s progress on the icehouse rehab, boathouse gangway, and some painting and tiling maintenance inside our home. There was also the poignant pique of a visit precipitated not by plan or passion but by infelicitous necessity.
The circumstances of my sojourn need no airing now since, perhaps, the “better part of valor is discretion“. So let’s skip the preamble and fast forward to the purely positive, right?
The cold, blustery ferry ride. The on-again, off-again frenzies of flurries pointillistic-pixelating the watery panorama, the approach to Essex, the desaturated vision of Rosslyn’s boathouse, the almost empty ferry queue, and the entirely empty roadway home.
Hhhmmm… Still shy of the purely positive, but hold tight. It’s coming.
Snow Falling on Cedar Shingles: January 16, 2014 (Photo: Geo Davis)
Snow Falling on Cedar Shingles
That blue-gray veiled waterfront snapshot dates from a post I shared on January 16, 2014. Just over nine years ago. And the title, “Snow Falling on Cedar Shingles“, remanifested in muddled facsimile (snow falling on hemlocks…) as I pulled in the driveway, observing the row of new evergreens planted along the norther edge of the front yard last spring/summer. (Which reminds me, I’ve still not posted those updates. Best get on with it before the one-year anniversary!)
The photo bears a close similarity with today, and this drift of words struck me as uncanny, sort of the mirrored reflection of my sentiments upon arriving today.
A parting glimpse of the boathouse blurred beyond veil of soggy snowflakes. Southwestern sirens are calling me away — by ferry, airplane and rental jalopy — so I leave the homestead in the able care of my bride and my dog for a few days. I’m willing deep drifts of powdery snow upon my return! (Source: Snow Falling on Cedar Shingles)
And this, fair reader, is where the positive uptick begins.
Another whirlwind visit, but rather than a whirlwind away in Santa Fe, it was to be a whirlwind in Essex. I took note of that. Just shy of a decade; a not-so-subtle shift. And then there was that twin allusion to the recently re-roofed icehouse, long since silver-foxed, and to David Guterson’s novel which had moved me then but has slowly vanished like the ferry’s wake resolving back into the surface of the lake. And that transformation from cedars, actually American arborvitae (known locally as “cedars” or “white cedars”) to hemlocks resonated as well.
Snow Falling on Hemlocks
Remembering the micropoem with macropotence. Superpowers.
There was no crow today to catalyze my “change of mood”. There were birds at the bird feeders beside the deck and beneath the leafless gingko tree. And several mallards retrieving fallen birdseed from the snow beneath the feeders. And the new row of hemlocks, similar to the old row of hemlocks on the other side of the property, looked green black beneath their frosted cloaks. But it wasn’t the songbirds, the mallards, or the hemlocks that “saved some part / Of a day I had rued.”
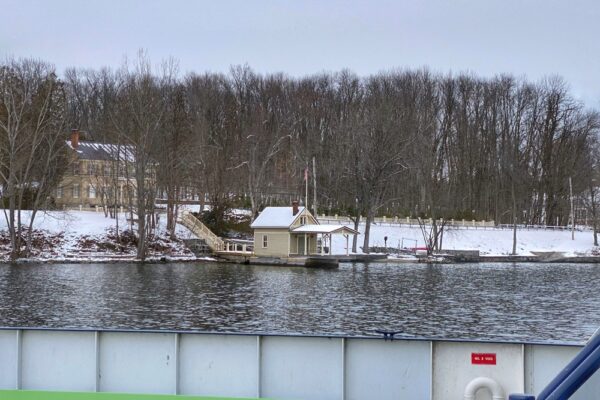
Snow Falling on Homecoming: January 25, 2023 (Photo: Geo Davis)
Snow Falling on the Icehouse
It was gathering with Tony and Peter and Steve inside the icehouse, taking in the awesome transformation from dirt floored shell of a utility building to micro mansion. A soaring one-room wonderland with a loft that thrills the 10-year old still overmuch alive in me. A barn loft with a handsome, homey stair rather than a ladder. A stout rebuild with an airy energy. An icehouse warm against the frosty afternoon despite the fact that no heat was running. A small scale sanctuary for writing and reading and creating the day away.
After meeting with the members of the team on hand I wandered, cold, and snow capping my hat and shoulders around and around, studying sightlines, editing hardscape and landscape plans, evolving furniture plans. After several months away, inspecting and and guiding and absorbing the progress from a digital distance that distorts the approximately 2,000 miles of reality jam-packed between me and the actual timbers and window openings and stair landing that have risen in the empty volume I left behind in September. Virtual reality is not reality. But walking and touching and rapping my knuckles and eyeballing alignments and sitting in a folding chair exactly where my desk chair will be several months from now,…
Snow Falling on Homecoming
This is the uptick. Where I felt tormented and conflicted in recent days, even as the ferry glided across the chilly lake, I now feel swollen with optimism. And underpinning the optimism is profound pride and gratitude for the work that has been completed and to the team who made this possible. Thank you Hroth, Pam, Tony, Eric, Matt, Brandon, Ben, Justin, Jarrett, Bob, Phil, Zack, David, Steve, Kevin, and everyone else I’m inadvertently overlooking. Your hard work and perseverance have begun to transform a vision into a building — an environment for creativity and productivity and entertainment — worthy of the handsome heritage that this historic property deserves. Susan and I are profoundly grateful to you all.
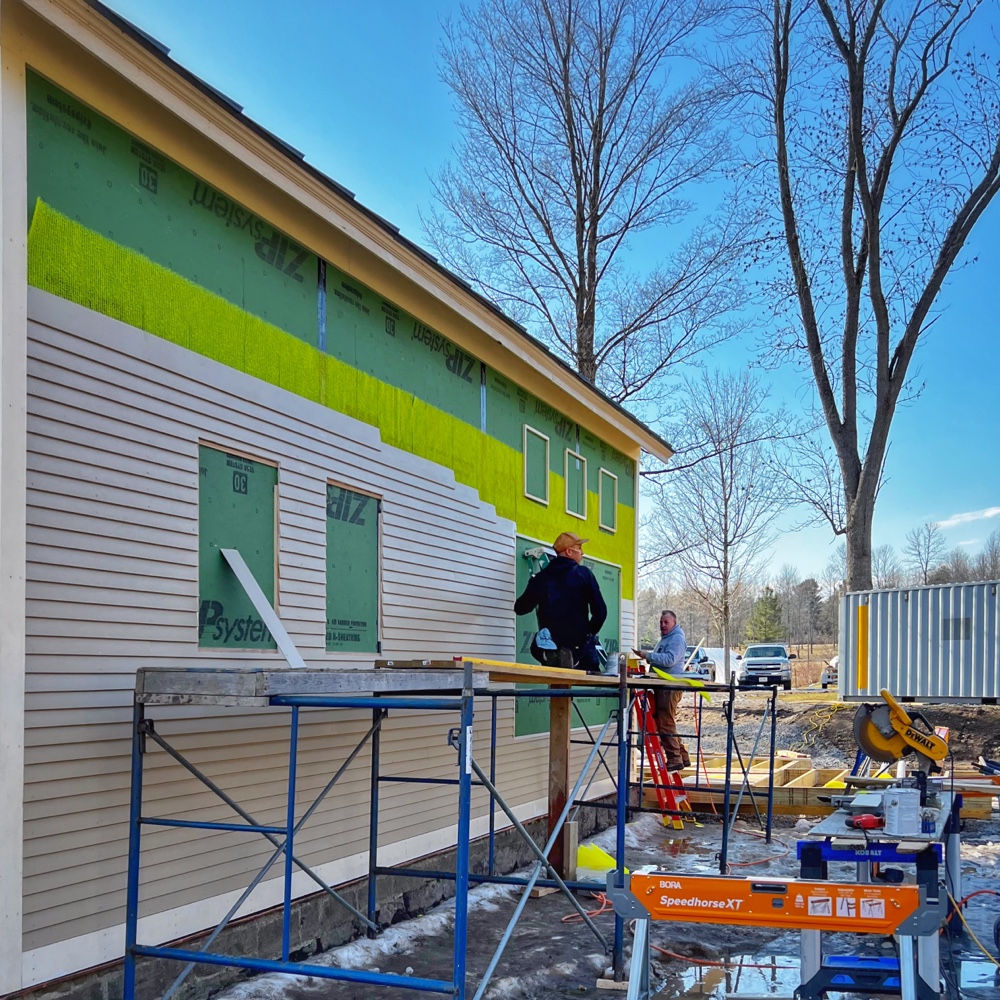
Matt and Supi Trim Icehouse, West Elevation (Photo: R.P. Murphy)
Today I’m pleased to post a quick update on the icehouse trim and clapboard installation. Temperate conditions are proving a bonus to this exciting progress. In the photo above Matt and Supi are wrapping up with the new trim so that the Benjamin Obdyke Slicker and clapboard can be installed.
The unique, vertically-channeled, three-dimensional matrix of Slicker® Classic provides a continuous space for drainage and drying, a thermal break and pressure equalization—eliminating the threat of trapped moisture. (Source: Slicker® Classic Rainscreen – Benjamin Obdyke)
This is a new product for us, and I’m optimistic that it will benefit the longevity of the cedar siding, which we ordered pre-primed and which we’re painting with two coats of paint (in the “paint shop” storage container) prior to installation.
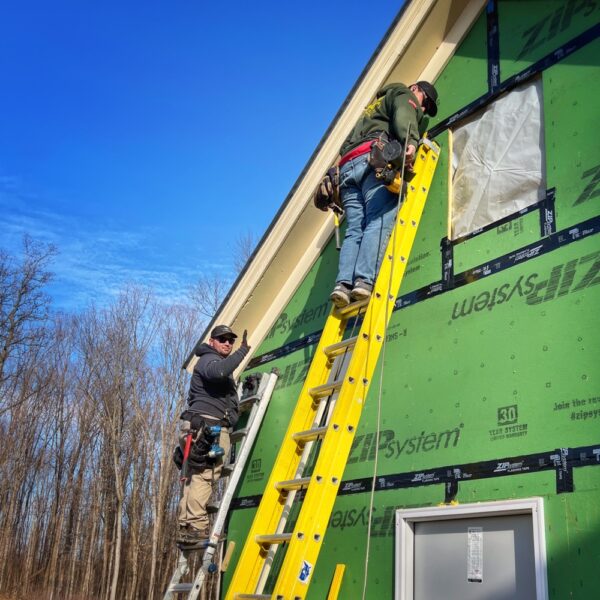
Installing Trim, Slicker, and Temporary Window Grounds on Icehouse (Photo: R.P. Murphy)
In the second photo you get a glimpse of the Slicker installation, an unfortunate color contribution rendering the temporarily green (ZIP System) building even more of an eyesore until the clapboard siding conceals it. Insect screen has been integrated into our installation to ensure that our insect neighbors look elsewhere for comfy accomodations.
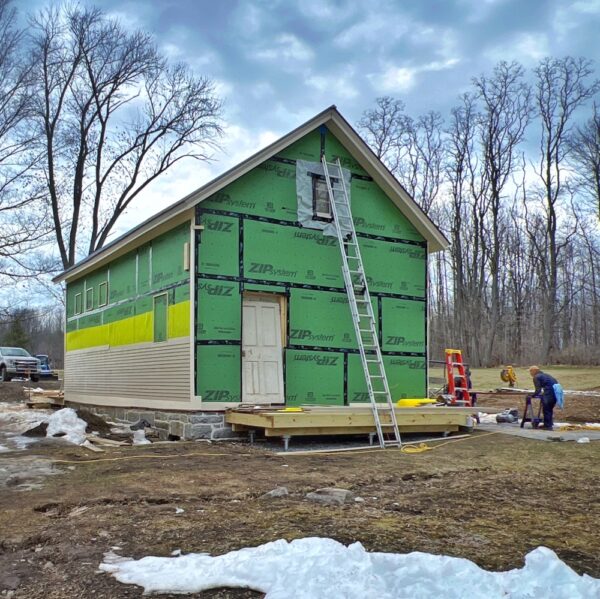
Tony Installing Clapboard on Icehouse (Photo: R.P. Murphy)
Clapboard (and slicker) in this next photo are progressing up the southern elevation. It’s a pretty dramatic transformation after looking at the glowing green icehouse, a notably incongruous focal point especially when surrounded by snow. We’re focusing on the southern and northern elevations first since they’ll allow for quick progress and fewer challenges.
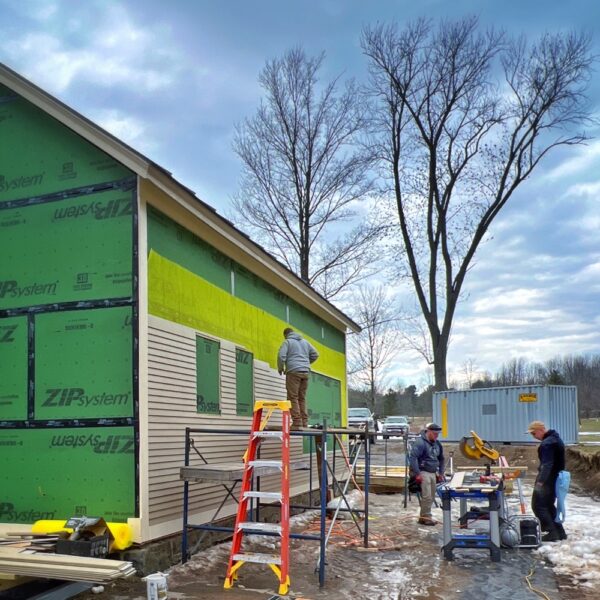
Calvin, Tony, and Matt Install Clapboard on Icehouse, North Elevation (Photo: R.P. Murphy)
Once Calvin and Tony are super comfortable with the icehouse siding installation given this slightly tricky historic rehabilitation (angles, etc. are never quite true) they will tackle clapboard installation on the gable ends. With the hustle and experience of Tony and Calvin — plus oversight from Peter, Pam, and Eric — this next step will advance smoothly. And soon enough we’ll be able to celebrate a handsome exterior.
Calvin and Tony Install Clapboard on Icehouse, North Elevation (Photo: R.P. Murphy)
Eric, Matt, Jarrett, Supi and Peter will continue installing trim boards throughout the rest of the week/weekend (and temporary window “grounds” that will be replaced when the windows and doors arrive) so that the gable ends are ready for clapboard. Stay tuned for updates.
A Jeroboam of gratitude to Kasey McKenna and Karly McKenna for their exceptional accomplishment repainting the entrance hallway. It looks superb! The lighting in the picture above doesn’t do justice to the work in progress, nor now that repainting the entrance hallway is complete. Lighting was poor. And the intention was just a quick progress report. Ditto for this next photo.
But I’ll be snapping some additional photos soon, hopefully with dramatic morning light illuminating the front hallways downstairs and upstairs. Until then, here’s a quick video walkthrough.
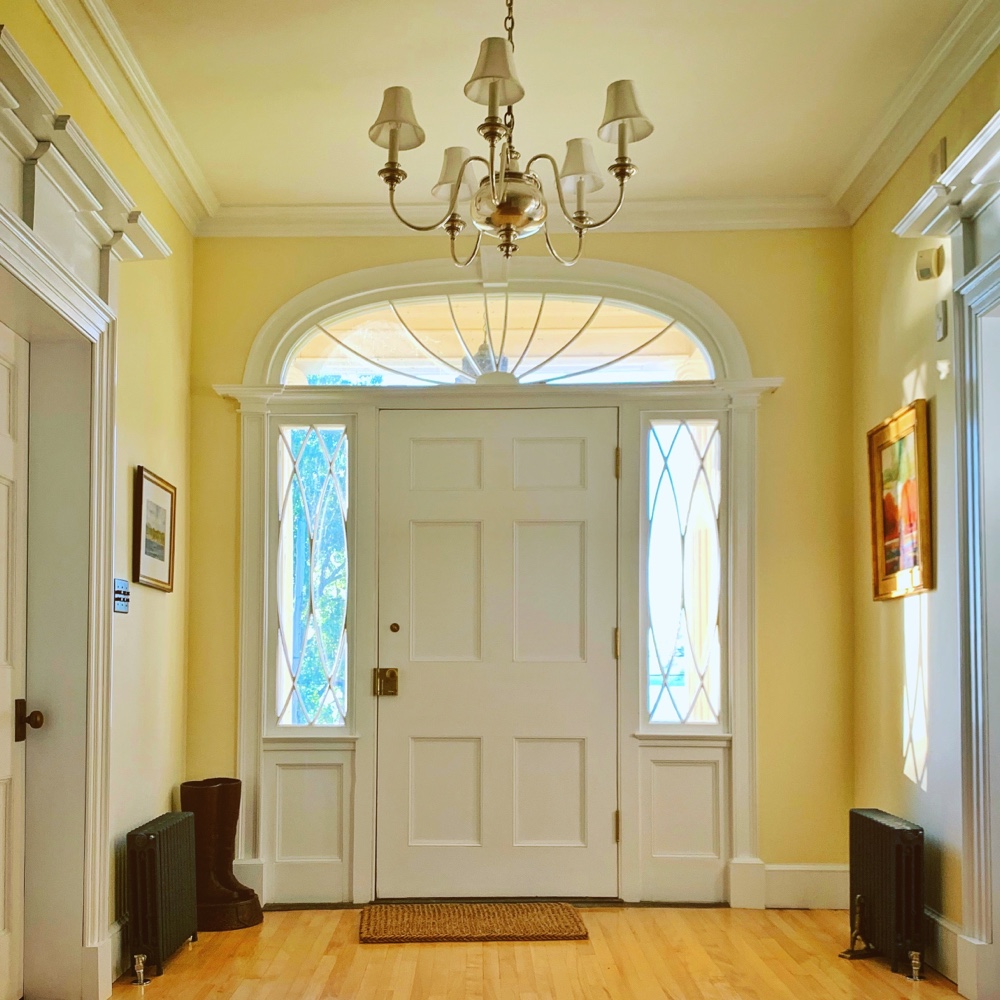
Late last August I reflected on the morning light in the front hallway, shared a moody morning photo as well as this warming shot that I took July 8, 2019.
Morning Light, Front Hallway, July 8, 2019 (Source: Geo Davis)
The mood and energy of this photograph perfectly conveys the opening moments of the daydream that I relived countless times in [late 2004 through early 2006 during] the extended prologue to our acquisition of this home. Although the interior of Rosslyn’s front hallway was in decidedly rougher shape during our early visits to the house…, I imagined it looking — and even more importantly — feeling just like this. (Source: Morning Light, Front Hallway)
I accompanied the photos in the post with a haiku, falling back on my Pollyanna confidence that poetry somehow captures what words and lenses overlook.
Needless to say, I remain a believer in the poetics of place. The following excerpt follows from the same morning rumination.
When Susan and I decided on paint colors, I pushed for yellow. She wasn’t particularly keen. I no longer recollect what color she desired, but my yen for yellow was quite simply a yielding to this daydream. My imagination had confected a morning vibe that needed to be experienced in reality. Not a particularly compelling argument when horse trading with Susan over design decisions, but I ultimately prevailed. Trim we agreed on early throughout the house. Beach hardwood flooring, the period chandelier and wall mounted lighting, the rug, the art,… all of these were joint decisions. But the yellow walls remain a point of disagreement even now. In fact, we’re considering a change, and given her willingness to accommodate me for the better part of a decade and a half with faint yellow walls in both halls, I’m inclined to yield at last. (Source: Morning Light, Front Hallway)
And this brings us to the present. Or just before the present when I agreed that it was Susan’s turn to pick a new color since we’re overdue for repainting the entrance hallway.
Fast Forward to Monterey White
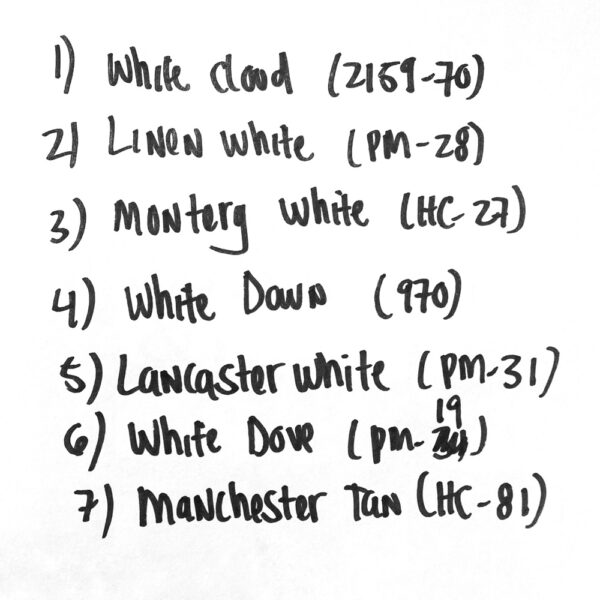
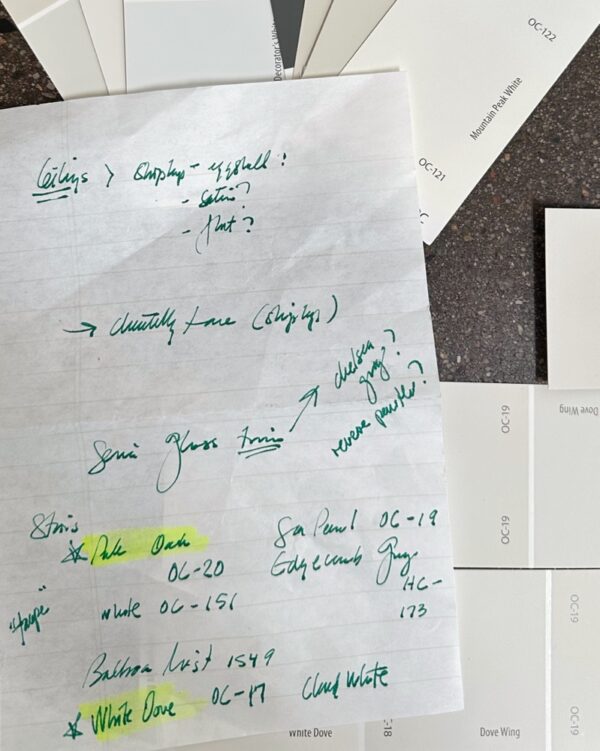
She sent me this list of preferred colors, carefully chosen to complement the color of the stair treads (Benjamin Moore‘s Clarksville Gray) that lead upstairs (as well as the hallway floor upstairs.)
Susan’s Benjamin Moore Sample List (Photo: Susan Bacot-Davis)
She had agreed to meet me partway by allowing that the new color not be a complete departure from the pale yellow paint that had lived in my mind for a couple of years and on the walls of both the first and second floor hallways for the better part of a decade and a half. This list represents her compromise. So off to the paint store I went for samples.
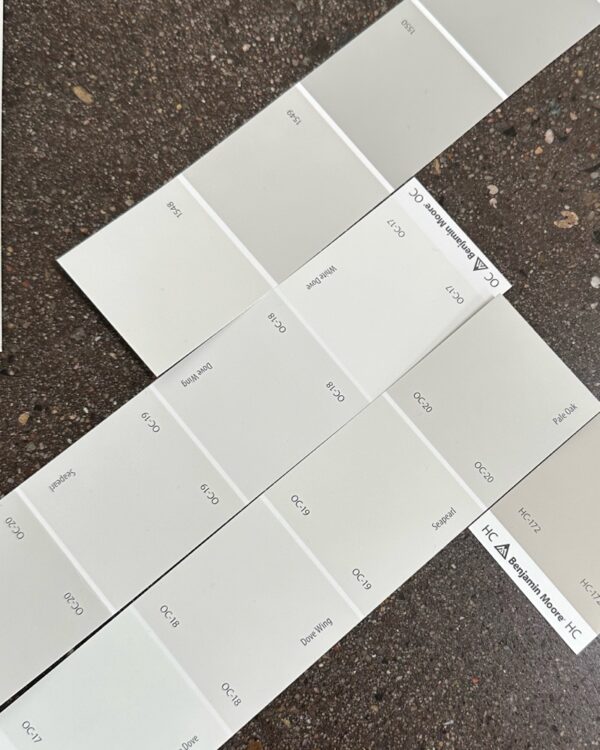
Benjamin Moore Paint Samples (Photo: Geo Davis)
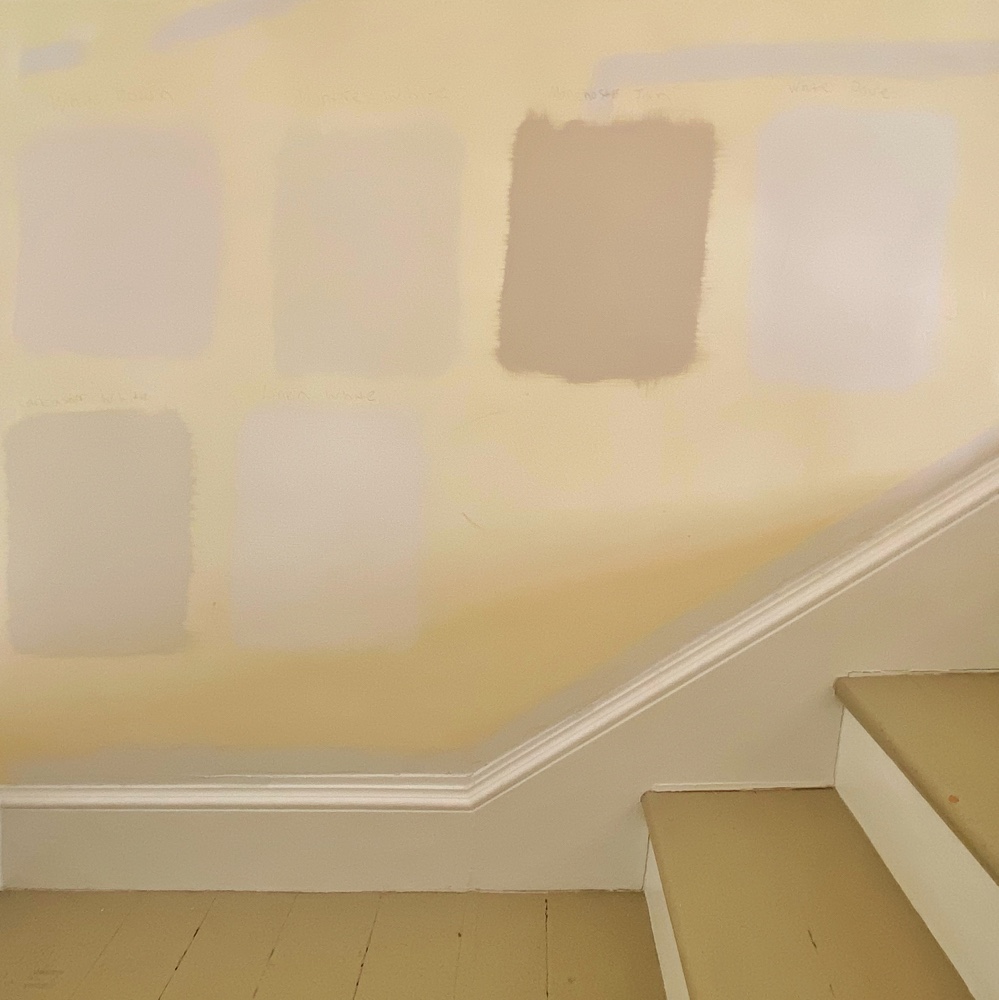
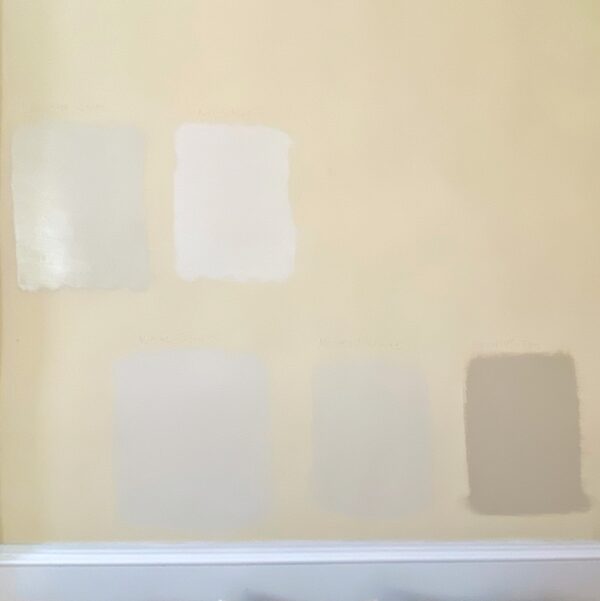
The next step was to paint some swatches onto the walls alongside the trim and the downstairs beech flooring.
Sample Paint Swatches for Entrance Hallway, 2023 (Photo: Geo Davis)
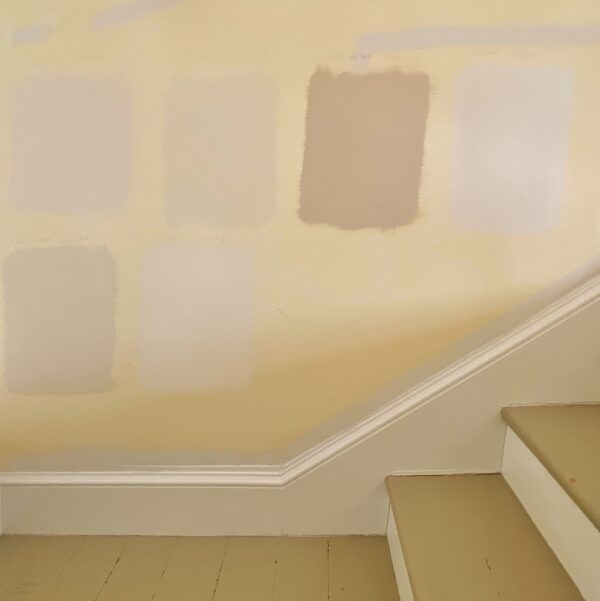
Although I’ve manage to crop out the flooring inadvertently, the swatches still capture the wide range in tones and hues. Here are the swatches on the mid-flooring landing, adjacent to the Clarksville Gray floor.
Sample Paint Swatches for Entrance Hallway, 2023 (Photo: Geo Davis)
Again, not the best photos, but you get the point.
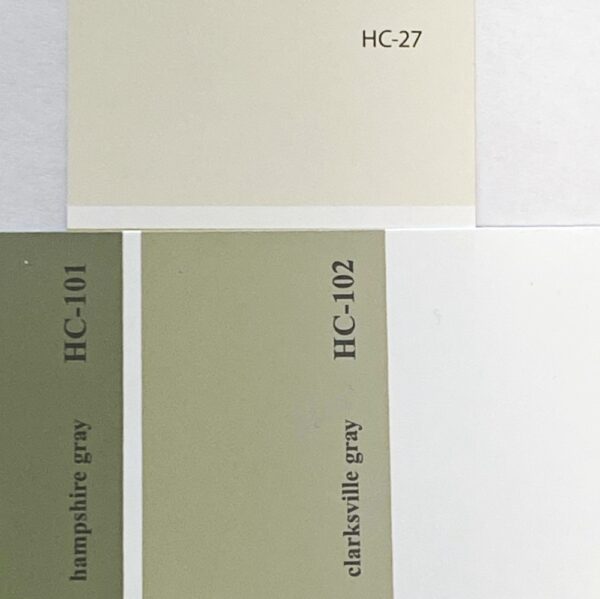
It’s worth noting that there was general consensus around Monterey White which is second from the left on the upper row of swatches in the image above. It is the second from the right on the lower row in the preceding photo. You can see that it has some of the warmth of the yellow (albeit without much of the yellow and a generally grayer cast). Here it is in Benjamin Moore’s color chip, adjacent to the Clarksville Gray which we all agreed was an agreeable combination.
And the Winner is… Benjamin Moore’s Monterey White (Photo: Susan Bacot-Davis)
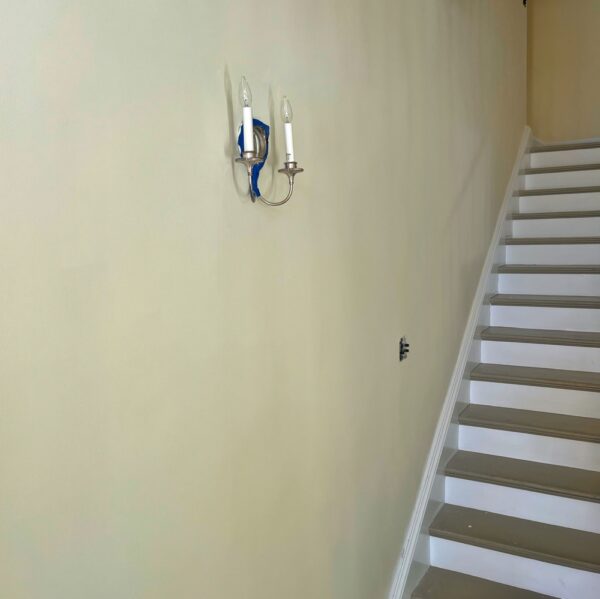
In the video above, the finished paint job is in fact somewhat reminiscent of the old color. Granted, Pam shot the video on a gray day which and low light. The result emphasizes the gray hue. But several of us, upon watching the walkthrough, commented on how similar it appeared to the previous color.
A closer inspection during the cutting in process however captures the significant change.
Repainting Entrance Hallway with Benjamin Moore’s Monterey White (Photo: R.P. Murphy)
I look forward to watching the space fill with early morning sunshine soon. How much will it rekindle the nostalgic daydream? Or will it feel like the departure that Susan has long anticipated? I’ll share an update soon…
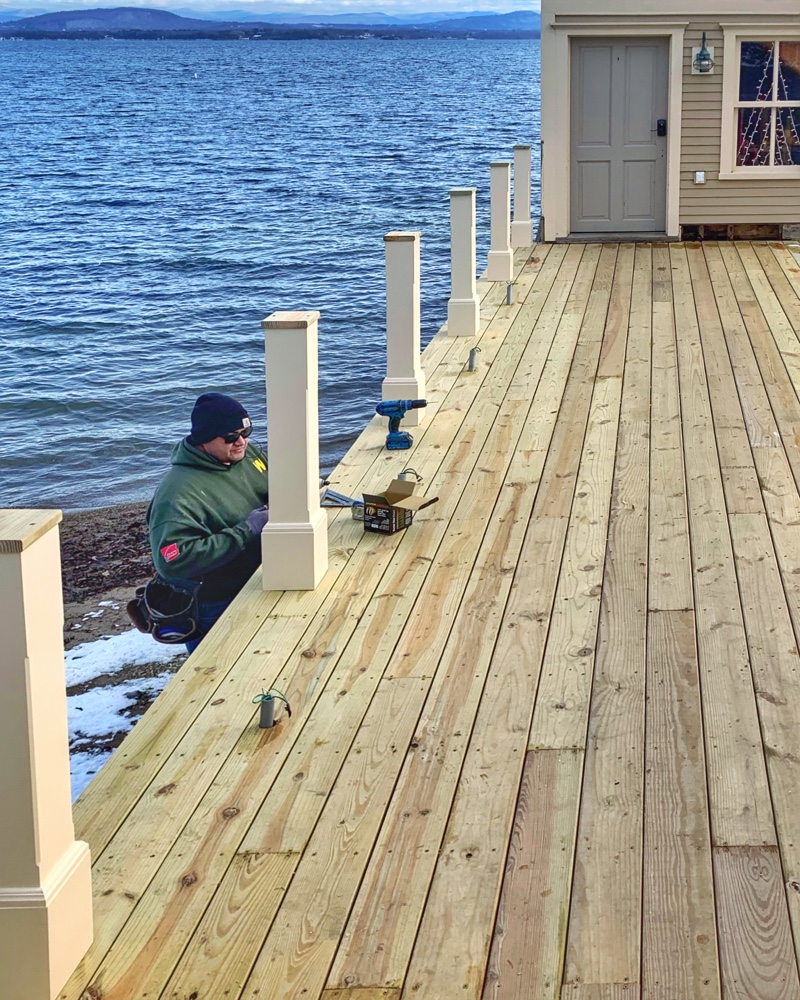
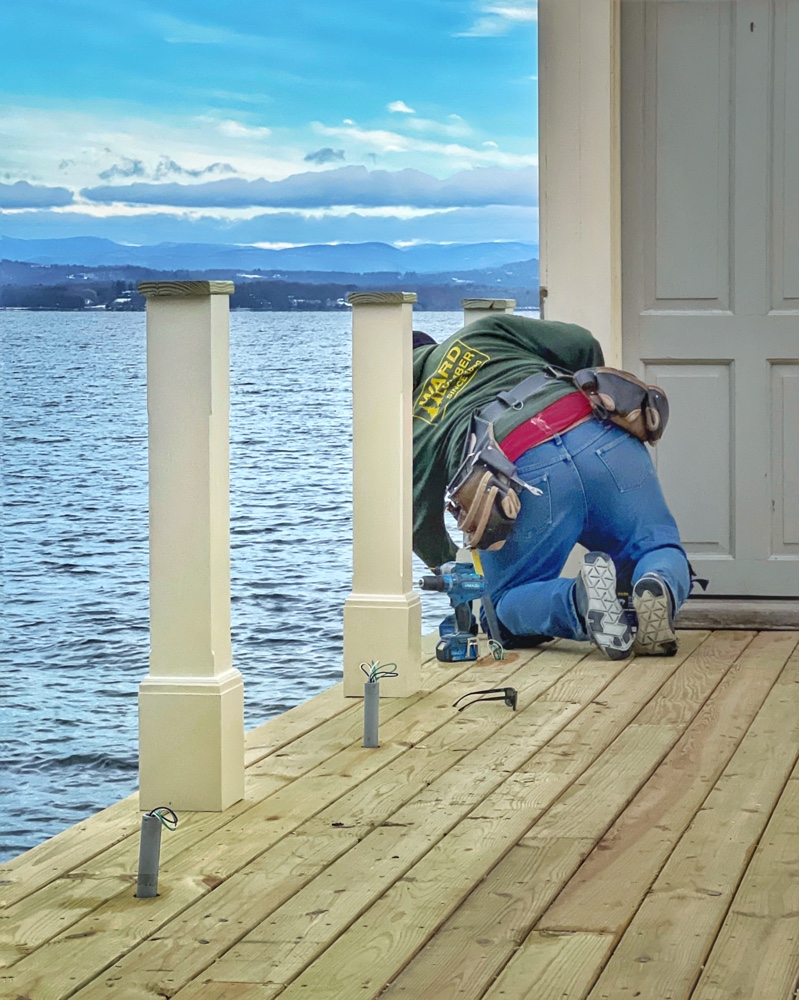
Supi Installing Northside Post Wraps (Photo: Peter Vaiciulis)
With the blizzard barreling into our neck of the woods, Peter and Supi hustled to wrap up installation of northside posts before snow stalls their progress.
Supi Installing Northside Post Wraps (Photo: R.P. Murphy)
These photos give the golden-lighted illusion that work conditions down at the boathouse are temperate and eminently agreeable. Reality is a bit different, of course. Temperatures have been damp and cold. And working on a manmade peninsula out into chilly, windy Lake Champlain isn’t for the delicate.
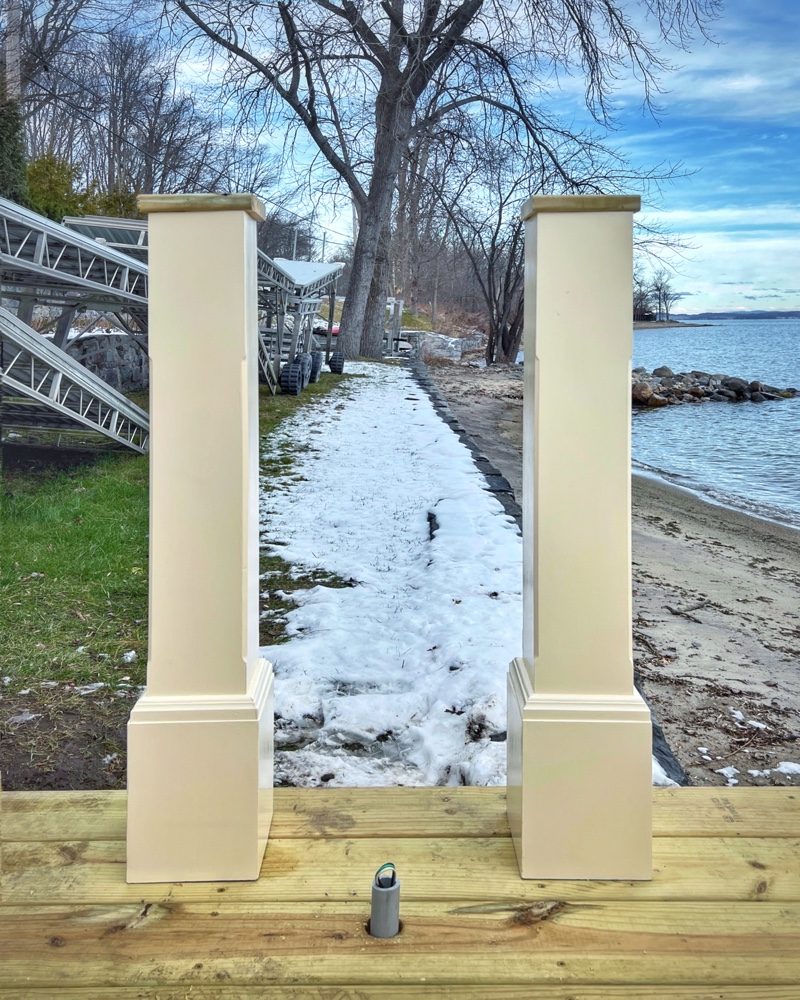
Northside Post Wraps (Photo: R.P. Murphy)
In the photo above the copper tops are as obviously absent as the railings. I had a “tin knocker” fabricate the copper tops almost a decade and a half ago. They’ve patinated handsomely in their demanding lakeside environment, and they’ve even endured a few dings from waterski fins, windsurfer booms, etc. over the years. So replace them, right? No way! We’re carefully removing the small copper nails that secure them, and we’ll reuse them once railings are in place. As if nothing ever changed!
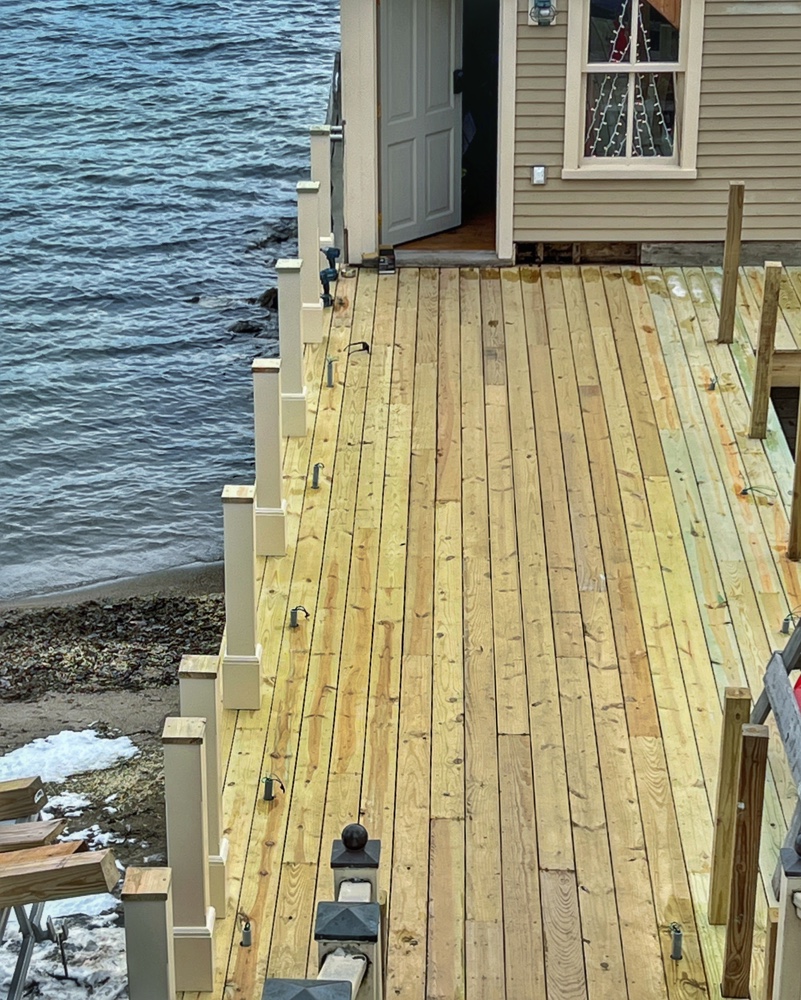
Boathouse Northside Post Wraps Installed (Photo: R.P. Murphy)
Northside Posts Ready for Rails
The northside posts are s assigned and ready for Peter and Supi to install the railings. The railing components are being fabricated — almost done — and following the posts to Willsboro where Erin is priming and painting the components prior to installation. Lots. Of. Steps. Have I mentioned before that it takes a team?!?!
Boathouse Northside Posts Installed (Photo: Peter Vaiciulis)
That photo above shows new post wraps primed, re-sanded, and ready for another coat of primer. Then they’ll receive two coats of paint before being installed. Overkill, you’re wondering? Actually it’s future -proofing. An investment in longevity. Yes, historic rehabilitation is a perpetual balancing act between revitalizing the past and endeavoring to preserve these architectural artifacts well into the future. Onward!


")