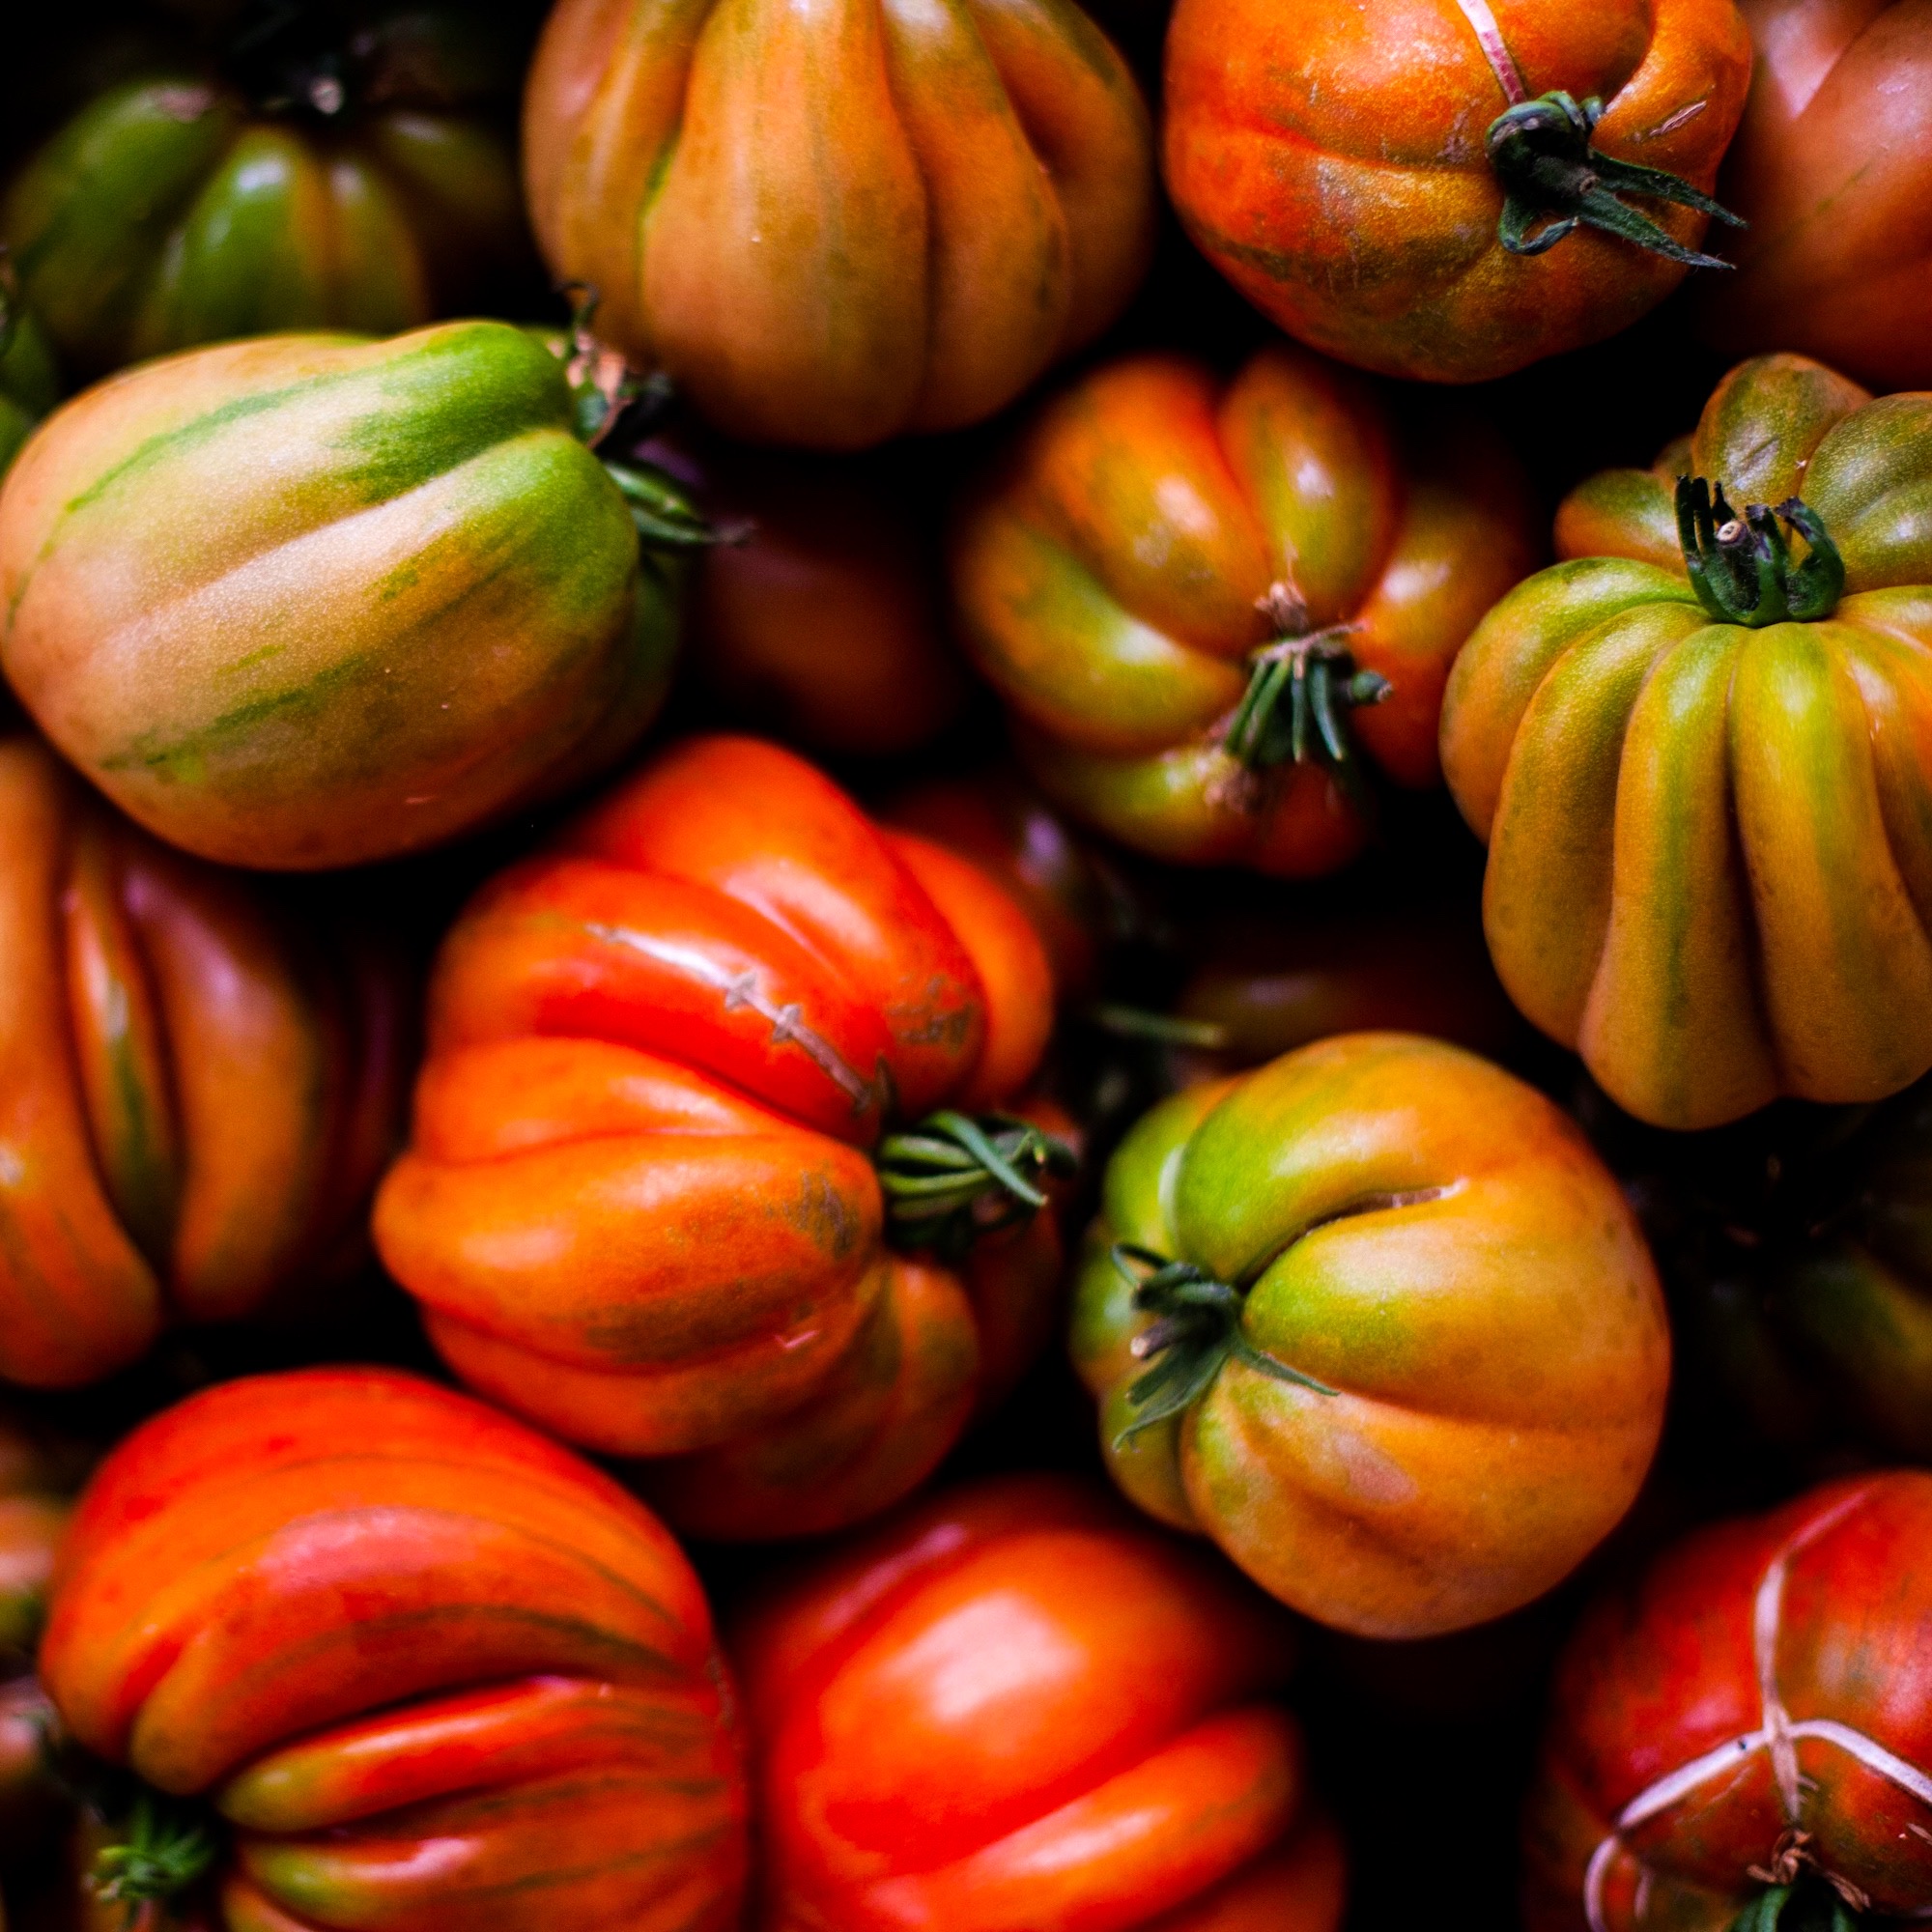
I’ve started ordering seeds for my vegetable garden this summer, and Cuore di Bue Tomato (aka Coeur de Boeuf or Oxheart) is new to me. I tasted these tomatoes grown in a friend’s garden and decided to add Cuore di Bue to my “Must Plant” list.
“This curious and striking tomato is guaranteed to turn heads as well as satisfy appetites. Its name is simply Italian for oxheart, although this selection (Riviera) is an exotic twist on the oxheart tomato type. These big tomatoes have a bottom-heavy shape reminiscent of a pouch with a gathered top. They measure 3 1/2 inches wide and 4 inches long and weigh in just under 1/2 pound each. Cuore di Bue is one of the tastiest saucing types with dense flesh and lustrous, orangey-red skin.”
Can’t wait to plant, harvest and eat, eat, eat these Cuore di Bue tomatoes!
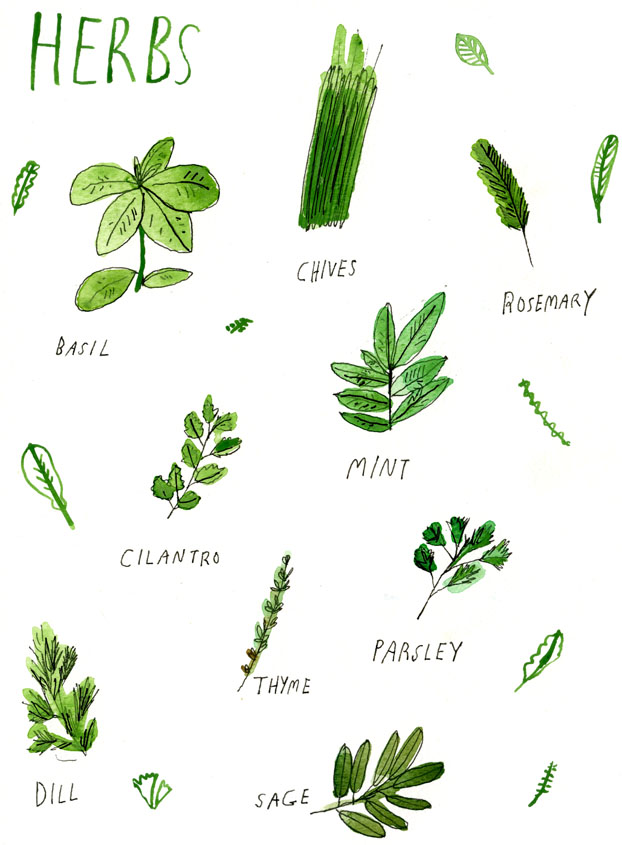
Some days it’s enough to wake up and smell the young herbs with July’s morning sun on the back of my neck. I make a cup of tea and head outside with Griffin. I wander barefoot into the herb garden while he takes care of his morning constitutional. As the plants warm up they release their perfume, some more than others. Dill. Lemon balm. Rosemary. Thyme. Lavender. Sage. Sometimes mint. Other herbs invite a gentle rub between thumb and index finger, imparting their tempting aroma throughout the morning whenever my hands pass near my nose. Basil. Parsley. Cilantro. Chives.
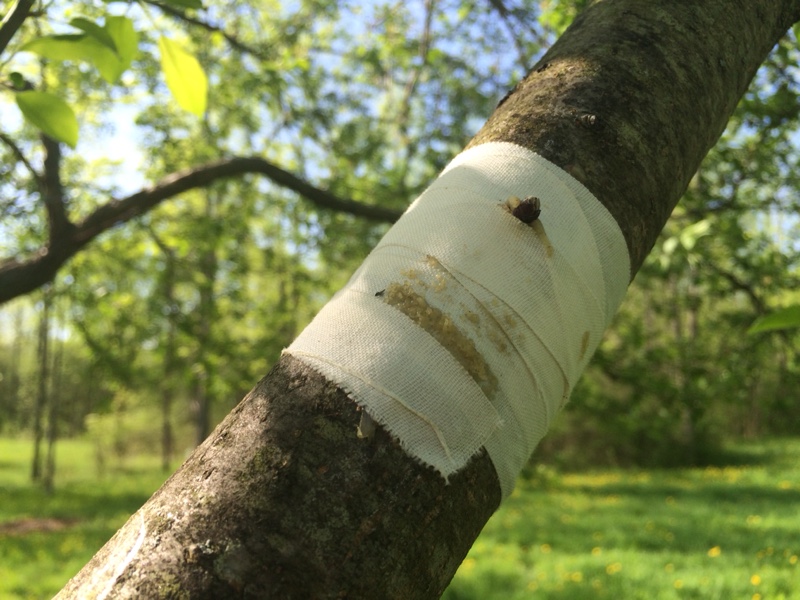
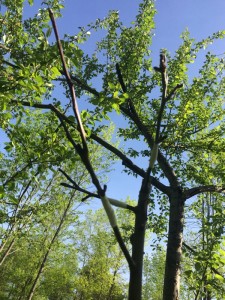
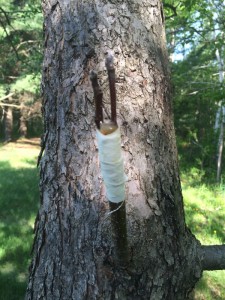
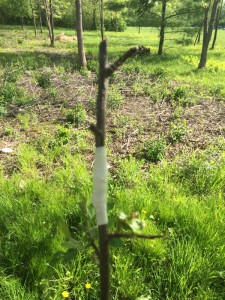
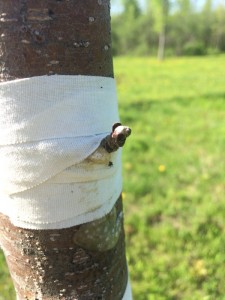
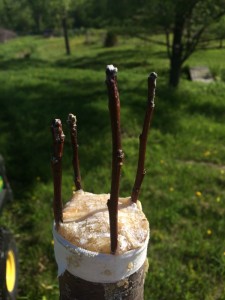
Almost a month after grafting three of Rosslyn’s old apple trees, none of the grafted buds/scions look like they have taken.
Some discouraging grafting news this morning: all three apple trees that I grafted with my father a little less than a month ago appear to be rejecting the grafts. No, that’s a bit presumptuous. The trees probably aren’t responsible for the failed grafts, I am.
I found no indication that any of our grafts have taken. Most of the grafted scions/buds look desiccated. Not a single hint of life…
I’ll check again in another week or two. Until then I’ll cultivate a positive mindset since optimism can’t hurt.
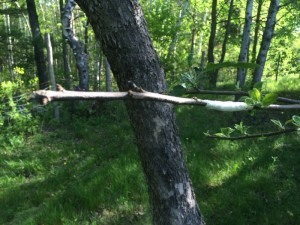
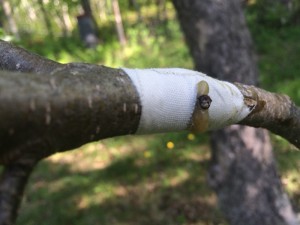
Here are a few more photos from today’s inspection.
Almost a month after grafting three of Rosslyn’s old apple trees, none of the grafted buds/scions look like they have taken.
Almost a month after grafting three of Rosslyn’s old apple trees, none of the grafted buds/scions look like they have taken.
Almost a month after grafting three of Rosslyn’s old apple trees, none of the grafted buds/scions look like they have taken.
Almost a month after grafting three of Rosslyn’s old apple trees, none of the grafted buds/scions look like they have taken.
Almost a month after grafting three of Rosslyn’s old apple trees, none of the grafted buds/scions look like they have taken.
Almost a month after grafting three of Rosslyn’s old apple trees, none of the grafted buds/scions look like they have taken.
Almost a month after grafting three of Rosslyn’s old apple trees, none of the grafted buds/scions look like they have taken.
Almost a month after grafting three of Rosslyn’s old apple trees, none of the grafted buds/scions look like they have taken.
When you don’t harvest your artichokes in time they bloom. And then they look like sea anemones!
On the one hand, it’s a pity. One fewer chokes to steam and dab in mayonnaise or butter or… hollandaise sauce. Yum.
On the other hand, these giant thistle blossoms are stunning! The size of softball, and violet purple the same shade as those sickening candy-shelled, marshmallow filled Easter candies from my childhood. They honestly look like sea anemones. Beautiful. Lethal.
This year we had sooo many artichokes that allowing a few to blossom wasn’t such a sacrifice. In fact, now that the frosts have dried and desiccated the last couple of dozen chokes, I think it’s fair to venture an estimate of how many Imperial Start Artichokes we produced this summer.
We planted fifteen plants, and all survived. Until today I’d claimed that fourteen out of fifteen had produced chokes. Only one plant “aborted” as gardening books sometimes explain an artichoke that fails to produce an edible choke.
But today, with all of the plants beginning to expire I discovered that the one plant which had remained a bit dwarflike, failing to produce any artichokes was the most vital of them all. Short but lush with green foliage. And in the very center, a lime green artichoke!
So even our one “dud” had come through. Fifteen out of fifteen. Not bad.
Artichokes. (Photo: Wikipedia)
The other fourteen plants produced, on average, 12-15 artichokes. Nobody believes me until they visit our vegetable garden and witness it for themselves. We’ve been harvesting for more than three months. I don’t think we’ll manage to eat any more, but on Saturday I gave away the last half dozen edible artichokes. So we grew at least 180 artichokes on a mere fifteen plants. This is far and away the best season we’ve ever had. Most of the credit goes to nature, good luck and attentive assistance from a couple of loyal watering helpers. But the single most notable difference between this summer and the preceding three years that we’ve experimented with Imperial Star Artichokes is that we planted them in mounds to ensure that the roots wouldn’t rot if we received excessive rain. That seems to help. We’ll repeat next year.
And now, as we put this summer’s garden to rest for the winter, I’m tempted to try and overwinter a few of the artichokes. Last year’s attempt flopped, but I’m curious to see if it isn’t possible to keep a few plants alive to produce again next year. Any advice?
Of all the ways that gardeners try protecting strawberries from birds, bird netting offers the best solution. Learn how to safely protect your strawberries. (Source: Bonnie Plants)
I mentioned to Catherine Seidenberg recently that strawberry bandits persistently steal/damage our ripe strawberries. The first couple of years after we established our strawberry patch, we produced an excess of strawberries.
No; correction. There’s no such thing as “an excess of strawberries”.
But we literally had to give strawberries away to keep up with the volume of delicious, ever-ripening strawberries. We couldn’t eat them all, even when our two still-tiny-but-strawberry-loving nieces visited. In hindsight, that was our “strawberry honeymoon”. Bliss. Worry-free. Decadent…
[pullquote]Abundance philosophy: grow enough strawberries that people and critters can feast.[/pullquote]And then the squirrels (and chipmunks and birds) discovered our strawberry patch. They eat the ripest fruit. And, honestly, I’m okay with that. Abundance philosophy: grow enough strawberries that people and critters can feast. Everyone’s happy.
Except that it doesn’t work out that way. The squirrels take a bite out of a ripe strawberry and move onto the next one. From fruit to fruit, taking a toothy swipe and then moving on, spoiling far more strawberries than they could ever manage to eat. The result is lots of rotten strawberries, and fewer and fewer fruit for us to eat.
Undoubtedly the most effective way to protect strawberries from birds is to drape the strawberry patch with bird netting… Supported on a frame like a floating row cover… (Source: Bonnie Plants)
I’ve ordered 100′ of Reemay Garden Blanket that should arrive later this week. Now I just need to figure out what I’m going to use for hoops…
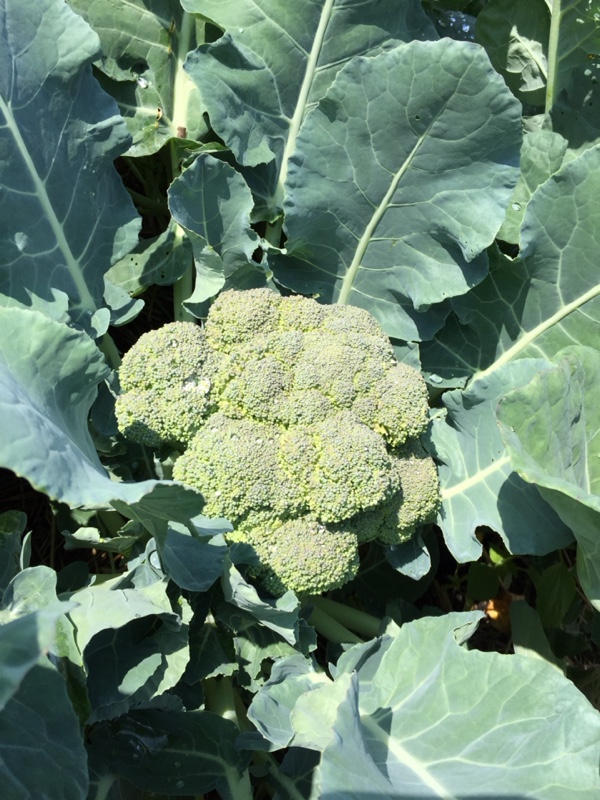
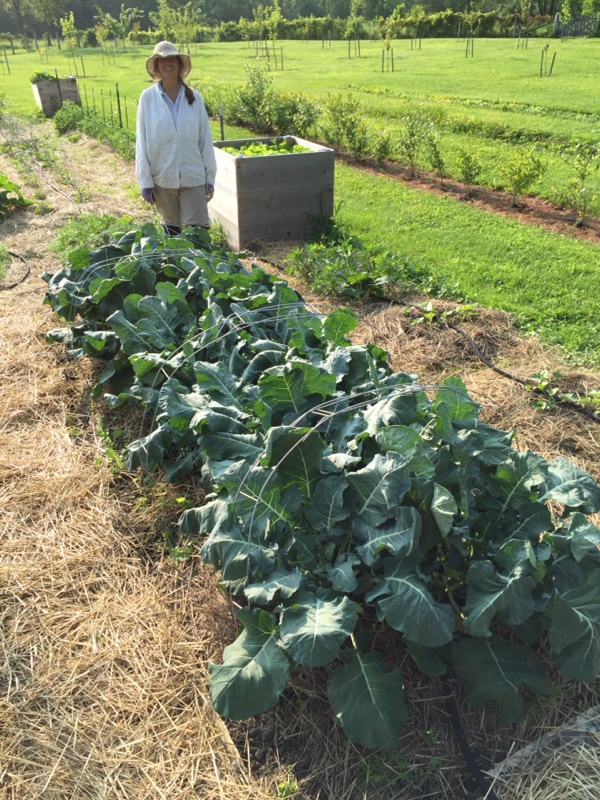
For the first time in my gardening life I am enjoying homegrown broccoli from our vegetable garden. Better yet? It’s totally organic and totally pest free! That’s a broccoli bonanza!
Our friend, neighbor and gardening guru Catherine Seidenberg asked me back in May why we weren’t planting broccoli. She had just agreed to join “Team Rosslyn” for the summer, and she was sorting through my garden geek database, seed orders, and seedlings.
“I’ve always heard and read that it’s too difficult to grow broccoli without using some sort of pesticide,” I explained.
She told me that she was confident we could grow broccoli without pesticide if we used plant covering to keep creepy crawley critters away from the tender plants. I was wary, but she seemed convinced me that we should give it a shot.
Catherine Seidenberg with Broccoli, July 2015
We planted broccoli and kept it covered until about a week ago. The pet plants grew quickly, and the heads formed faultlessly. The heads were large but anemic-looking, pale yellow in color, more like cauliflower than broccoli. But a week ago Catherine Seidenberg removed the row covering and allowed the plants to absorb sunlight The heads quickly darkened, and last night we harvested two of the biggest and healthiest broccoli heads I’ve ever seen. And they were delicious!
It’s worth noting that we soaked both heads for well over an hour in salty water to remove bugs/worms/etc. We found nothing. The broccoli was clean, healthy, tender and super tasty. Thank you, Catherine Seidenberg.
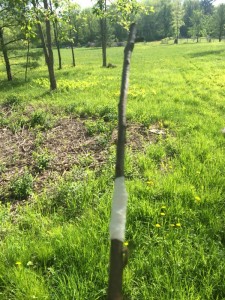
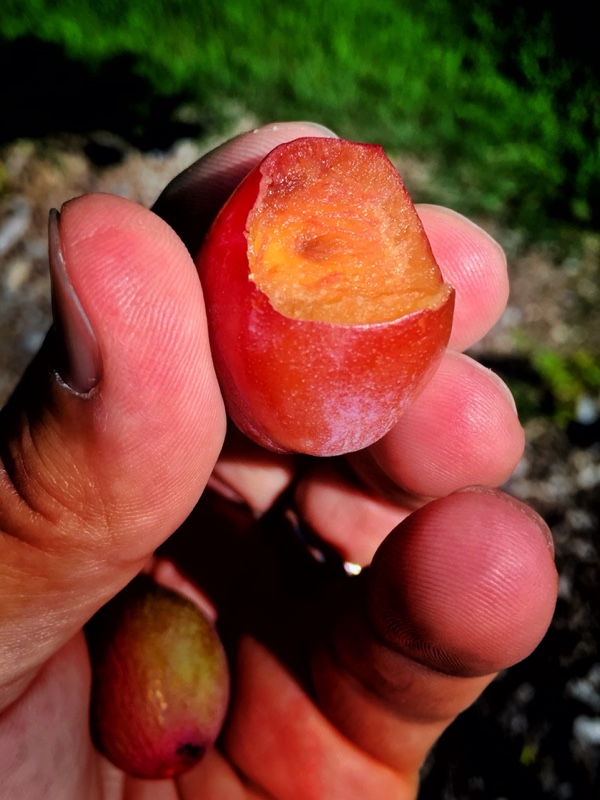
Plum Premature Fruit Drop: Rosslyn, July 15, 2015 (Photo: virtualDavis)
For weeks I’ve been anticipating our first crop of plums. A small crop, but proof that the last few years nurturing our plum trees to health despite hail storms and severe Adirondack winters, Japanese beetles and a zero pesticide regimen was worth it. And then this! Plum premature fruit drop…
Today is July 15, 2015 and of the only two plum trees that successfully fruited this year in Rosslyn orchard, only about a half dozen small plums still remain on the trees. The rest were on the ground beneath the trees when I made my daily rounds.
Yes, daily rounds. I’m that eager. Or anal?
[pullquote]I grabbed the two ripest fruit for a taste test. A quick spit shine and “Aaahhh…”[/pullquote]Despite the fact that a nutritionalist would likely discourage me from eating fruit off the ground (parasites? evil spirits?) I grabbed the two ripest fruit for a taste test. A quick spit shine and “Aaahhh…”
Delicious!
Actually, that’s a twinge hyperbolic. Promising, perhaps. Still start, but distinctly plum-flavored. Not 100% sweet yet, but encouraging.
Encouraging, that is, except for the fact that they’d all fallen from the tree. Why did we suffer plum premature fruit drop?
The verdict’s still out, but I’m thinking that yesterday’s (and today’s) heavy winds are responsible. And the fact that these tress are not properly tethered, allowing far too much movement in heavy wind.
Supporting your young tree with tree stakes help prevent damage to the tree during windstorms. (Source: Shedding Light on Fruit Drop)
Plum Premature Fruit Drop: Rosslyn orchard, July 15, 2015 (Photo: virtualDavis)
Needless to say, I’ve quickly staked one of the trees, and I’ll tackle the second tomorrow. It’s worth noting that all of these fruit trees were originally staked, but I’ve eliminated some of the stakes as they gotten larger. I’ve been meaning to retake the plums since they have so much windage and still somewhat slender trunks. Also because I’ve read that the plums will actually become healthier and more productive if I can train the branches to open up into more of a “goblet” form. Better late than never!
I would like to find some suitable steel stakes that will not rot quickly, but for now I’m using wood. Maybe two foot lengths of steel REBAR could be bent into large staples that would work well? I’ll experiment and post and update anon.
And one last good bit of news about our plum premature fruit drop. It may be due to the age of the trees.
Premature fruit fall usually occurs in trees less than five years old. (Source: Premature Fruit Drop)
I’ll check my notes, but I think that these plums were planted three to four years ago. Good news?
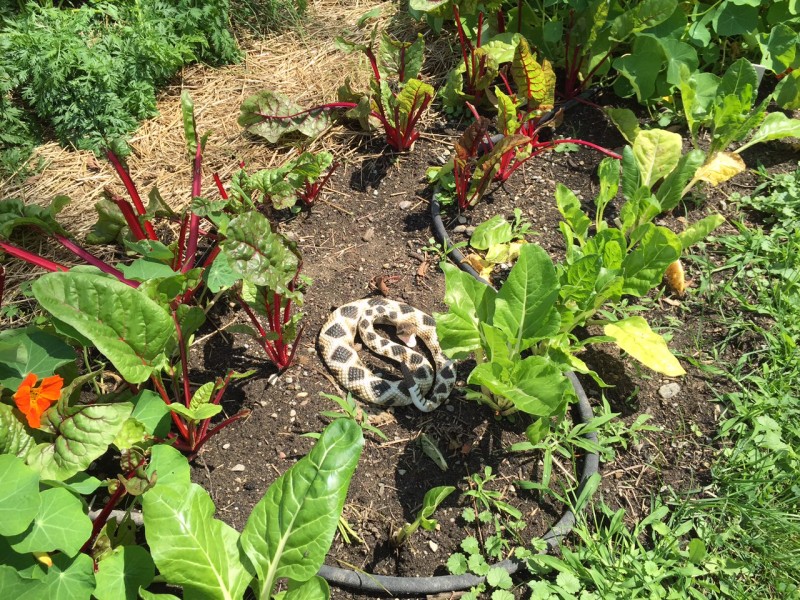
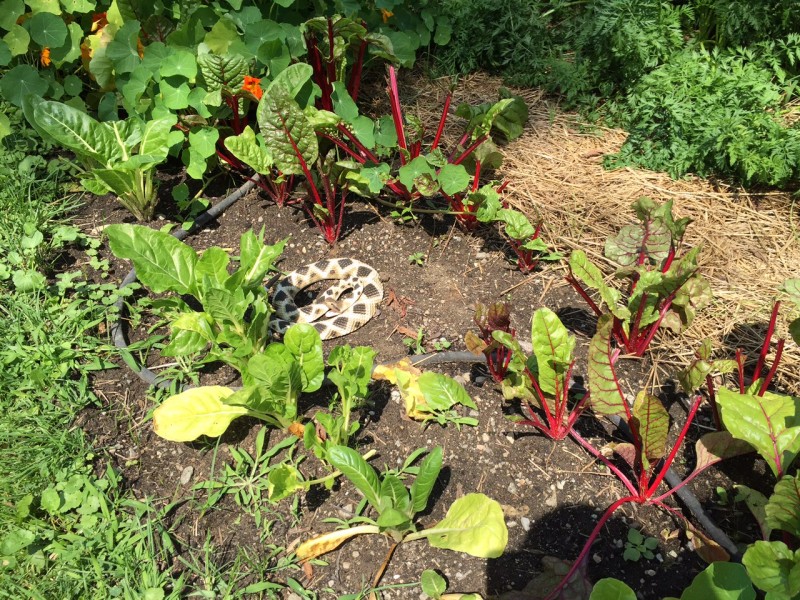
Rattlesnake decoy among the Swiss Chard to deter the White Tail Deer
A week ago today was a day for snakes. Though – sadly, I must add – it was not a day for living snakes…
Rattlesnakes and White Tail Deer
Let’s start with the good news. Or at least the benign-if-slightly-amusing news. To set the stage, imagine yourself walking across the still dewy lawn south of the carriage barn. A light morning mist still hangs in the air adding a slightly bluish, fuzzy aspect to the vegetable garden, orchard, and meadows beyond.
[pullquote]Your eyes would suddenly, inevitably notice a coiled rattlesnake in the middle of the Swiss chard![/pullquote]Approaching the southeast corner of the vegetable garden your eyes would be drawn to the delicious, spicy radicchio growing in the cedar raised bed at the corner. Next your eyes would dart to the bright orange nasturtium sprawling alongside. Perhaps you would bend over and pick a succulent, young leaf to munch on. The flavor drifts somewhere between the subtlest peppercorn and cinnamon stick.
As you wander along past two varieties of beets interspersed with a fresh crop of French Breakfast Radishes your eyes would suddenly, inevitably notice a coiled rattlesnake in the middle of the Swiss chard!
But don’t panic. It’s not real. More precisely, it’s not a live rattlesnake. It is a lifelike rubber decoy. Before I explain to you why this rubber rattlesnake is coiled, rattle raised and head drawn up and back with fangs bared, here’s a quick backstory.
Rattlesnake decoy among the Swiss Chard to deter the White Tail Deer
Duck Doodoo
Back in May Lake Champlain water levels were low and dropping. But June brought rain, rain, rain. The lake level went up, up, up.
[pullquote]Doug called to say that two ducks were cuddled up asleep with the rubber rattlesnake…[/pullquote]The shoreline shrank, so the mallards decided that our dock was the perfect place for snoozing, eating, and… evacuating the rather rich byproduct of their rather rich diet. This stinky mess created an undesirable obstacle course for accessing the boat. So we hosed and scrubbed. But within a few hours the situation repeated itself.
After many weeks of duck waste remediation (DWR) I suffered a small stroke of genius. We needed a decoy predator! I researched and discovered that others had found that a coiled rubber rattlesnake deterred ducks, geese, seagulls, even pelicans. Perfect.
I placed the order and chuckled my way down to the dock on deployment day. An hour or two later Doug called to say that two ducks were cuddled up asleep with the rubber rattlesnake…
White Tail Deer Decoy
What to do with a worthless rubber rattlesnake? A few silly pranks came to mind, but before I could regroup and execute, I discovered that Doug had transferred the rubber rattlesnake to one of the Swiss chard patches in our vegetable garden that the white tail deer have been devouring. Good idea!
It’s too early to determine for certain whether or not the rattler is going to dissuade the deer, but I’ll update you if there’s any news.
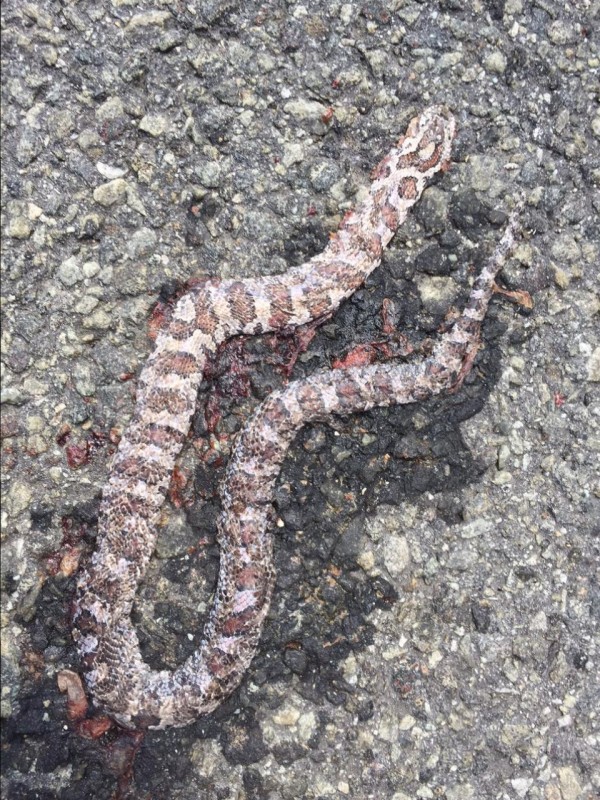
Corn Snake Roadkill
In sorrier stories, this unfortunate sight caused me to pause during a recent bike ride.
Is this unfortunate snake spotted on Willsboro point at the end of July 2015 an anerythristic corn snake?
I pedaled past this exotic roadkill on a Willsboro Point bike ride, and circled back to try and identify the unfortunate fellow. Aside from the always disturbing sight of roadkill, this snake instantly reminded me of the mystery snake I spied in the rhubarb a few years ago. In fact, I’m almost 100% certain now that is the same species I failed to identify then.
A quick search online suggests to me that it might be an anerythristic corn snake. Check out the photograph below and decide for yourself.
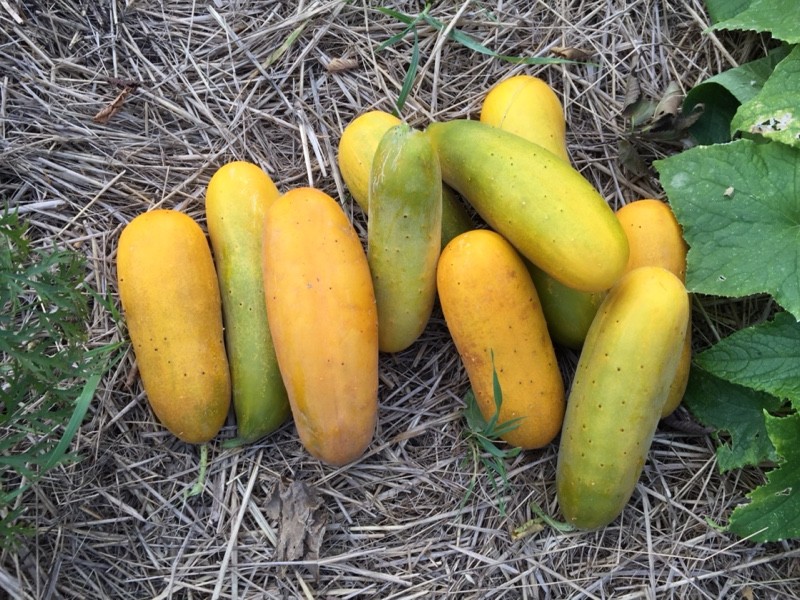
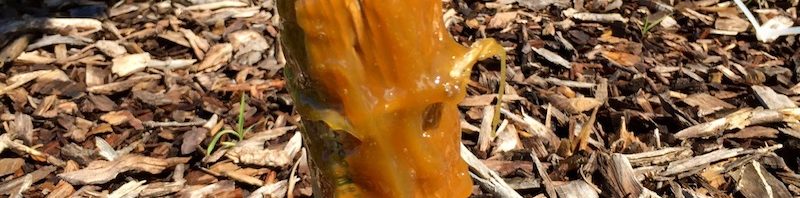
Why are my cucumbers orange? They’re turning yellow-orange, to be precise…
This summer we have enjoyed more productive cucumber plants than ever before, but recently the enormous fruit are discoloring from green to yellow to orange before we can eat them. Here’s the reason why.
Cucumbers turn orange when they grow excessively ripe before harvesting, explains Veggie Gardener. The cucumbers first turn yellow, and if left on the vine, they quickly develop a vibrant orange hue. This happens because chlorophyll levels decrease past the point of peak ripeness… [They become] very bitter and unsuitable for human consumption. (Source: Ask.com)
Bitter. It’s true. I taste tested just to make sure they were no longer suitable for human consumption. They aren’t, though our caretaker assured us that his wife can still turn them into pickles. I encouraged him to take all he could haul!
Our yellow and/or orange cucumbers are an unfortunate result of the extended heat wave and drought we’ve been enduring. It’s true we may have overplanted. But our beautiful cukes growing, greening, and spoiling before our eyes is heartbreaking. What to do?
The only way to prevent cucumbers from turning yellow and orange is to harvest them at the proper time. Ripe cucumbers have firm flesh with a medium-green rind and feel heavy for their size. Most varieties ripen between 50 and 70 days after planting. Size is also an important indicator of ripeness. Each cucumber variety has a different optimal size and quickly develops a bitter flavor if allowed to grow larger. Some cucumbers, such as those used for pickling, are naturally smaller than other varieties. Consequently, gardeners must know what type of cucumber they have planted and the target size for ripe specimens in that category. The most common cause of orange and yellow cucumbers is over-ripening, but the discoloration is sometimes a symptom of the Cucumber Mosaic Virus. According to Gardening Know How, the Mosaic Virus produces soft, mushy cucumbers with mottled patches and curled, withered leaves. This incurable virus also affects peppers. When a cucumber displays symptoms of the Mosaic Virus, the best course of action is to remove it from the garden. (Source: Ask.com)
The good news is that we don’t have Cucumber Mosaic Virus. But the bad news is that our compost is becoming overwhelmed with yellow and orange cucumbers. Perhaps we should redistribute these technicolor cukes to our wild neighbors for their enjoyment? (See Woodchucks & Cucumbers!)
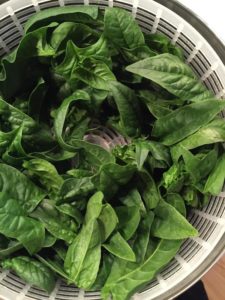
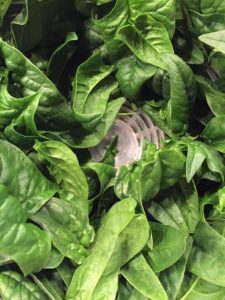
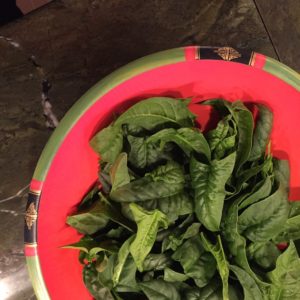
Spinach: From early spring until late autumn spinach, spinach, spinach,… (Source: Geo Davis)
Spinach is one of the first garden fresh veggies we enjoy each spring. And it’s one of the last in the fall. A “shoulder” vegetable…
And we usually manage to grow it most of the summer as well. Too hot, and it bolts. But a fresh batch is quick to germinate, so we replant often (and try to eat fast before it bolts.)
Spinach: From early spring until late autumn spinach, spinach, spinach,… (Source: Geo Davis)
Spinach: From early spring until late autumn spinach, spinach, spinach,… (Source: Geo Davis)
Spinach: From early spring until late autumn spinach, spinach, spinach,… (Source: Geo Davis)
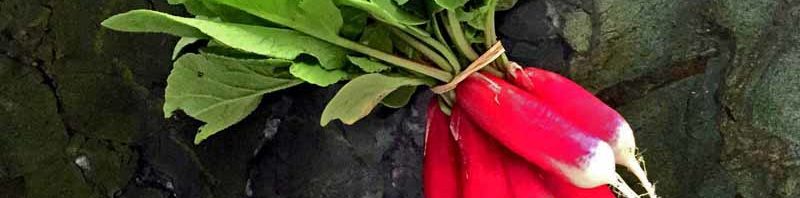
On this technicolor Tuesday I present to you one of our flashiest May garden treats, French Breakfast Radishes.
French Breakfast Radishes: The peppery-but-sweet taste of spring.
Field and forrest foraged veggies — like stinging nettles, wild ramps, and fiddleheads — are nature’s charitable reminder that winter has once again yielded to spring. Then our vegetable gardens begin to awaken with asparagus and spinach that spoil our palates with succulent, vitamin packed hints of warmer days.
Radishes (my favorite are French Breakfast Radishes) celebrate precocious summer’s spicy return with vibrant, bye-bye-mud-season colors, a super satisfying crunch, and tastebud reviving explosions of peppery sweetness.
French Breakfast Radishes: The peppery-but-sweet taste of spring.
And radishes aren’t just crunchy eye candy for the crudités. Radishes are nutritious. Especially the radish greens!
My ever-curious, ever-creative, ever experimenting mother introduced me to cooked radish greens a year or two ago, and I’ve been a fan ever since.
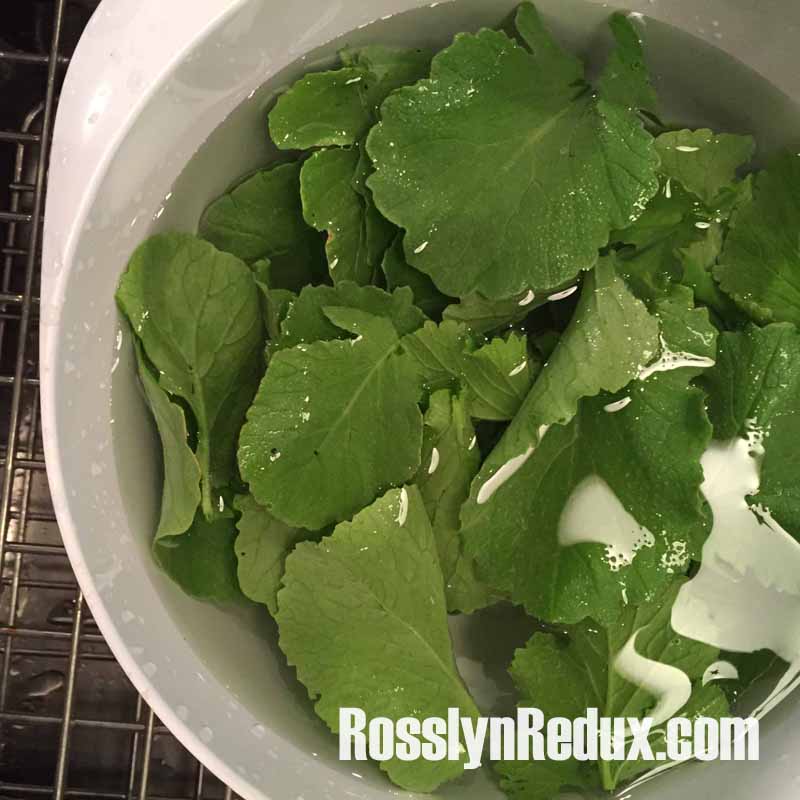
French Breakfast Radish Greens: Don’t compost this nutritious spring green!
Radish Greens Recipe
This evening’s sautéed radish greens were prepared by my bride, a far more gifted cook than she willingly admits. I pulled about nine large French Breakfast radishes from the garden, scrubbed them up and separated the bulbs from the best greens. The second and third photographs above show you what my wife inherited.
Preparing sautéed radish greens is quick, easy, and delicious. I’ll offer you the steps I offered my bride, but duplicating the perfectly peppery and garlicky side dish she served is up to you.
Clean radish greens and soak in cold water
Lightly chop greens and remove any “woody” stems
Heat olive oil in a sauté pan
Crush 1-2 garlic cloves; add to olive oil
Brown the garlic and add radish greens
Stir gently with a splash of white wine
Add balsamic vinegar and/or soy sauce
Salt and pepper to taste
My bride chopped and sautéed a yellow bell pepper with the radish greens which added a subtly caramelized nuance (and intriguing texture variety) to the radish greens. It was delicious!
Radishes (and Radish Greens) are Nutritious
[Note: I won’t pretend to be an expert in matters nutritional, especially when it comes to Raphanus sativus. But I’ve stumbled upon an inspiring article from Full Circle that helps fills in some gaps. I’ve excerpted some of the best below.]
As a cruciferous vegetable like broccoli, radishes have a host of health benefits but are typically under-appreciated… However, for both their health benefits and amazing array of flavors radishes top our list of foods to start paying more attention to and eating on a daily basis… here are nine reasons to “eat your radishes!”
Naturally cooling Radishes are… highly regarded in eastern medicine for the ability to decrease excess heat in the body…
Sooth sore throats [Radishes] can help eliminate excess mucus in the body and… help clear the sinuses and soothe soar throats too.
Aids digestion Radishes are a natural cleansing agent for the digestive system…
Prevents viral infections … regular consumption of radishes can help prevent viral infections.
Eliminates toxins [Radishes] break down and eliminate toxins and cancer-causing free radicals in the body.
Protects against cancer … radishes contain phytonutrients, fiber, vitamins and minerals that are cancer protecting.
Relieves indigestion Radishes… can help relieve bloating and indigestion.
Low in calories, high in nutrients [At] less than 20 calories in an entire cup, radishes are a great way to add nutrients, fiber and tons of flavor to your meals…
Keeps you hydrated With a high water content and lots of vitamin C as well as phosphorus and zinc, radishes… can help keep your body hydrated… (Source: Full Circle)
Cooked Radishes
I’ve been hearing more and more about cooked radishes. Not radish greens. Radishes. So far I haven’t tried grilling or roasting radishes. Have you? I’m looking for advice…
It’s time for a follow-up to my Organic Orcharding post, specifically a detailed look at how to use Tanglefoot for non-toxic pest control in a holistic fruit tree orchard. For readers wondering about zone compatibility and looking for a regional reference to help you evaluate the relevance of this post to your individual growing conditions, our orchard is located in Essex, New York along the Adirondack Coast of the Champlain Valley. We are purists when it comes to holistic orcharding and gardening (despite challenges unique to growing fruits and vegetables in the North Country) and we have come to rely on Tanglefoot summer after summer. (You may also want to check out my post, “How to Apply Tanglefoot to Trees“ for a simple, straightforward how-to video. Your holistic orchard will thank you in abundance!)
Pre-Goo & Post-Goo
Here’s a glimpse at the first two phases of Tanglefoot installation, documented in Rosslyn’s 100% organic orchard. This first photo was taken just before the sticky goo was lathered onto the corrugated paper.
Tanglefoot Installation: wrap trunk with corrugated paper (Source: Geo Davis)
So tidy, right? Not for long! Here’s what it looks like after the sticky Tanglefoot is installed.
Tanglefoot Installation: lather ultra gooey Tanglefoot on the corrugated paper wrapped around tree trunk. (Source: Geo Davis)
Yuck! Hopefully the noisome critters that like to climb up the trunks of fruit trees agree.
It’s a messy installation process, but it seems to work pretty well.
How to Use Tanglefoot
I’ll prologue the most important part of this post by saying two things:
Applying Tanglefoot to fruit trees a messy but relatively straightforward task.
Better instructors have already explained application, so I’ll defer to their able guidance rather than overlook something important.
One of the best step-by-step Tanglefoot installation videos was made by San Diego master gardeners Carol Graham (unfortunately no longer available online). Similarly thorough written instructions are provided by the products’s manufacturer, Contech-Inc:
We recommend using 4” wide wrap of waterproof paper or tape on the trunk of the tree and applying Tree Tanglefoot over the wrap. Tree Tanglefoot is oil-based and the oils will soak into the bark. Banding material eliminates staining of the tree and offers quick, complete removal of the sticky material. In addition, Tree Tanglefoot will remain sticky longer when applied on top of a surface resistant to oil. For rough bark trees it may be necessary to plug the gaps between the tree trunk and the banding, this can be done by using insulation or other materials.
Apply Tree Tanglefoot Insect barrier in a uniform fashion. It can be applied in a heavy or light coat. Heavy coats are approximately 3” wide and 3/32” thick. A heavy coat is used when the insects to kept from the tree foliage are large or numerous, or when there is little time available to maintain the band. Light coats are 3” wide and 1/16” thick. A light coat is good as a general barrier against smaller or less numerous insects, or when the band can be maintained regularly.
Generally, Tree Tanglefoot will remain sticky and effective until it is covered with insects, dust or other debris. A build-up of debris or insects will create a bridge for other insect to cross. This debris requires removal and possible re-application in spots. If an area is unusually dusty or the surface of the barrier is stiffened, Tree Tanglefoot can be rubbed around to expose a new sticky layer beneath. Remove bands at end of season. (Source: Tree Tanglefoot Insect Barrier Products – Contech Inc)
Still a little uncertain? (Or just procrastinating to avoid making a gooey-sticky mess?) Here’s another resource I’ve also relied upon for amazing step-by-step Tanglefoot guide with photographs. Here are the simple, straightforward instructions.
Using a putty knife or a cake decorating spatula. If you choose a putty knife be very careful with the edges and corners as they are very sharp and can easily damage the bark of the tree. I recommend using a cake decorating spatula because they have rounded edges at the tip.
1. Wrap your tree in plastic film
2. Soften up a glob of Tanglefoot with the spatula
3. Work it into a smooth lump without strings back to the bucket
4. Apply the product in a thin 1″ wide band a few inches from the top of the plastic all the way around the tree creating a complete circle
5. Drag your spatula in the same direction that you wrapped the tree with the plastic. If you go the other way you’ll just pull the plastic right off
6.Make another band of Tanglefoot a few inches down from the first band. This creates 2 barriers that work together to stop the pests from walking up your tree (Source: How to Use Tanglefoot – Backyard Food Growing)
I use the paper “tape” version and have not yet tried the plastic film, but I’m intrigued. However this post made me wary.
I got some Tanglefoot this year for my apple trees, had a lot of problems with ants last year. I tried attaching bands of saran wrap around the tree trunks and applying the Tanglefoot that way. That was a complete disaster/mess, so I called the Tanglefoot manufacturer and asked if it would harm my trees to apply their product directly to the bark. They said that other than a dark ring/stain around the tree, no, it should not harm the tree at all to be directly applied. So, that is what I did. Did it about a month ago. No signs of any tree trouble yet. (Source: Putting tanglefoot on trees directly – GardenWeb)
I decided to ask the author, Stacy, the about plastic wrap vs. paper banding.
Great post, and the photo play-by-play is the best resource I’ve found online! Thank you. This is my first foray into fruit tree pest tangling (wrangling?), and I’m curious about your preference for plastic wrap instead of the paper/cardboard option proposed by the manufacturer. I’m guessing you’ve tried both and decided that the plastic wrap works better? Would you be willing to explain the pros and cons of plastic instead of paper? Hoping to get this right the first time! Thanks.
Stacy answered my question the very same day (Wow! Thanks, Stacy.) as follows:
Thank you! I’m happy the pictures are helpful for you. You’ll do just fine, the hardest part is keeping it off of yourself and your clothes! I have a few reasons for the plastic.
The method that I show here (with the two stripes/plastic/cotton balls) was the way I was taught during my first experience with Tanglefoot, I didn’t even know about the cardboard at that point. It wasn’t until I started working in a retail nursery a few years later that I found out about the cardboard wrap.
I think the cardboard wrap could be good if your tree is perfectly smooth, as it leaves gaps that the bugs can walk under unobstructed. It might work ok if you put cotton balls under it and secure it tightly to close those gaps though.
Also, I don’t choose the cardboard because I live in a very rainy climate and the cardboard would disintegrate in no time at all. If your area is less rainy then it would probably be ok. I prefer the plastic too because it holds tight to the bark and stays put for the month or two that it’s on there.
I’ve just continued to use the plastic/cotton balls method because it was simple and used items I already had at home, there wasn’t an additional product that I needed to buy.
It’s just important to get the plastic off when the season is done or when the Tanglefoot becomes ineffective, the plastic allows no airflow for the bark. This would be a benefit to using the cardboard. (Source: backyardfoodgrowing.com)
Thanks again, Stacy.
Needless to say, I still haven’t tried the plastic film. Three years of installation with paper wraps, and the approach seems to be working. So, if it ain’t broke don’t fix it!
")


")
")
")
")


")
")