Blog

  • The Farm Backstory

    The Farm Backstory

    As we hurtle toward completion of the icehouse rehab, I catch myself in barn reflection. Again. Yes, I consider the icehouse a barn. And, yes, migrating my books and artifacts and works in progress from a bedroom-turned-office (aka study/studio) in our home into the almost renovated icehouse is enthusing me beyond reason. It’s also catalyzing reverie and rumination into my farm backstory. Let’s dig a little deeper?

    Undoubtedly my affinity for barns is rooted, albeit subconsciously at times, in early to mid 1970s recollections of a tumbledown farmstead tucked into a wooded holler in Cossayuna, New York.

    The Farm in Cossayuna, New York (Painting: Louise Coldwell)
    The Farm in Cossayuna, New York (Painting: Louise Coldwell)

    The painting above, made by my godmother, Louise Coldwell, has hung above my study/studio fireplace for the last 15 or so years. In this façade of the first home I remember, the two small windows at the top, right were my bedroom. Below my bedroom, the dining room. To the left of the entrance doorway, the living room. My parents bedroom was above the living room. I say, “the first time I remember”, but there were others. An apartment in Manhattan and another in Bronxville. Also, overlapping, a house in Glens Falls and another in Lake Placid. Itinerant years when my parents were still primarily living and working in New York City and then orchestrating a shift upstate. I’ll sit down with them to try and map out these years and lodgings. I muddle these memories in part to offset the fact that The Farm stands out for me. I’m not 100% certain why, but it is the first home the main impression on me, a home that still conjures poignant flashbacks.

    Recently I’ve been sifting through memories and mementos of those few-but-formative years, and I’m coming to suspect that my association between barns — especially old, weathered, rural farm barns — and “home” (as well as “homing” and basically all matters related to “homeness”) is intrinsically rooted in my early childhood adventures at The Farm.

    Omnipresent: OMC and The Farm (Photo: Geo Davis)
    Omnipresent: OMC and The Farm (Photo: Geo Davis)

    Note the painting, partially cropped, in the photograph above. For a decade and a half this is what I saw when sitting at my desk, if I turned away from Lake Champlain to look at the fireplace. And if you allow your eyes to drift down to the cluttered mantle above the fireplace, you’ll see a black-and-white photograph.

    That’s me as a shaggy, bowl-cut youngster, with OMC, a family friend and neighbor when we were at The Farm. He was also my godfather and, in many respects, a surrogate grandfather. The initials stand for Old Man Coldwell, a nickname he used to sign the pottery he made (including the enormous bowl featured in this post: “Generosity of Friends: Lemons from Afar”).

    Memories of The Farm and OMC overlap for me. Not always, but often. His presence and guidance, his physicality — apparent in this photograph — and his wonder-welling words. Our time together was guided by adventure. Riding an old tractor through a field to round up a cow that had gotten out. Riding an old tractor through a field to round up a cow that had gotten out. Walking to a distant meadow where he kept a rowboat and fishing rod ready on a pond bank. Squatting among strawberry bushes hunting for the largest, ripest fruit. Harvesting honey from a hive and eating it, thick and warm from a spoon. Massaging clay and squishing it through my fingers when he and my mother were potting…
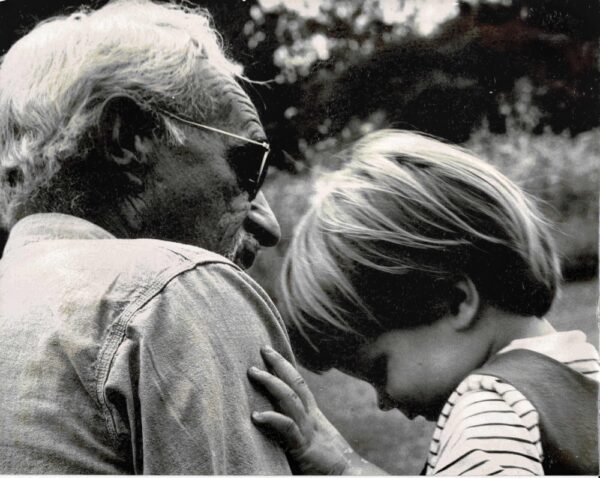
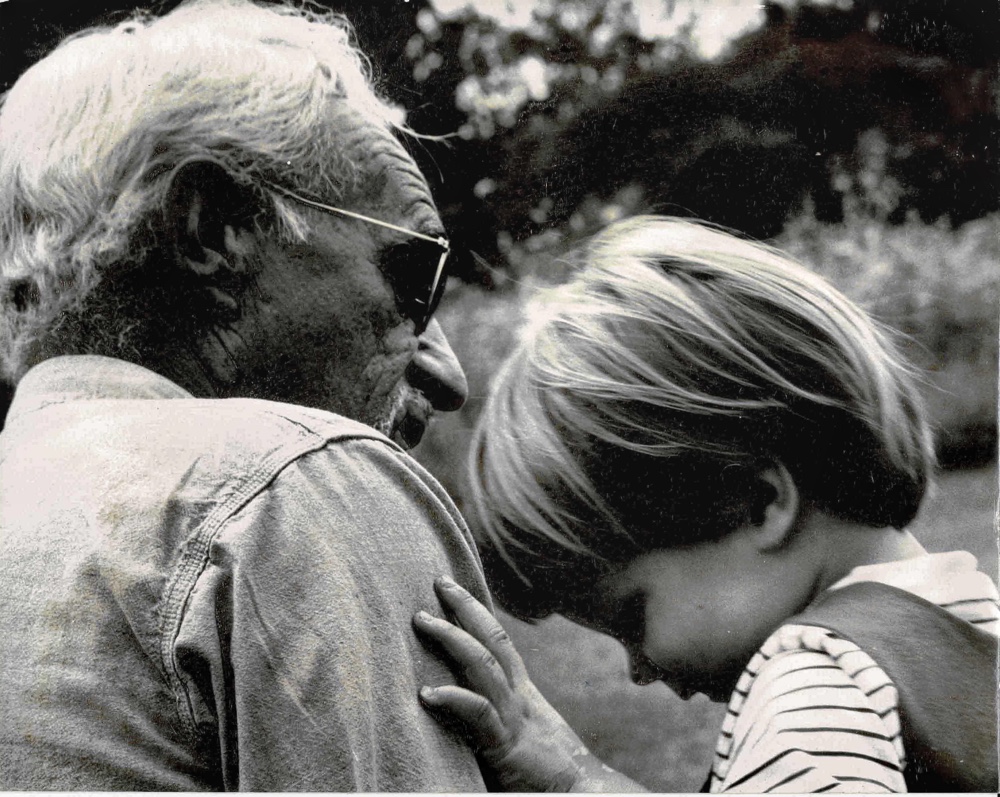
    At The Farm with OMC circa 1974-5
    At The Farm with OMC circa 1974-5

    My parents’ friendship (and eventual falling out) with OMC remain intertwined with their memories of The Farm as well. I’ll inquire what if any memories they might share. Until then, I’ll loop back to the property itself.

    My parents, living and working in New York City, had purchased an 1840s farmhouse on 85 acres in Greenwich, New York five months after getting married. I was born less than two years later. Although The Farm served primarily as a weekend getaway for the next five years, it dominates the geography of my earliest childhood. A stream of nostalgia gilded memories flow from this pastoral source: exploring the time-worn barns, absent livestock except for those conjured up by my energetic imagination and the swallows which darted in and out, building nests in the rafters, gliding like darts through dusty sunbeams; vegetable gardening with my mother; tending apple, pear and quince trees with my father; eating fresh rhubarb, strawberries and blackberries; discovering deer and raccoons and snakes and even a snapping turtle. (Source: The Farm)

    Bucolic. Burnished, no doubt, by time’s spirited sentimentality.

    I weave The Farm in Cossayuna (aka “The Farm“) into a conversation, a blog post, a social media update. Why? Not sure. Maybe the omnipresence of The Farm as a defining point of reference in my own life? (Source: Preservation by Neglect: The Farm in Cossayuna)

    I’ve explored elsewhere the overlap between my lifelong fascination with barns (and barn vernacular) and my early memories at The Farm. The chicken or the egg? Which came first?

    Woven into the earliest tapestries of my childhood are fond associations with barns. (Source: A Barnophile of Bygone Barns)

    I wander my patchwork memory map and wonder, wandering, wondering, where is the margin mocked by tides and waves, the littoral boundary of fact and fiction, fluctuating with wind and moon? What was The Farm? And what have I imagined into it?

    I inevitably distort history, omitting and abbreviating and emphasizing, distilling the vast landscape of data into vignettes. These accrete gradually, revealing the narrative design of my story. (Source: Remembering and Recounting)

    Are these memories of The Farm in Cossayuna accurate? Reliable? Are they actually defining details in my life, reliable anchors tethering my current contemplation of homeness?

    “Life is not what one lives, but what one remembers and how one remembers it in order to recount it.” — Gabriel Garcia Marquez, Living to Tell the Tale (Source: Remembering and Recounting)

    This rings true to me. We are our story. Our stories. And The Farm, embedded inextricably into my attraction to Rosslyn, has provided a sort of scaffolding for many of my homing initiatives since about 2005.

    As I bring this meandering meditation to a close, it’s worth noting that I’ve shared images of The Farm over the years. Always the farmhouse, never the barns. Peculiar that I don’t have any images of the barns. I’m almost certain that I took a few photographs when I visited within the last decade, but I haven’t managed to put my fingers on them. I will keep looking, but in the meantime, I’ll ask my parents if they might have an old photograph or some other representation of the outbuildings at The Farm.
  • High Tunnel Tomato Plants, Take Two

    High Tunnel Tomato Plants, Take Two

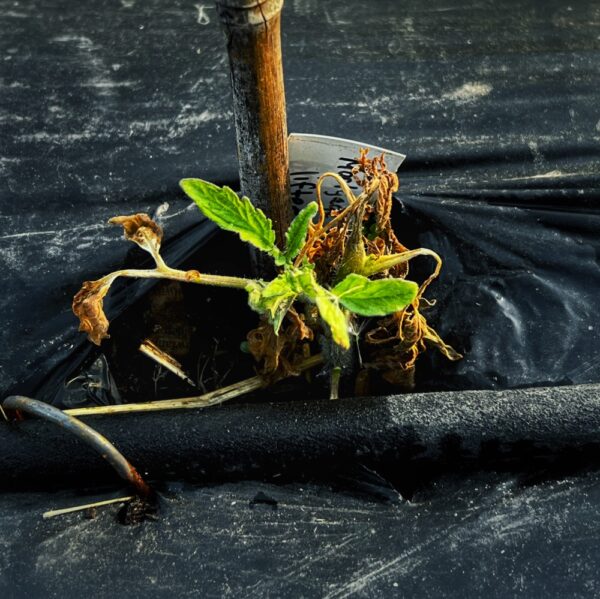
    Frost Damaged Tomato Plants. May 18, 2023 (Photo: R.P. Murphy)​
    High Tunnel Tomato Plants, Take One: Frost Damaged Tomato Plants, May 18, 2023 (Photo: R.P. Murphy)

    Sometimes, when I’m trying to explain the many merits of gardening, I describe the cultivation of plants as a quasi-religious force in my life. Sincerely. Hyperbole? Perhaps, but there’s much in the practice of planting and sowing, cultivating and composting, even weeding and pruning and grafting that underpins my worldview, informs my optimism, and provides a circular and self sustaining system of belief and practice. What constitutes a religion is a debate for another blog. But tossing this into the mix may help contextualize the significant ache I was veiling in my recent High Tunnel Hubris post.

    I tried to remain matter-of-fact, sidestepping the debilitating discouragement that sidelined me for a day or two after a severe frost shocked dozens of the plants that I’d helped transplant.

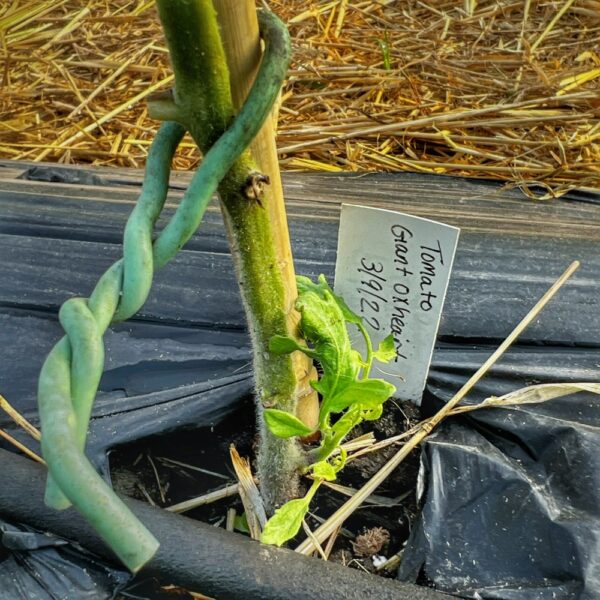
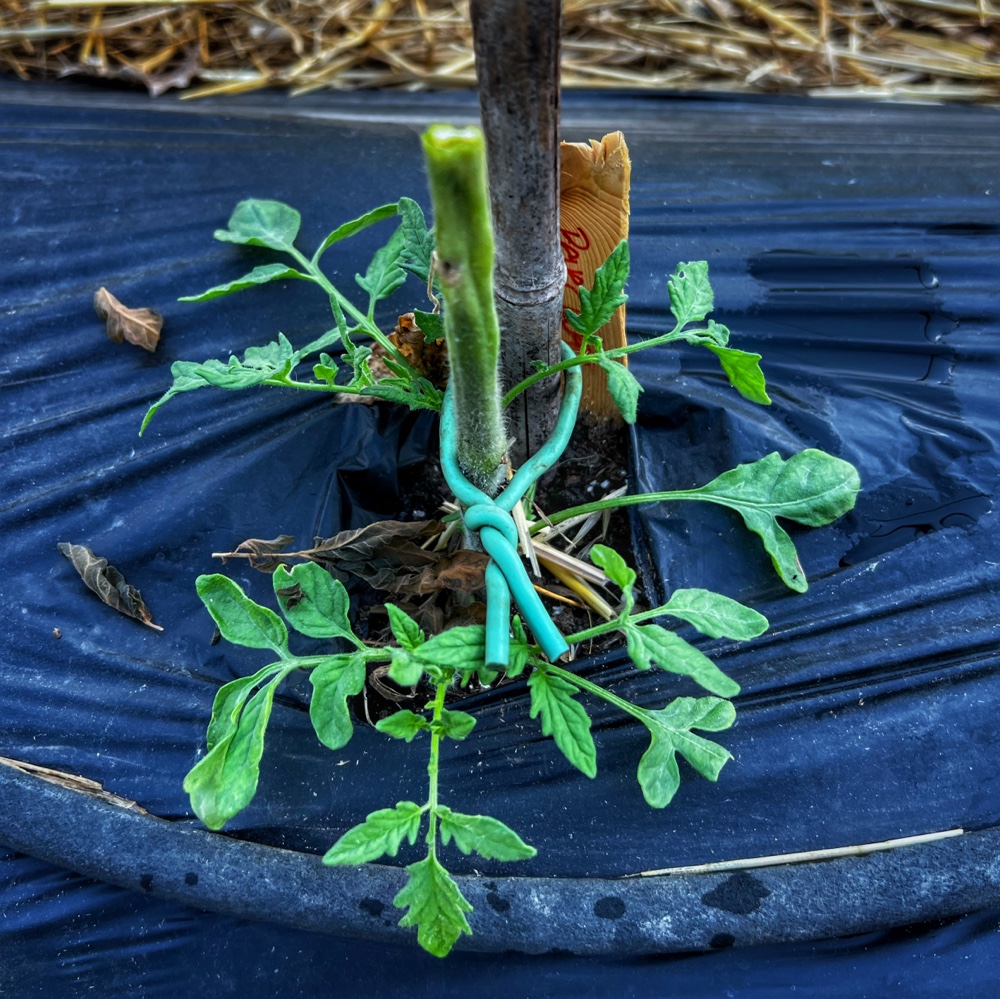
    High Tunnel Tomato Plants, Take Two: Suckering Back to Life? (Photo: R.P. Murphy)
    High Tunnel Tomato Plants, Take Two: Suckering Back to Life? (Photo: R.P. Murphy)

    So… when we jumpstarted our spring starts in the high tunnel, I was fueled with fervor and faith. We’d have tomatoes by the end of June!

    But a severe frost reminded us that BLTs and gazpacho aren’t a matter of pipe dreaming alone. Yes, nature humbles.

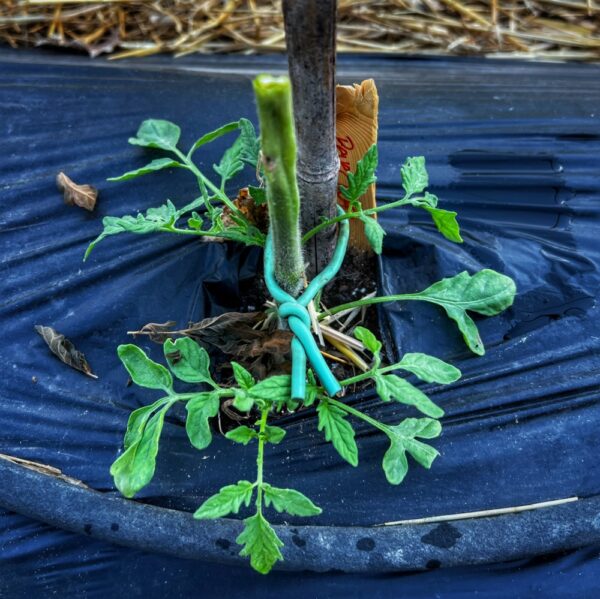
    High Tunnel Tomato Plants, Take Two: Suckering Back to Life? (Photo: R.P. Murphy)
    High Tunnel Tomato Plants, Take Two: Suckering Back to Life? (Photo: R.P. Murphy)

    No blame, except my own optimism. I understood the stakes. I understood the risks. And I understood the consequences. Although the perspective is pretty bleak, at this point, I’m tentatively hopeful that some of the tomatoes may recover. If the soil was warm enough, the roots may remain vital. If a sucker shoots in, we can cultivate it into a new plant. The prospect, of course, for tomatillos is less good. But I’m not prepared to give up yet. The possibility of new growth might yet eclipse the discouraging dieback we’re now witnessing. After all, I’m not aware of anyone who has ever died of optimism! (Source: High Tunnel Hubris)

    And so I fell back on optimism. Pollyanna optimism. We left the cold-shocked tomato plants in the ground. And little by little *some* regrowth has occurred. A minority, but an inspiring minority of our zapped tomato plants have rebounded, sending up new growth as “suckers” that we’re endeavoring to cultivate into new stems, new productive tomato plants.

    High Tunnel Tomato Plants, Take Two: Suckering Back to Life? (Photo: R.P. Murphy)
    High Tunnel Tomato Plants, Take Two: Suckering Back to Life? (Photo: R.P. Murphy)

    It’s still early, as you can see in today’s photographs. They may endure. They may thrive. They may produce a robust tomato crop. Or, they may not. But we’re tending them. Loving them. Believing in them. We’re fertilizing these resilient tomato plants with optimism. If fortune so chooses, we’ll have learned from our hubris *AND* we’ll be able to celebrate our wisening with the sweet tangy sacrament of Black Krim and Green Zebra tomatoes!

  • Variable Width Flooring

    Variable Width Flooring

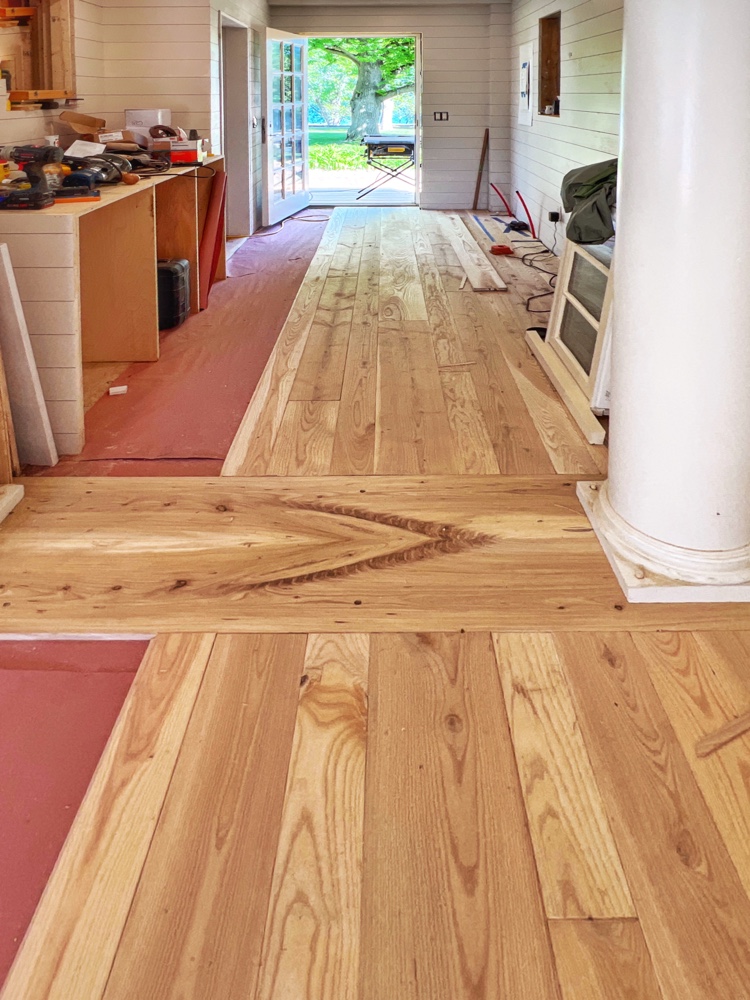
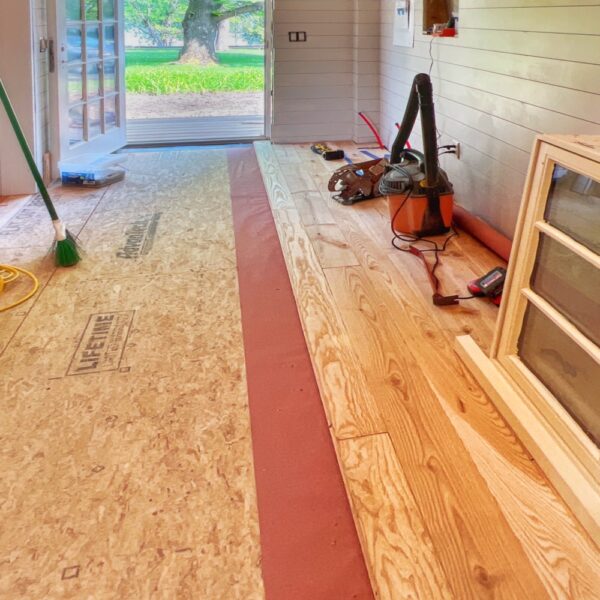
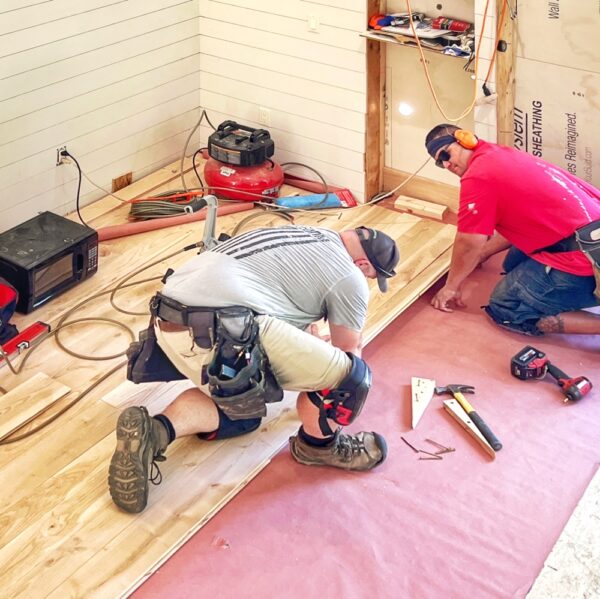
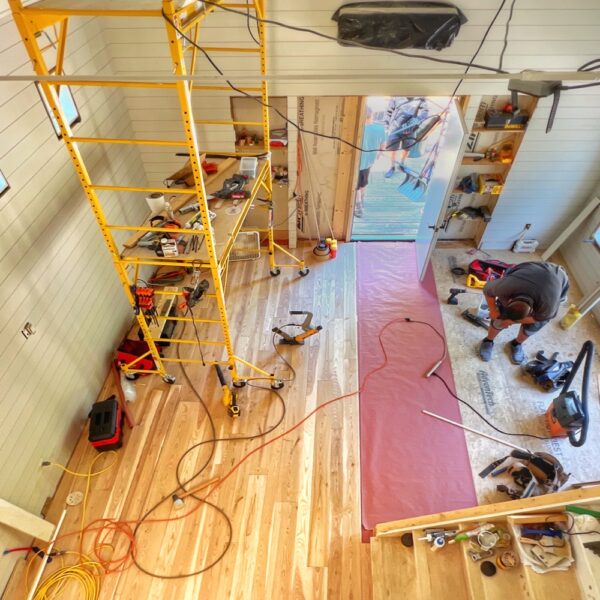
    I shared a “Flooring Sneak Peek” a couple weeks ago when the first two rows of ash and elm flooring had been installed. Now that our homegrown hardwood installation is advancing I’d like to share a few progress photos and explain the choice of variable width floorboards.

    Installing Variable Width Flooring (Photo: R.P. Murphy)
    Variable Width Ash and Elm Flooring Installation (Photo: R.P. Murphy)

    Why Variable Width Flooring?

    You may recall that we decided to mix ash and elm for the icehouse flooring, showcasing a decade and a half worth of lumber that we had harvested, milled, seasoned, dimensioned, and finished on-site. But I haven’t given much ink to the question of why we opted for variable width flooring instead of uniform sizing (as is the case with the beech flooring in the loft, the garapa paneling in the bathroom, and the T&G nickel gap cladding the rest of the interior walls.)

    Installing Variable Width Flooring (Photo: R.P. Murphy)
    Installing Variable Width Flooring in Icehouse Vestibule (Photo: R.P. Murphy)

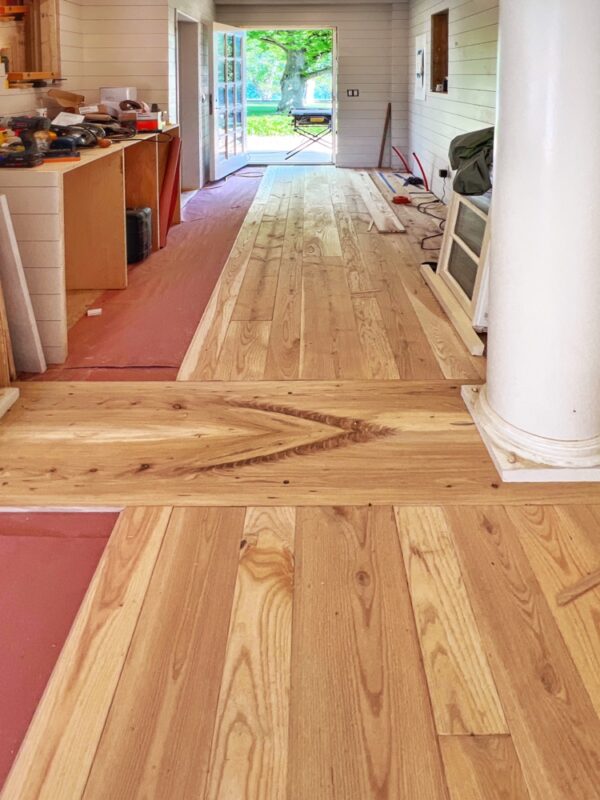
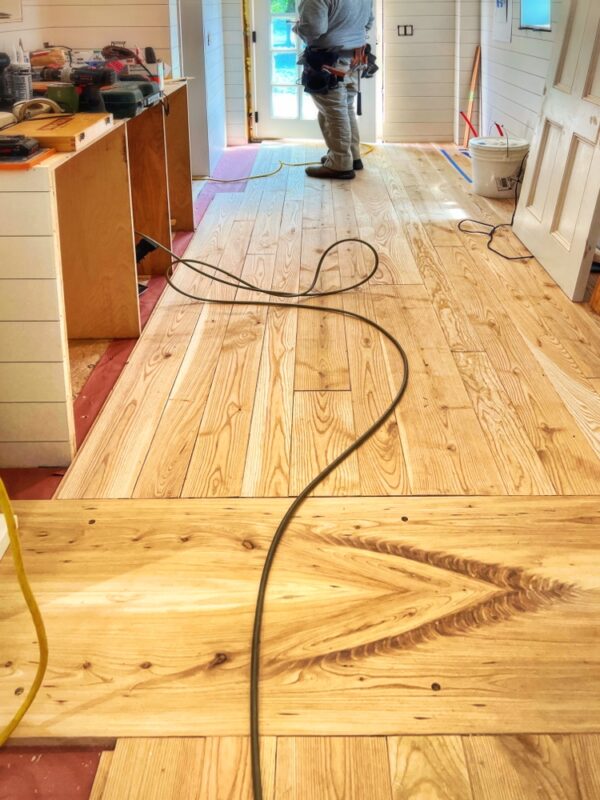
    In the photo above the mixed species floorboards, randomly interspersed ash and elm, are clearly different widths. We decided on 4”, 6”, and 8” widths for several reasons. Mixing planks of different widths

    • contributes an authentic barn appearance (large planks more common in 1800s when icehouse was built)
    • suggests a more rustic atmosphere
    • varies visual pattern from the consistent geometry of paneled walls and loft floors
    • draws attention to the character-rich wood that is a focal point of our rehab story
    • permitted us to include luxuriously wide floorboards, maximize breadth of widths, and minimize waste
    Installing Variable Width Flooring (Photo: R.P. Murphy)
    Installing Variable Width Flooring (Photo: R.P. Murphy)

    Although we incorporated a bookmatched threshold to visually delineate the vestibule from the main room, the flooring courses have been sized and aligned on both sides of the threshold, visually unifying the floor.

    Installing Variable Width Flooring (Photo: R.P. Murphy)
    Installing Variable Width Flooring (Photo: R.P. Murphy)

    The east-west orientation of the flooring is both practical (perpendicular to the direction of the floor joists) and aesthetically appealing, contributing to the visual flow from entrance-to-entrance, emphasizing the visual axis, and inviting one’s focus toward exterior views beyond the largely glass west wall.

    Installing Variable Width Flooring (Photo: R.P. Murphy)
    Installing Variable Width Flooring (Photo: R.P. Murphy)

    It’s worth noting that significant attention is being given to sequencing the variable width flooring to ensure a harmonious and attractive progression from board-to-board, allowing the color and character variations to enhance the cohesive integration across entire floor.

    I can’t wait to see the floor completely installed, sanded, and sealed soon!

  • Fenestrated Facades

    Fenestrated Facades

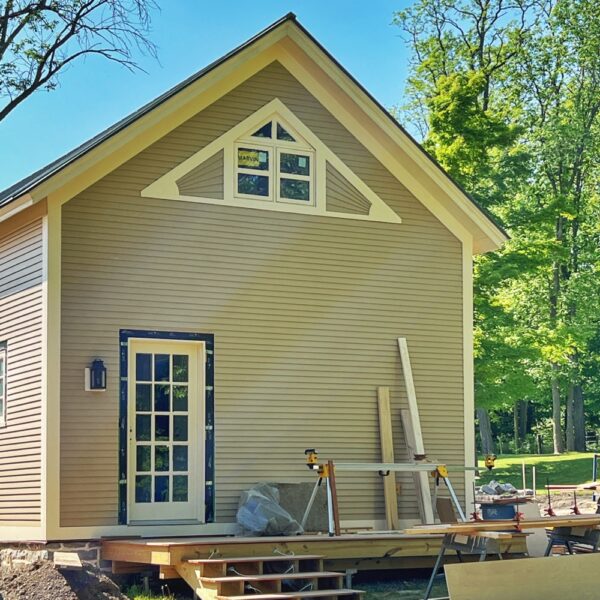
    It’s time for an icehouse window installation update. I’m pleased to announce fenestrated facades on all four sides!

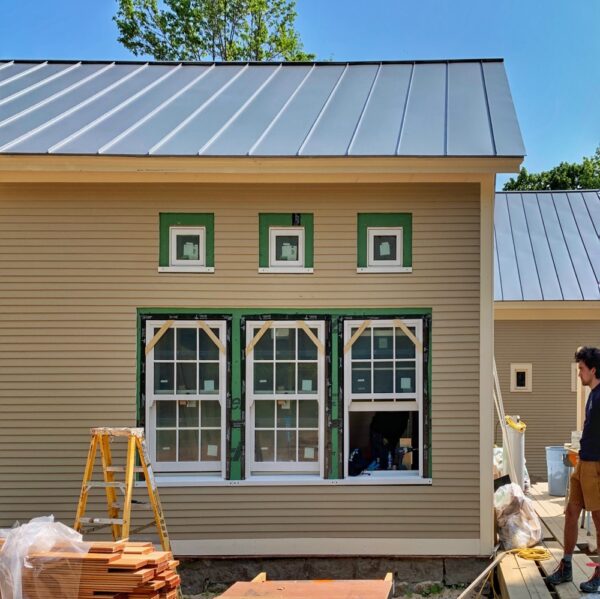
    Fenestrated East Facade (Photo: R.P. Murphy)
    Fenestrated East Facade (Photo: R.P. Murphy)

    Aside from window and door trim, three out of four elevations — east (above), south, and north — are now exhibiting their close-to-final appearance. Pretty exciting. Trimming in the jambs will pull it all together, but for now these snapshots offer a pretty good glimpse.

    To refresh your memory, this is a notable threshold because we inverted the typical sequence (install windows and doors first, then install cladding). In other words, our atypical workflow pushed out potential hiccups to the eleventh hour…

    We flip-flopped windows/doors and siding. That’s right, in order to maintain an ambitious timetable… [we installed] exterior and interior cladding prior to installing the windows. This involved some unintuitive workarounds, reverse engineering an otherwise routine process. So… “windowing” the icehouse has been a unique challenge. (Source: Windowing)

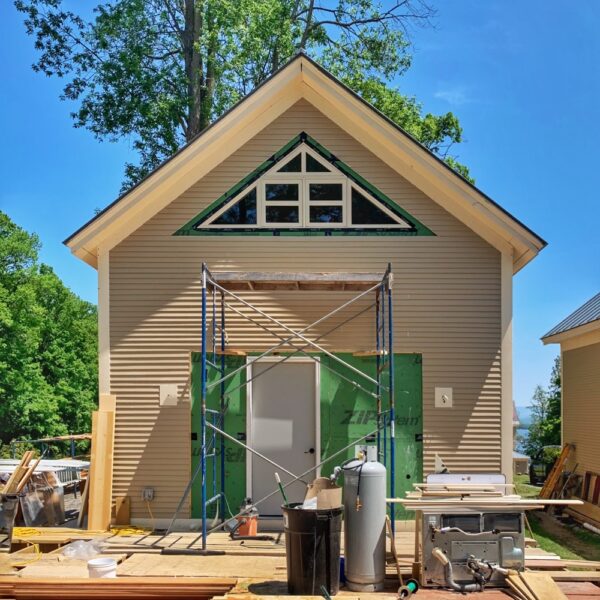
    Fortunately, as you can see in the photos, no significant hiccups so far. Only the west elevation (below) is still waiting on installation of the 1st floor double doors and flanking windows. And that’s on hold until flooring is complete. So, hopefully soon!

    Partially Fenestrated West Facade (Photo: R.P. Murphy)
    Partially Fenestrated West Facade (Photo: R.P. Murphy)

    Aside from fun alliteration, fenestrated facades are an aesthetic and functional leap forward, a *GIANT* leap toward our icehouse rehab finish line. Before I explain, let’s take a quick look at the word, “fenestrated”.

    Fenestrated: having one or more openings (Source: Merriam-Webster.com Dictionary, Merriam-Webster, https://www.merriam-webster.com/dictionary/fenestrated. Accessed 2 Jun. 2023.)

    So fenestrated facades are elevations with apertures — door(s) and/or window(s) — that transform the porosity and transparency of the domain.

    Fenestrated North Facade (Photo: R.P. Murphy)
    Fenestrated North Facade (Photo: R.P. Murphy)

    By strategically introducing apertures and maximizing transparency in this small structure we’re endeavoring to dilate the living experience beyond the finite building envelope, to challenge the confines of walls and roof, and when possible and esthetically judicious, to improve porosity with abundant new fenestration, dynamic interior-exterior interplay, subtle but impactful landscaping changes (including a new deck) that will work in concert to amplify the breathability of the interior and temptingly invite insiders outside. (Source: Gable End Window in West Elevation)

    The fenestrated facades of Rosslyn’s icehouse define a new aesthetic chapter when viewed from without, evolving not only the looks of this historic building over the last 16–17 years, but also delineating this rehabilitated structure from them way it looked for well over a century. From within, it’s still a little premature to evaluate whether or not we’ve accomplished the lofty goals I listed above. But we can begin to appreciate the dramatic increase in natural light, illuminating the interior of the icehouse.

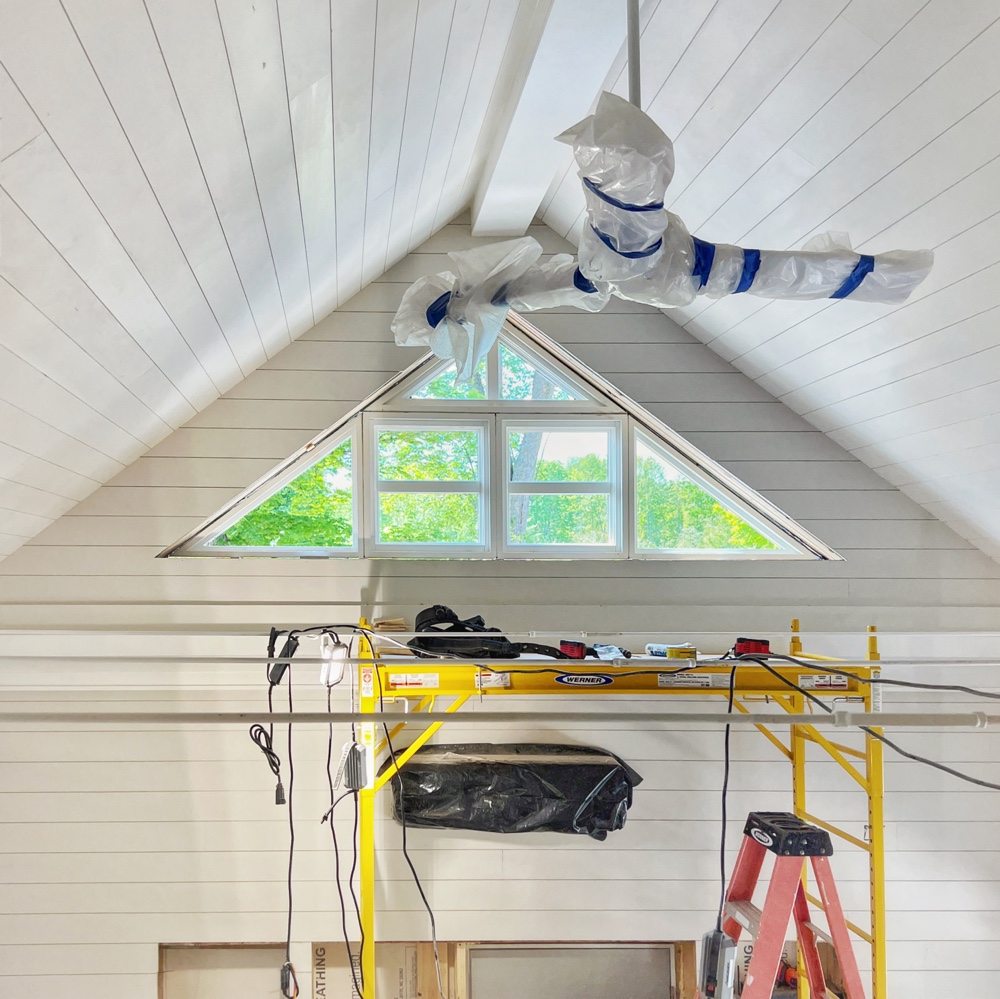
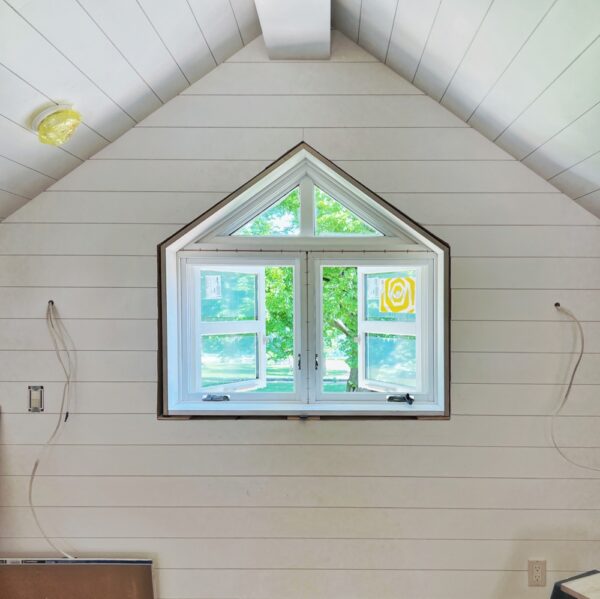
    Loft Fenestration (Photo: R.P. Murphy)
    Loft Fenestration (Photo: R.P. Murphy)

    Natural light and views. The window in the photograph above will look over Rosslyn front lawns, the back of our home, Lake Champlain, and slender slivers of the Green Mountains. My desk will be positioned below this window, so morning will invite the rising sun into my loft study, shimmering across the lake, illuminating my work.

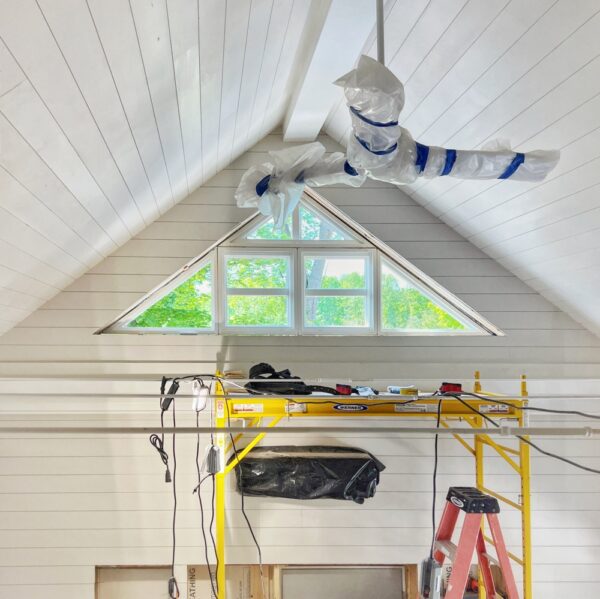
    In the photograph below the west gable end window will allow afternoon sunlight to flow into the interior, brightening the main room and loft.

    West Gable Fenestration (Photo: R.P. Murphy)
    West Gable Fenestration (Photo: R.P. Murphy)

    Once the double doors flanked with windows, four glass apertures balancing the gable window above, are installed, this west-facing elevation will allow for a seamless interplay of interior and exterior living area. So long anticipated, these fenestrated facades are beginning to bridge the envisioned and the actual. Within weeks I’ll know if we’ve realized the lofty ambition of transforming this small, dark, confined environment into a more ample, permeable, and voluminous experience.

  • Holistic Orcharding: Kaolin Clay

    Holistic Orcharding: Kaolin Clay

    Holistic Orcharding: Kaolin Clay (Photo: Tony Foster)
    Holistic Orcharding: Kaolin Clay (Photo: Tony Foster)

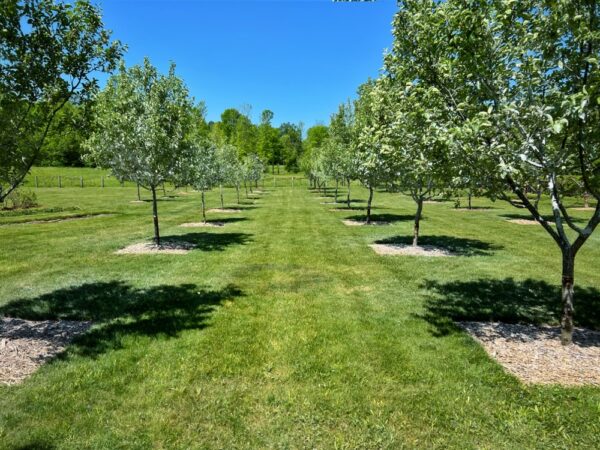
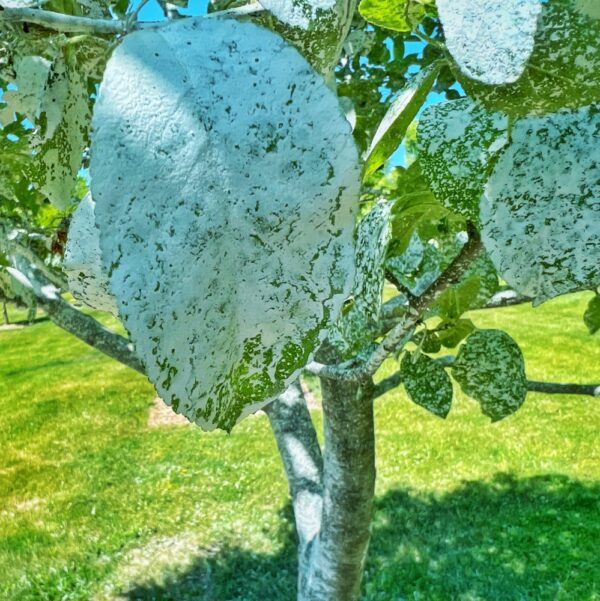
    Kudos to Tony Foster for completing the first kaolin clay treatment in the orchard. Spraying Rosslyn’s fruit trees with kaolin clay is part of our nontoxic, organic, holistic orcharding regimen. It’s an effective way to reduce plum curculio (Conotrachelus nenuphar) larvae and European apple sawfly (Hoplocampa testudinea) larvae without resorting to toxic pesticides.

    Here’s the scoop from holistic orcharding guru, Michael Phillips.

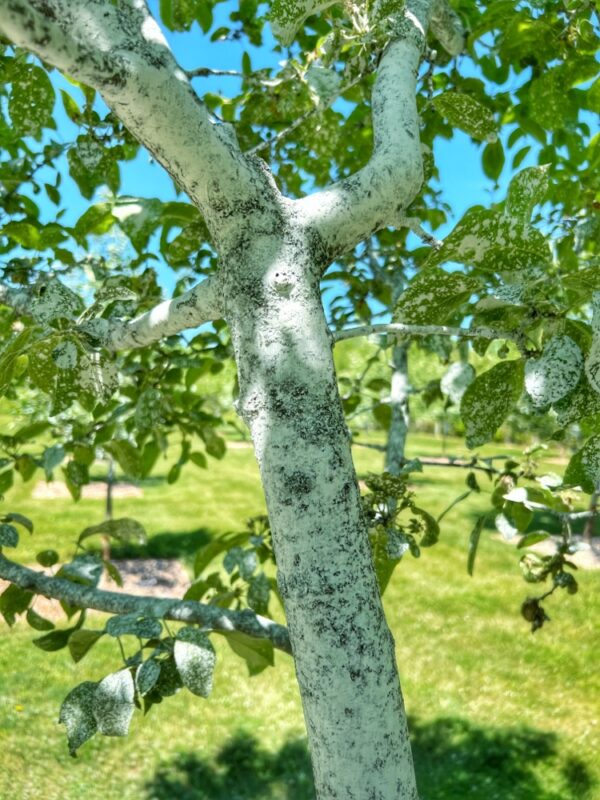
    We deal with two “petal-fall pests” in the eastern half of the United States… Plum curculio larvae get their start in a crescent-like scar the female weevil makes to prevent the growing fruitlet from crushing her egg; European apple sawfly larvae first scratch the surface of a pea-sized fruitlet, and then go on to eat the seeds in another three or four fruitlets… Those petal-fall pests… can be held effectively in check with a nontoxic white clay covering applied over the entire surface of the tree. The kaolin clay panicles confuse the insect adults and prove incredibly irritating… Application begins as the blossoms start to fall and needs to be thorough. It takes two or three initial sprays to build up a thick enough base to repel these insects. Renew the clay weekly for the next month. (Source: Holistic Orcharding: Michael Phillips)

    Sure, spraying kaolin clay onto the trees creates a curious camouflage look, but it’s proven quite an effective deterrent.

    Holistic Orcharding: Kaolin Clay (Photo: Tony Foster)
    Holistic Orcharding: Kaolin Clay (Photo: Tony Foster)

    And, given that the alternative, fruit marred with plum curculio larvae and European apple sawfly larvae isn’t particularly pleasant, we’ve found that several coatings of white kaolin clay early in the fruiting season is a super solution.

    Holistic Orcharding: Kaolin Clay (Photo: Tony Foster)
    Holistic Orcharding: Kaolin Clay (Photo: Tony Foster)

    Thank you, Tony, for following up installation of the Tanglefoot wraps with round one of kaolin clay spraying. Round two as soon as the rain begins to diminish the white mottling…

  • Holistic Orcharding: Fruitful and Deer-full

    Holistic Orcharding: June pears (Source: Geo Davis)
    Holistic Orcharding: June pears (Source: Geo Davis)

    I’m excited to report that we may finally be able to enjoy Rosslyn peaches, nectarines, and even a few pears and apples this summer. For the first time since we began planting an orchard, several trees have matured enough to set fruit.

    Fruitful Orchard

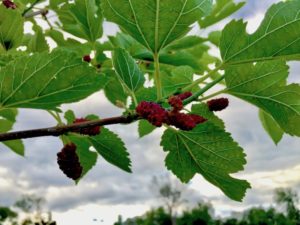
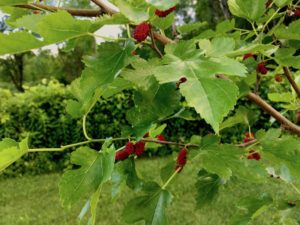
    Those bright red mulberry will darken as they soak up sun and begin to sweeten. They’re still pretty mealy (though the birds don’t seem to mind at all!)

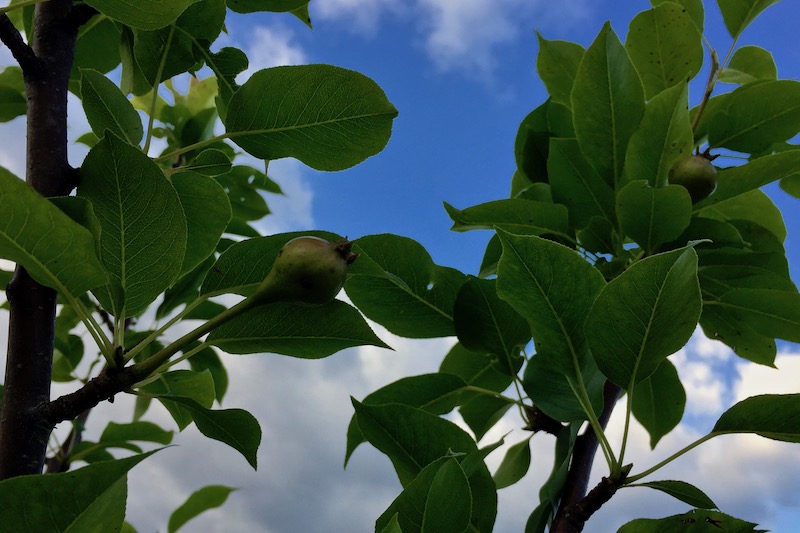
    The photograph at the top of this post shows a couple of small pears. A couple of pear trees set a pear or two last summer, but they dropped (or were eaten by critters) before I ever tasted them. Most of the pear tress are still fruitless, but a couple small green and red fruit are looking promising.

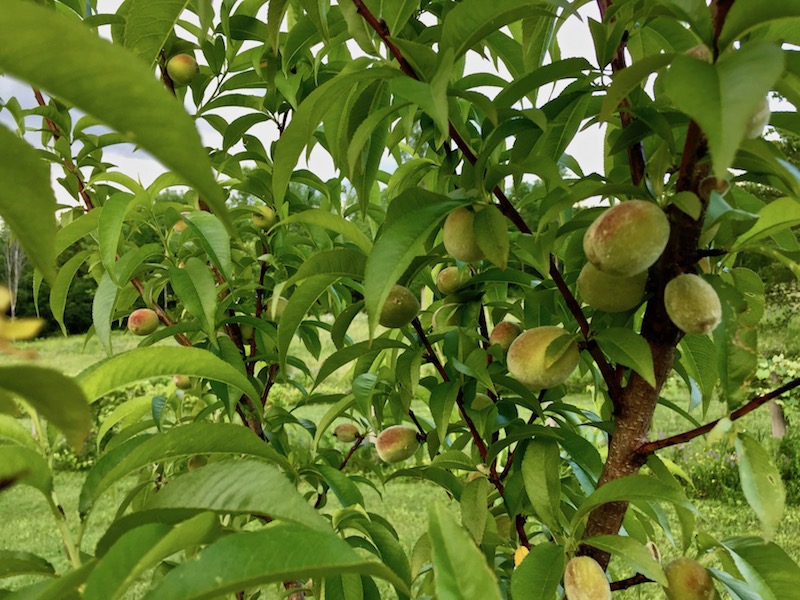
    Holistic Orcharding: Young peaches in June (Source: Geo Davis)
    Holistic Orcharding: Young peaches in June (Source: Geo Davis)

    For the first, our peach trees are setting fruit. Heavy winds and rains have resulted in steady fruit drop, but I’m guardedly optimistic that we may actually be able to sink out teeth into a few fuzzy, nectar-sweet peaches soon.

    The peaches are the most fruitful of all the trees at this point. In fact, a couple of trees are so laden that I’ll probably begin thinning fruit as they grow larger, culling the runts and least healthy fruit and leaving the best.

    The photo below on the left offers a wider perspective on a fruitful peach, and the photo on the right shows a young and almost equally fruitful nectarine tree.

    The three nectarine trees are 3-4 years younger than the peaches, so I’m curious why two of them are already setting fruit. The third nectarine tree has never been very healthy. Dwarfish and sparsely branched, leafed, I’ll try for one more summer to help it along. If it doesn’t begin to catch up, I’ll consider replacing it next year.

    Like the apricot that I replaced this year…

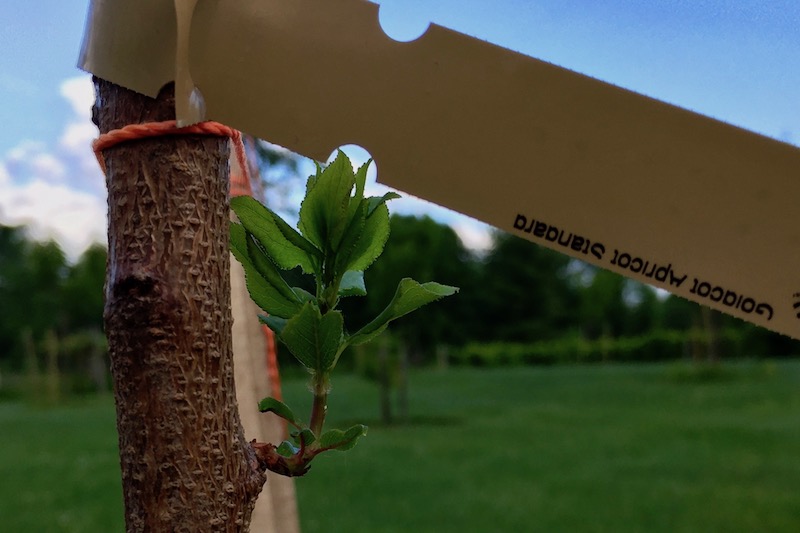
    Holistic Orcharding: Transplanted apricot tree (Source: Geo Davis)
    Holistic Orcharding: Transplanted apricot tree (Source: Geo Davis)

    We’ve struggled with apricots. Few of our apricot trees are thriving, and one died last year. We replaced it this spring with the Goldicot Apricot above, the only variety that seems to be adapting well. I can report good new growth so far on the transplant, but another apricot has died. Both are lowest (and wettest) on the hill, so I plan to address the drainage this fall. Perhaps the heavy clay soil and high spring water table is simply to much for the apricots to withstand.

    Deer-full Orchard

    Unfortunately it’s not all good news in the orchard. We remain committed to our 100% holistic orcharding (thanks, Michael Phillips!) mission, but we’re still playing defense with Cedar Apple Rust and other pesky challenges. I’ll update on that soon enough, but there’s another frustrating pest that provoked my frustration yesterday.

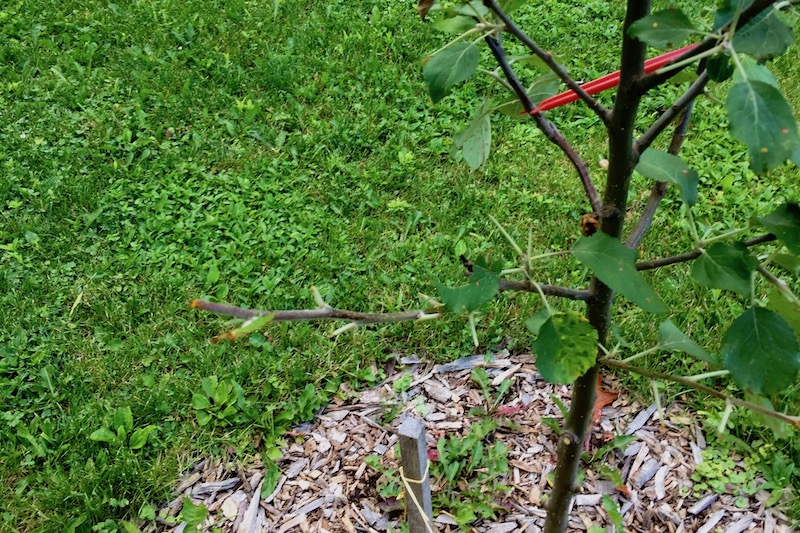
    Holistic Orcharding: Apple tree browsed by deer (Source: Geo Davis)
    Holistic Orcharding: Apple tree browsed by deer (Source: Geo Davis)

    Can you see the munched leaves and branches?

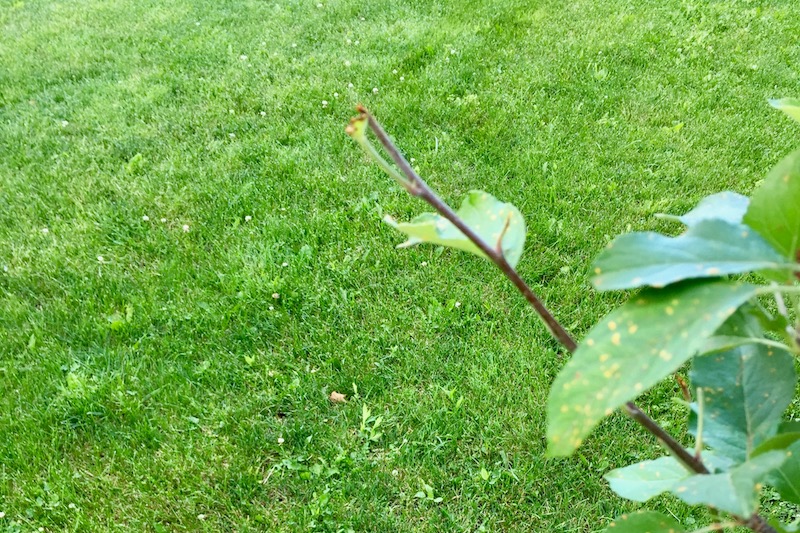
    Holistic Orcharding: Apple tree browsed by deer (Source: Geo Davis)
    Holistic Orcharding: Apple tree browsed by deer (Source: Geo Davis)

    Another munched branch (and early signs of Cedar Apple Rust).

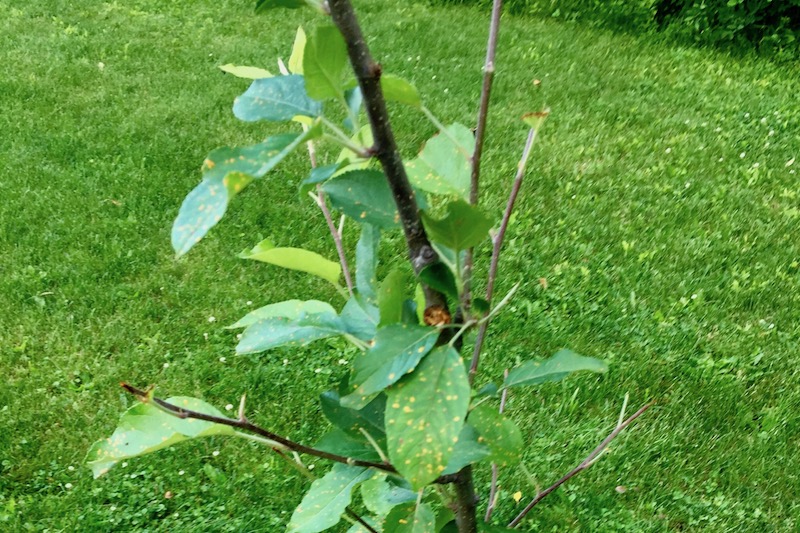
    Holistic Orcharding: Apple tree browsed by deer (Source: Geo Davis)
    Holistic Orcharding: Apple tree browsed by deer (Source: Geo Davis)

    Ive you look just below center of this photograph you’ll see where a large branch has been snapped right off. It was laying on the ground below. Also plenty of smaller branches and leaves chewed.

    The two apple trees which were targeted by the deer were planted last spring. They’d both established relatively well, but they were short enough to offer an easy snack. We keep the trees caged during the fall-through-spring, but we had just recently removed the cages to begin pruning and spreading limbs (see red spreader in image above?), so the trees were easy targets.

    And there’s worse news.

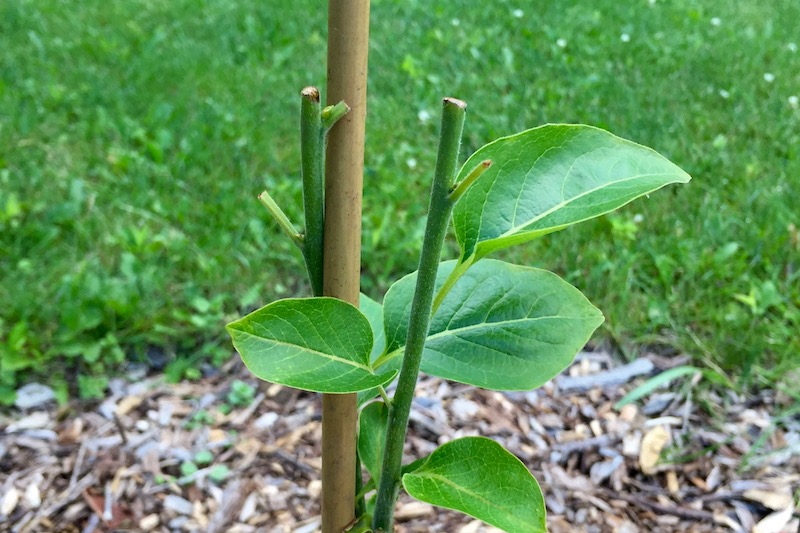
    Holistic Orcharding: Young persimmon tree browsed by deer (Source: Geo Davis)
    Holistic Orcharding: Young persimmon tree browsed by deer (Source: Geo Davis)

    That’s a young persimmon tree that we just planted a couple of weeks ago. It was a replacement for a persimmon that arrived dead from the nursery last year (another drama for another day…)

    Not only did the deer browse the persimmon, but it ate both leads, presenting a serious hurdle for this transplant. Not a good situation. I’ll pamper this youngster in the hopes that one of these blunted leads will send up another lead, or—more likely, but far from guaranteed—a fresh new lead will bud and head skyward. Fingers crossed.

    SaveSave

    SaveSave

    SaveSave

    SaveSave

    SaveSave

    SaveSave

    SaveSave

    SaveSave

    SaveSave

    SaveSave

    SaveSave

    SaveSave

    SaveSave

    SaveSave

    SaveSave

  • Organic Orcharding

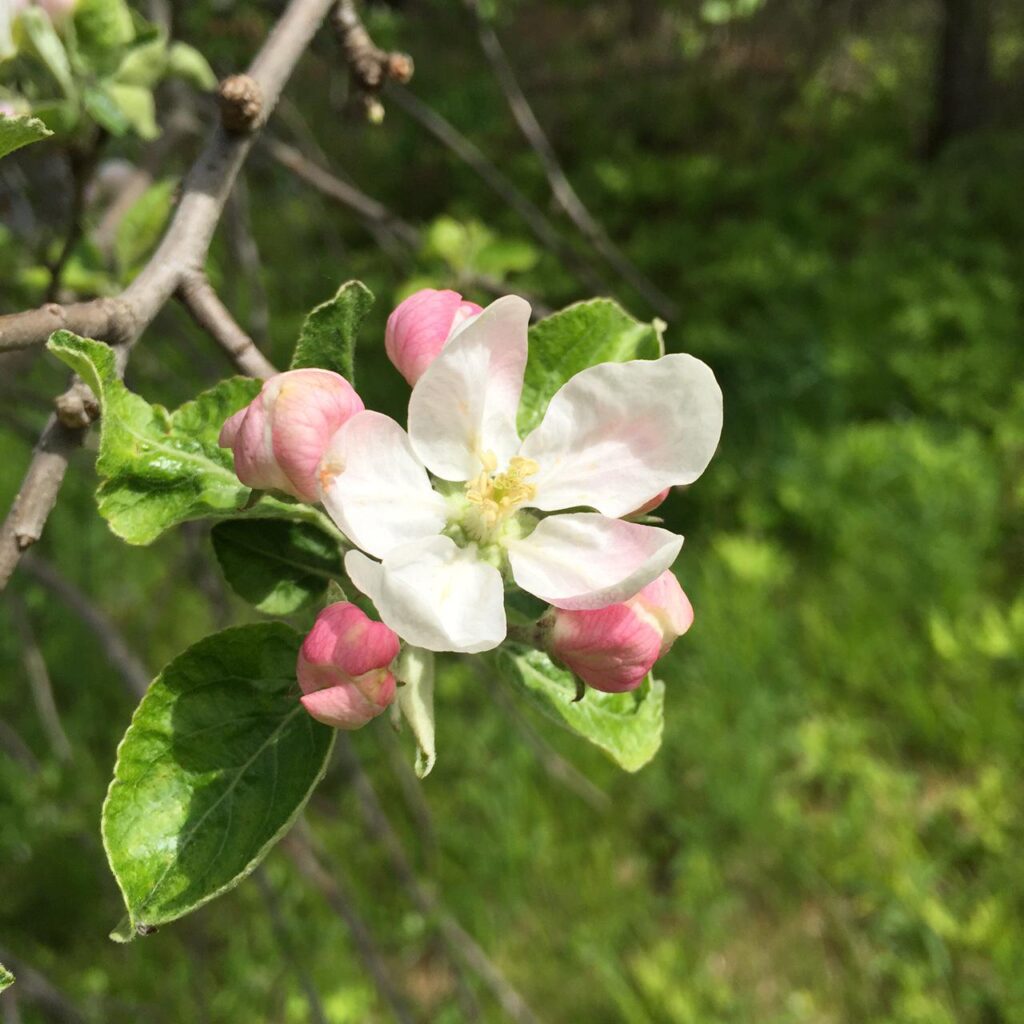
    Apple Blossom, Spring 2016
    Apple Blossom, Spring 2016

    For the last few years I’ve made brazen claims about holistic, organic gardening and orcharding. No pesticides. No way; no how.

    Period.

    No exceptions.

    I’ve refused to spray our fruit trees to inoculate them against all of the baddies that lurk in an orchard’s tender places. I’ve refuted the discouraging oracles who assure me that I will fail; that a successful orchard requires, requires, pesticides and fungicides; that neighboring fruit tree growers will consider my bad judgment not only an ill-informed mistake but a dangerous threat to their own trees.

    Apple Blossom, Spring 2016
    Apple Blossom, Spring 2016

    I’ve soldiered on, resolved to make Rosslyn a toxin-free, organic, healthy environment. I’ve poured over alternative gardening, lawn maintenance and orcharding resources. And I’ve experimented. Sometimes successfully, sometimes unsuccessfully. The orchard alone has required about a 5-10% replant rate over the last 3+ years. Which is discouraging. And frustrating. But it’s also remarkable that most of the trees have survived and thrived!

    But I am slightly evolving in my thinking. Less dogmatic. More informed. And my black and white “Pesticides: No Way, No How” line in the sand is yielding to alternative, non-toxic, but considerably more proactive approaches to fruit tree growing. (Much credit is due to Michael Phillips (Grow Organic Apples: Holistic Orchard Network) among other holistic orchard mentors. Thanks, Sir Phillips!)

    Last summer I added three new “tools” to my orcharding, and I’m going to focus on each of the three in separate posts in order to keep the topics focused and useful to others exploring the realm of healthy, non-toxic fruit tree propagation. Here are the three:

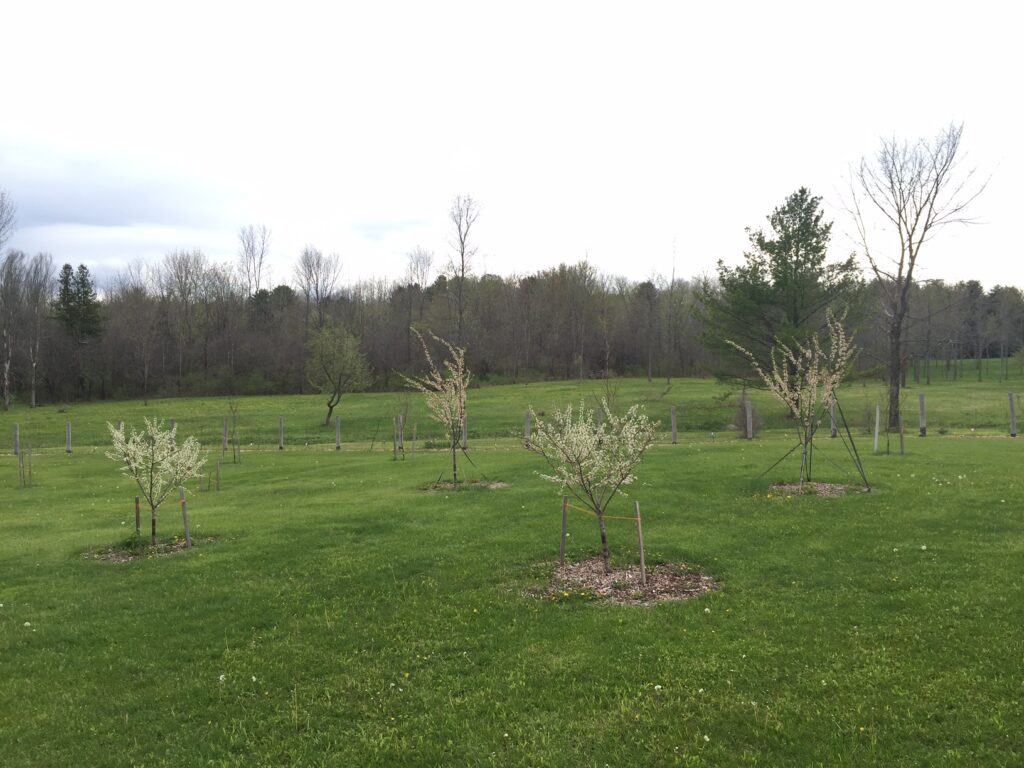
    Organic Plum Trees in Bloom, Spring 2016
    Organic Plum Trees in Bloom, Spring 2016

  • Holistic Orcharding: Michael Phillips

    The Holistic Orchard: Tree Fruits and Berries the Biological Way, by Michael Phillips
    The Holistic Orchard: Tree Fruits and Berries the Biological Way, by Michael Phillips

    For several years I’ve been absorbing holistic orcharding and gardening wisdom from Michael Phillips. I no longer recall how I came across the pied piper of organic, non-toxic fruit tree propagation, but it’s quite possible that my first introduction was an article in Mother Earth News titled, “Organic Apple Growing: Advice From Michael Phillips“.

    If you’re uninitiated, Michael Phillips is the owner (along with his wife, Nancy, and their daughter, Gracie), steward, and chronicler of Lost Nation Orchard in New Hampshire. His book, The Holistic Orchard, is the bible for organic apple growers. Here’s a trailer for the companion DVD, Holistic Orcharding.

    The book is outstanding. As is The Apple Grower: A Guide for the Organic Orchardist. And I’d also recommend this YouTube playlist of Michael Phillips’ organic orcharding videos.

    Holistic Orcharding Tips

    Whether or not “Organic Apple Growing: Advice From Michael Phillips“, the article in Mother Earth News, was my introduction to Michael Phillips’ ideas about holistic orcharding, there are some great takeaways that I’ll highlight here:

    Q: How big of a hole do I need to dig for planting a tree?
    A: The size of the tree hole needs to be large enough to accommodate the roots without bending them. A 3-foot diameter hole generally fits the bill. (Source: MOTHER EARTH NEWS)

    Q: A friend told me I should buy a mycorrhizal product to boost the growth of my trees. Does such a product have any worth?
    A: Plants have developed an incredible symbiotic relationship with certain fungi to help get nutrients from the soil, as well as to ward off pathogenic organisms. An apple tree has specific mycorrhizae that interact with its roots in the humus layer in these ways. You can inoculate your soil by finding a healthy wild tree and then bringing a few scoops of the soil beneath its branches back to your ground. Ecosystems adapt to the needs at hand without our necessarily having to buy a packaged product. (Source: MOTHER EARTH NEWS)

    Q: Some bug is tunneling into a lot of my fruit when it’s just the size of a nickel. What’s up?
    A: We deal with two “petal-fall pests” in the eastern half of the United States that easily could be your culprits. Plum curculio larvae get their start in a crescent-like scar the female weevil makes to prevent the growing fruitlet from crushing her egg; European apple sawfly larvae first scratch the surface of a pea-sized fruitlet, and then go on to eat the seeds in another three or four fruitlets. (Source: MOTHER EARTH NEWS)

    Q: What’s up with the new kaolin clay spray?
    A: Those petal-fall pests identified above can be held effectively in check with a nontoxic white clay covering applied over the entire surface of the tree. The kaolin clay panicles confuse the insect adults and prove incredibly irritating… Application begins as the blossoms start to fall and needs to be thorough. It takes two or three initial sprays to build up a thick enough base to repel these insects. Renew the clay weekly for the next month. (Source: MOTHER EARTH NEWS)

    Q: Why did my grandparents hang open jugs of vinegar and molasses out in the orchard?
    A: Such homegrown traps usually target adult fruit moths such as the codling moth. Unfortunately, all sons of bugs end up drowning in this brew, some of which might have been beneficial allies. I prefer to control codlings moths with well-timed sprays of Bacillus thuringiensis (Bt), a biological pesticide stomach-specific to caterpillars. Others have had some success wrapping corrugated cardboard around the trunk of the tree, where the larvae crawl to continue their development. Then at the end of the summer, the cardboard is removed and burned. (Source: MOTHER EARTH NEWS)

    Q: When do I hang those red sticky ball traps?
    A: Apple maggot flies (AMF) are the culprits drawn to these effective traps. The new generation emerges from the soil beginning in late June, with females seeking fruit in which to lay eggs throughout July and August. The sticky balls mimic the best apple to be found in the orchard. The female alights on the trap and stays put because of a layer of sticky goo called “Tangletrap” covering the red sphere… Two to four traps per tree generally suffice to keep AMF larvae from ruining a good harvest. I set out traps on early maturing varieties by the first of July, then scrape off the dead flies and renew the sticky material when moving the traps to later-maturing varieties in early August. (Source: MOTHER EARTH NEWS)

    Books by Michael Phillips

    The Holistic Orchard: Tree Fruits and Berries the Biological Way, by Michael Phillips
    The Holistic Orchard, by Michael Phillips

    https://www.amazon.com/Apple-Grower-Guide-Organic-Orchardist/dp/1931498911/ref=as_li_ss_il?ie=UTF8&ref_=asap_bc&linkCode=li3&tag=geodavis-20&linkId=a5d5dd3a98959a1a1687255afe071774
    The Apple Grower by Michael Phillips

    The Herbalist's Way: The Art and Practice of Healing with Plant Medicines, by Nancy and Michael Phillips
    The Herbalist’s Way, by Nancy and Michael Phillips

    SaveSave

  • Garapa Paneled Bathroom, Pt. 2

    Garapa Paneled Bathroom, Pt. 2

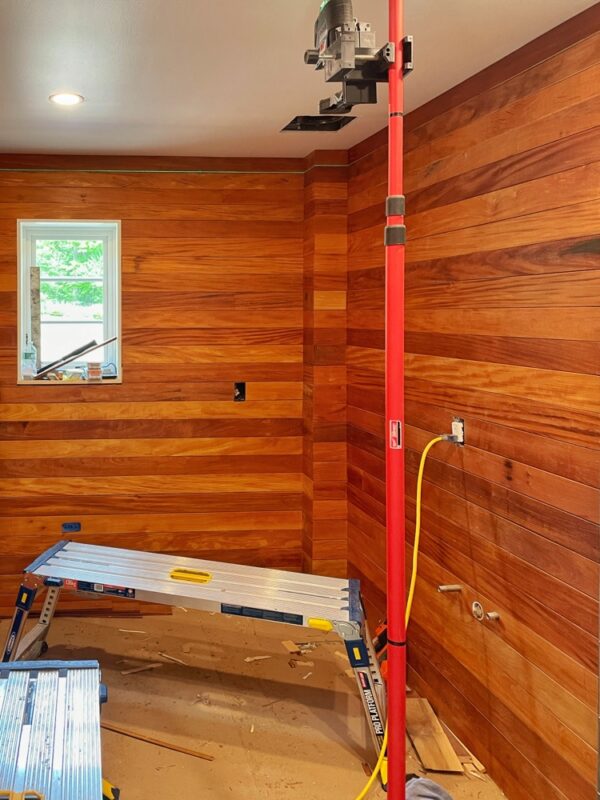
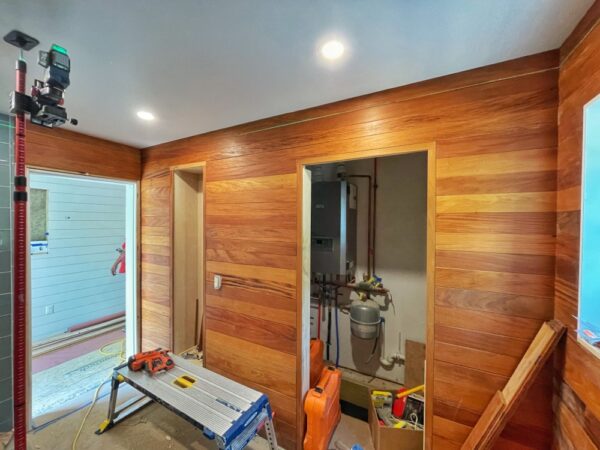
    Just over a week ago I posted a prologue to today’s garapa paneled bathroom update. I apologize if it felt a little half baked.

    For just a little longer, I’ll keep you in suspense before I share photos of the now completed garapa installation. Remember, anticipation is half the pleasure! (Source: Garapa Paneled Bathroom, Pt. 1)

    I wasn’t teasing out the update for the sake of suspense. I promise. And today’s post will hopefully offer some recompense for your patience. But there was a lot — a LOT — to pack into a single post, so I felt it more reasonable to subdivide it into a couple of installments.

    I’m dividing this… update into two posts to fairly review and showcase a project that has taken the better part of a year from beginning to finish… (Source: Garapa Paneled Bathroom, Pt. 1)

    Besides, I was about to head into the Gila Wilderness when Eric Crowningshield gave me the good news, and I simply couldn’t squeeze it all in before going off-line adventuring for a week sans connectivity, computer, etc.

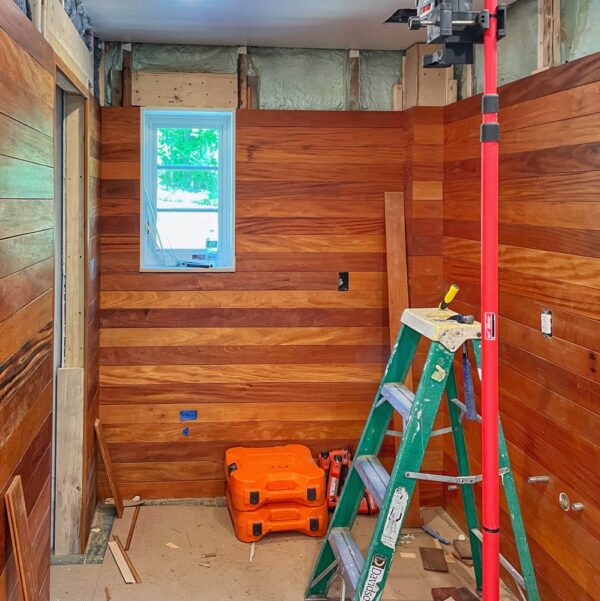
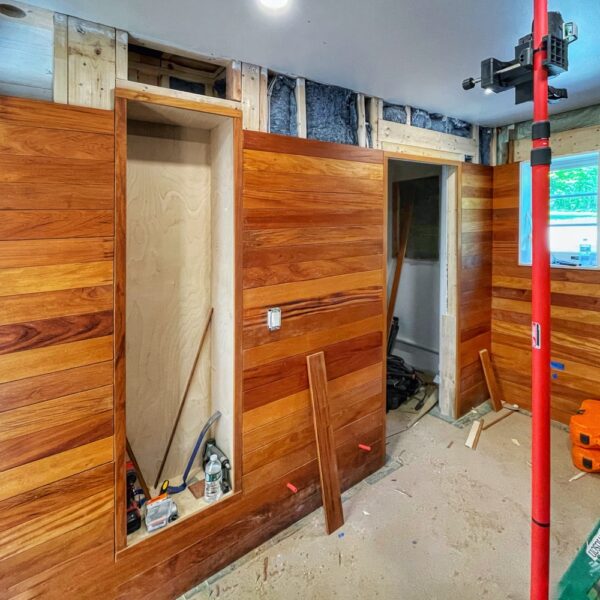
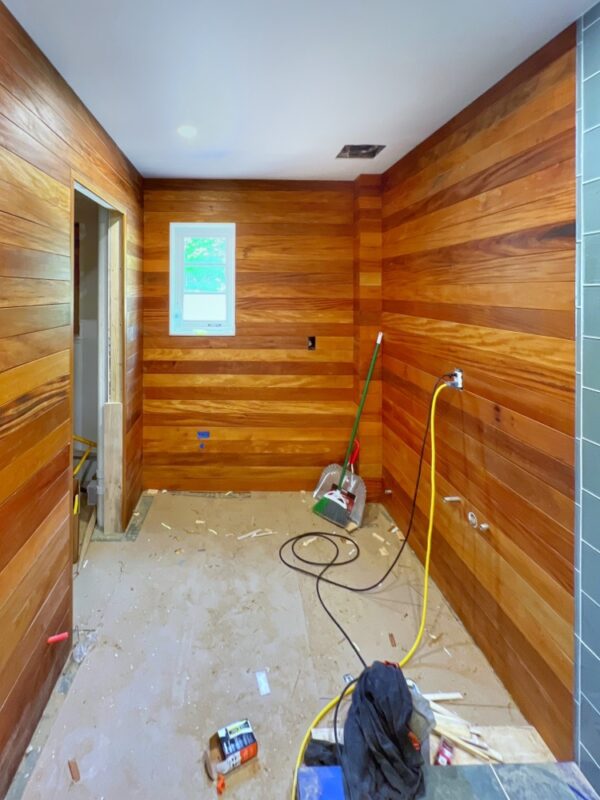
    But now it’s time to celebrate completion of the icehouse bathroom’s garapa paneling, to showcase the photos, and to sing praises for the carpenter behind this monumental accomplishment.

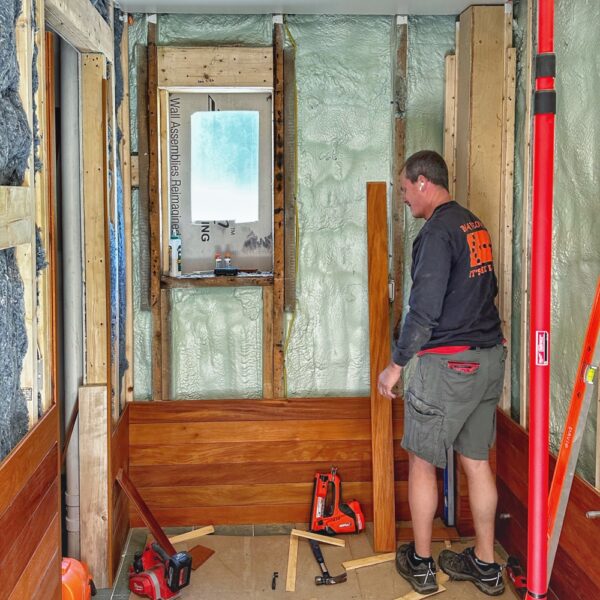
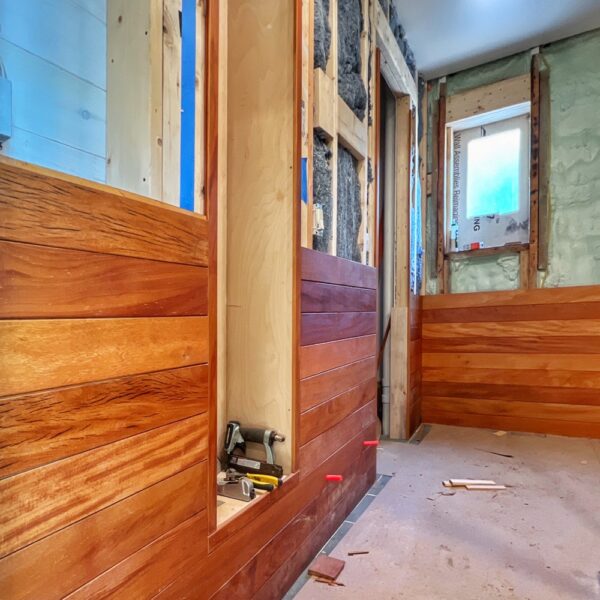
    Eric Crowningshield Installing Garapa Paneling in Icehouse Bathroom (Photo: R.P. Murphy)
    Eric Crowningshield Installing Garapa Paneling in Icehouse Bathroom (Photo: R.P. Murphy)

    Garapa Paneling the Bathroom

    Upcycling Rosslyn’s deconstructed garapa decking into interior paneling has occupied many members of the icehouse rehab team for months. It’s been a challenge. Every. Single. Step. From demo’ing the old deck (while painstakingly deconstructing, selecting, and grading the most reusable and aesthetically pleasing garapa) to troubleshooting, iterating, and finally re-fabricating the decrepit, timeworn decking into elegant interior finish material, this upcycling endeavor has been an epic quest. And the exacting preparation demanded even more exacting installation.

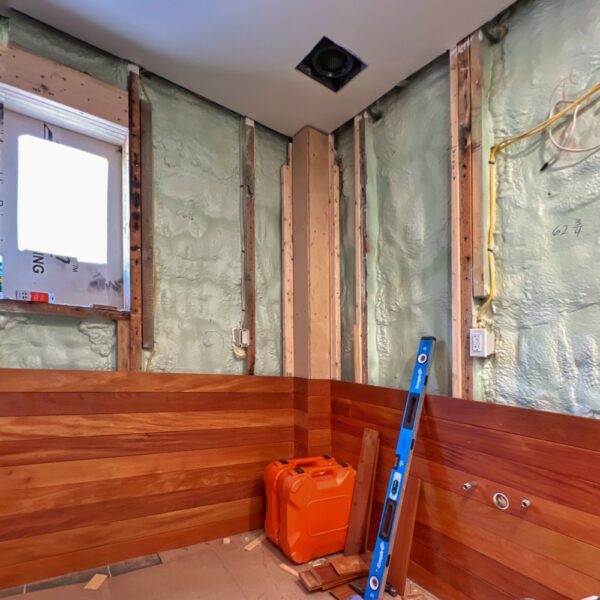
    Garapa Paneling Progress in Icehouse Bathroom (Photo: R.P. Murphy)
    Garapa Paneling Progress in Icehouse Bathroom (Photo: R.P. Murphy)

    Today we celebrate Eric’s conscientious carpentry and dogged determination, shepherding the garapa paneling to its exquisite completion! (It’s worth noting that Matt Sayward assisted in the early stages of installation, but Eric soon took ownership of the project to ensure 100% consistency.)

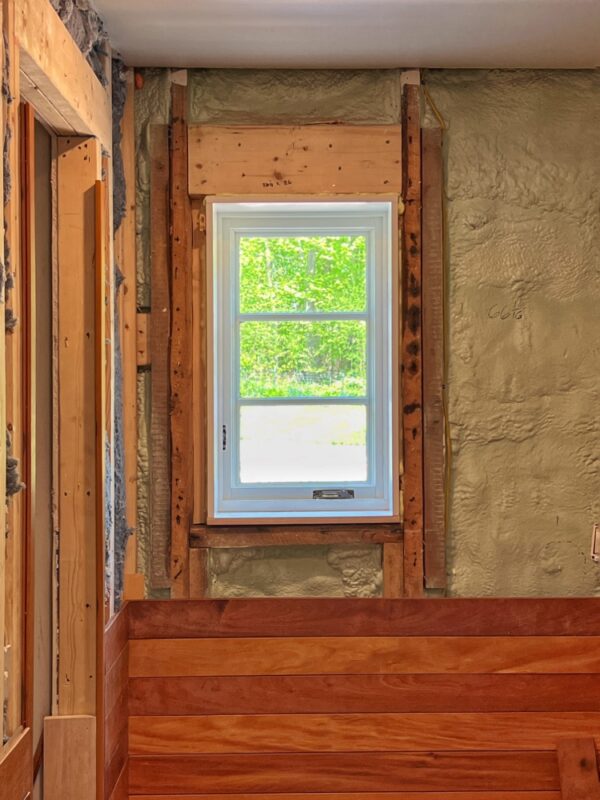
    Garapa Paneling Progress in Icehouse Bathroom (Photo: R.P. Murphy)
    Garapa Paneling Progress in Icehouse Bathroom (Photo: R.P. Murphy)

    The following excerpts and photos offer an interesting perspective as Eric worked through installation of the garapa paneling.

    Garapa Paneling Progress in Icehouse Bathroom (Photo: R.P. Murphy)
    Garapa Paneling Progress in Icehouse Bathroom (Photo: R.P. Murphy)

    It should go a little quicker now with the breaks in the runs [and] not needing to lineup 4 miters in one location. Nothing about this is easy but my gosh probably one of the most rewarding project thus far… — Eric Crowningshield

    Garapa Paneling Progress in Icehouse Bathroom (Photo: Eric Crowningshield)
    Garapa Paneling Progress in Icehouse Bathroom (Photo: Eric Crowningshield)

    On the left side of this door it is 3-1/8” from the inside of the door jam to the tile. Do we not put garapa and run a 3” trim around the jam leaving a 1/8” reveal? On the other side we only have about 2”, so I’m guessing it may look odd with wider trim on the left and top. — Eric Crowningshield

    The best way to handle the garapa around the door is difficult to determine from afar. My suggestion is that you and Peter look at it together and come up with the best solution. We have some asymmetry to deal with. Tricky. — Geo Davis

    I’m going to put horizontal pieces on the left side before trim because the trim on the other side is around 1 3/4” so I think it would look better keeping the same size around the door. — Eric Crowningshield

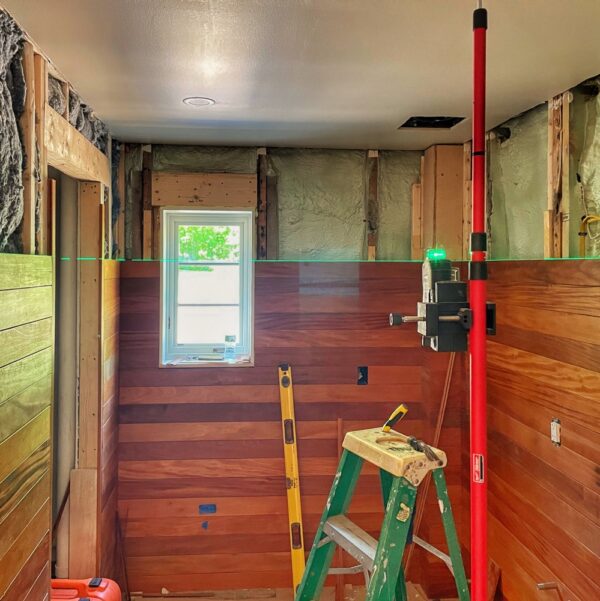
    Garapa Paneling Progress in Icehouse Bathroom (Photo: R.P. Murphy)
    Garapa Paneling Progress in Icehouse Bathroom (Photo: R.P. Murphy)

    I went down tonight for a few hours and ripped some [garapa] down to the same width so the last 4 rows will be the same. Otherwise we were going to end up with a 1” or so piece around the ceiling. I put another row of that up so only 3 rows left. — Eric Crowningshield

    How much did you have to takeoff of each of the boards for the last four courses? Or, better question, how different will they be from the rest of the words? — Geo Davis

    About 3/8 of an inch. The boards I put up throughout the whole wall ranged from 4” down to 3-5/8” and a few at 3-1/2”. I had 13” left so I was doing 3-1/4” for the last 4 rows. — Eric Crowningshield

    Garapa Paneling Progress in Icehouse Bathroom (Photo: R.P. Murphy)
    Garapa Paneling Progress in Icehouse Bathroom (Photo: R.P. Murphy)

    It is completed!!! I love saying that. — Eric Crowningshield

    Superb! Congratulations, Erik. It really looks amazing. I hope you’re proud of the results. I know this has been an almost endless process from demoing the deck to installing the paneling, but a worthwhile adventure. Well done. Is everything wrapped up around the door as well? — Geo Davis

    No, we are going to adjust the casing so it is the same size trim on each side. Yes, super excited about it and everything it means to you and the story behind it all! — Eric Crowningshield

    Garapa Paneling Progress in Icehouse Bathroom (Photo: R.P. Murphy)
    Garapa Paneling Progress in Icehouse Bathroom (Photo: R.P. Murphy)

    Bravo, Eric Crowningshield, for completing installation of the glorious garapa paneling in the icehouse bathroom. What a tour de force! It’s hard to believe that this is the same decking your team deconstructed from Rosslyn’s deck a year ago. Many months of brainstorming, experimenting, re-milling, oiling, and installing later this masterpiece is born. Hurrah! — Geo Davis

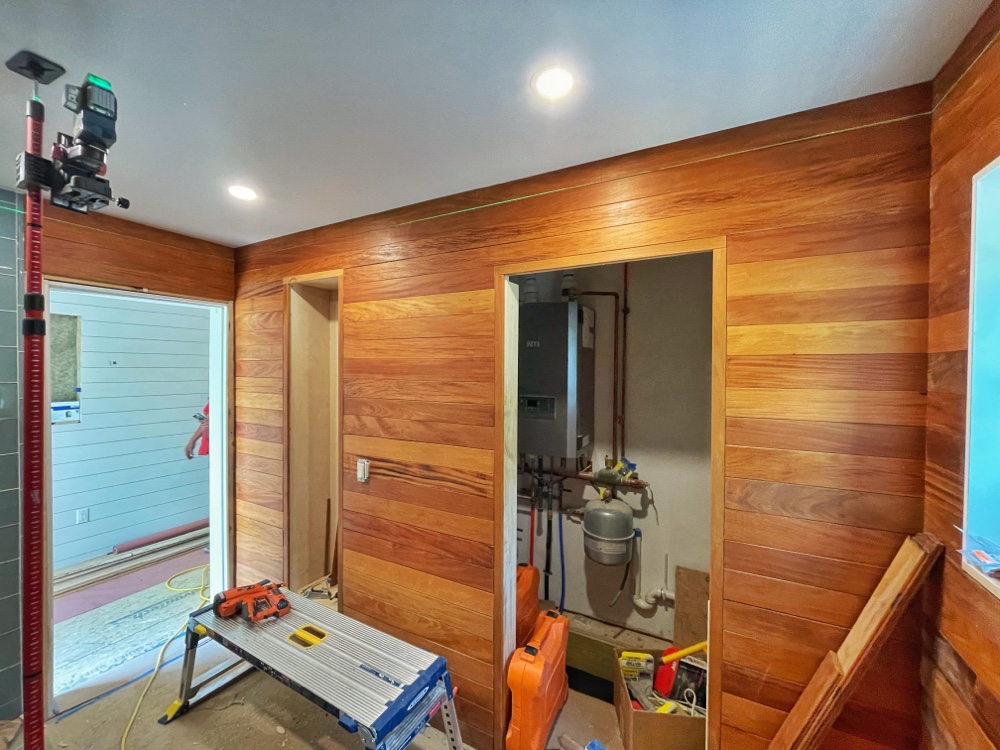
    Garapa Paneled Bathroom (Photo: R.P. Murphy)
    Garapa Paneled Bathroom (Photo: R.P. Murphy)

    It was a task for sure, but the end result more than makes it worth the struggles. It is a must see in person although the pictures capture how amazing it looks, [though] it’s even more impressive in person! — Eric Crowningshield

    Garapa Paneled Bathroom (Photo: Eric Crowningshield)
    Garapa Paneled Bathroom (Photo: Eric Crowningshield)

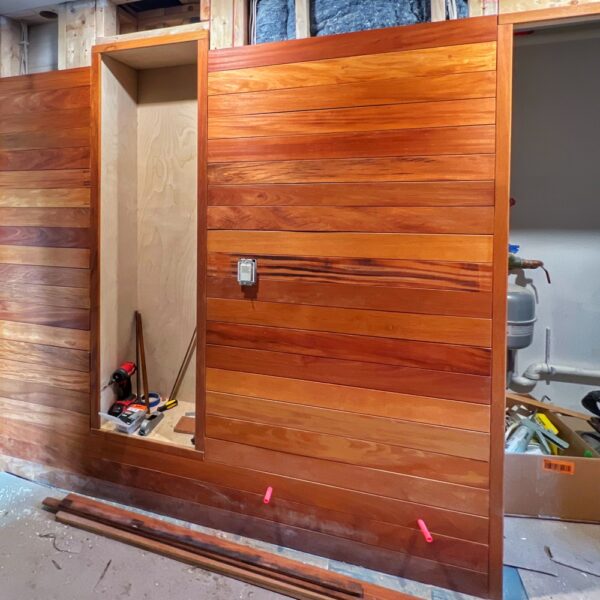
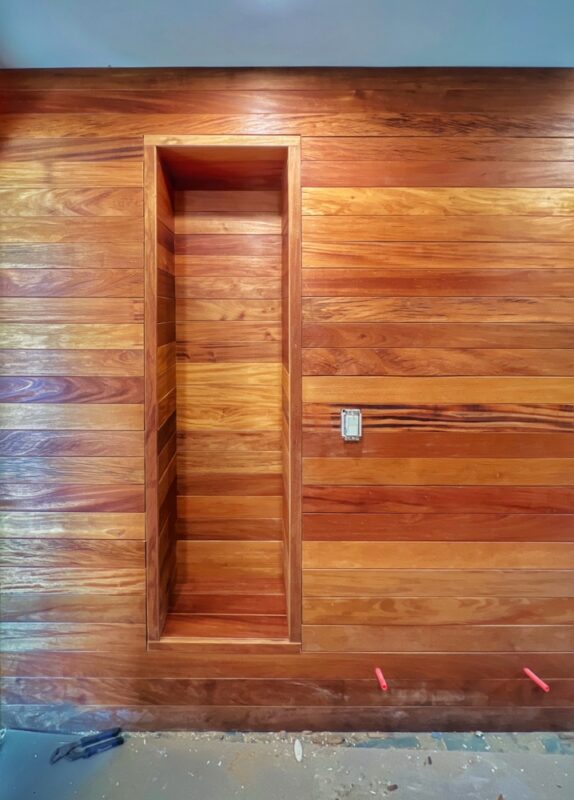
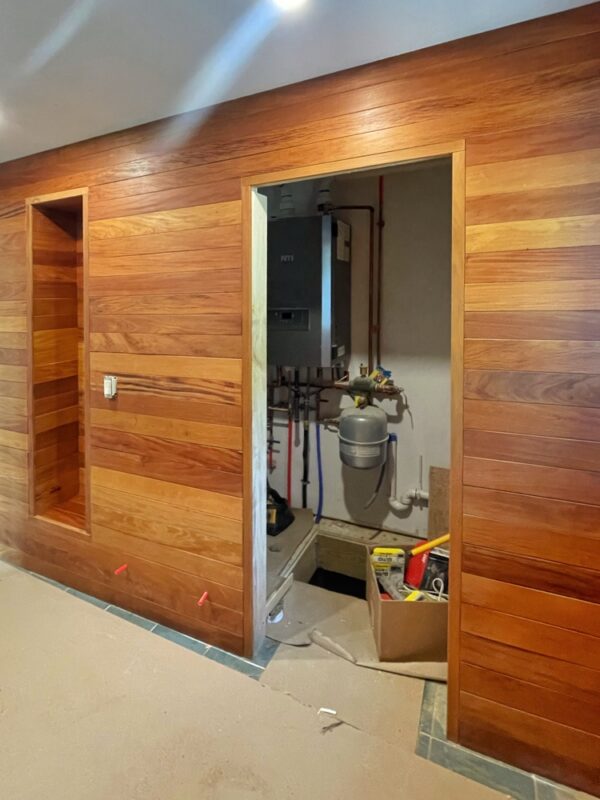
    I forgot to tell you. I found one board with plugs still in it, so if you look close it is about midway up the wall between the utility and niche. A couple small ones in the niche as well. I thought that would be pretty cool to help tell the story about it being old decking. Wish I found more. — Eric Crowningshield

    Garapa Paneled Bathroom (Photo: Eric Crowningshield)
    Garapa Paneled Bathroom (Photo: Eric Crowningshield)

    Thanks for letting me know. I will hunt for them next time I’m back. Although you should’ve left it to see if I noticed! — Geo Davis

    Garapa Paneled Bathroom (Photo: R.P. Murphy)
    Garapa Paneled Bathroom (Photo: R.P. Murphy)

    This subtle upcycling/repurposing souvenir isn’t quite discernible in the photo above, but it thrills me. Can’t wait to inspect in person!

    Garapa Paneled Bathroom (Photo: R.P. Murphy)
    Garapa Paneled Bathroom (Photo: R.P. Murphy)

    I look forward to sharing more photographs of the icehouse bathroom as it approaches completion. It’s so close… Until then, I’d like to express my profound gratitude to Eric for transforming this vision into reality. What an extraordinary accomplishment!

  • Garapa Paneled Bathroom, Pt. 1

    Garapa Paneled Bathroom, Pt. 1

    Eureka! After many months of brainstorming, experimentation, painstakingly protracted preparation, troubleshooting, oiling, and meticulous installation, the garapa paneling in Rosslyn’s icehouse bathroom is complete. What a remarkable journey it’s been, and the final results are breathtaking.

    Wayne Gryk Sealing Garapa Deck, September 19, 2009 (Source: Geo Davis)
    Wayne Oiling Deck in 2009 (Photo: Geo Davis)

    Garapa Backstory

    Our garapa backstory has its beginning waaayyy back when we built the original garapa deck on the west side of Rosslyn’s ell.

    Let’s start by rewinding the timeline to 2008-9. Building the new deck and installing garapa decking was the proverbial caboose in a virtually endless train of construction that started in the summer of 2006. (Source: Garapa Decking 2008-2009)

    A touch melodramatic, but the metaphor was (and is) 100% appropriate. It was nothing short of triumphant to finally complete the deck, a real and symbolic final frontier between construction site and comfortable home. It was a much anticipated extension of our indoor living space, a convenient way to access three entrances to the home, and a private exterior zone to dine and relax and entertain.

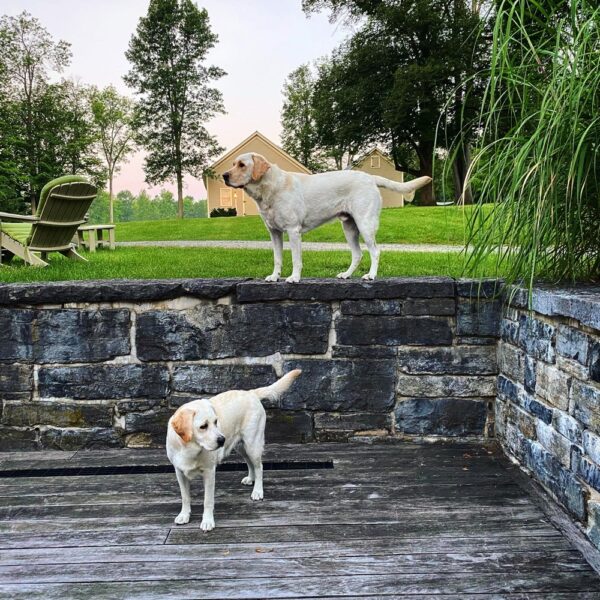
    Carley & Bentley on Old Deck (Photo: Geo Davis)
    Carley & Bentley on Old Deck (Photo: Geo Davis)

    Fast forward a couple of years, and the triumph began to tarnish.

    Long story short, the original deck failed. Not the garapa decking which performed admirably year-after-year. But the substructure.

    […]

    Rather than dwelling on the achilles heal that lamentably undermined the integrity of three critical substructures — Rosslyn’s house deck, boathouse gangway, and waterfront stairs — I’ll just say that all three experienced premature decay and rot of the structural lumber…

    […]

    Because the substructures began rotting virtually immediately after construction, we spent a decade and a half chasing the problem, scabbing in new lumber, etc. But within the last few years the failure was beginning to outpace our ability to provide bandaids and we scheduled replacement. (Source: Deck Rebuild)

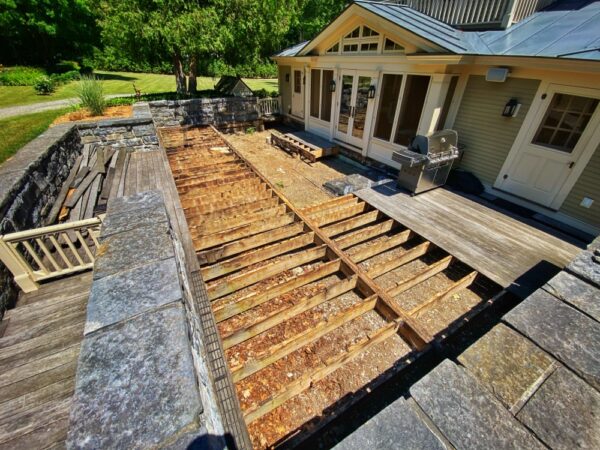
    Carley Overseeing Demo of Old Deck (Photo: Geo Davis)
    Carley Overseeing Demo of Old Deck (Photo: Geo Davis)

    Eric Crowningshield’s team deconstructed much of the deck during the late spring of 2022. When Hroth Ottosen and David McCabe joined them at the beginning of the summer they determined that it was necessary to fully replace rather than repair the existing deck.

    Old Deck Demolition (Photo: Geo Davis)
    Old Deck Demolition (Photo: Geo Davis)

    The deconstructed garapa was separated from the structural demolition debris, the highest grade (ergo most salvageable) material was graded, and the best preserved and most character-rich garapa was stored for repurposing in the icehouse rehab project. Then began a lengthy, painstaking upcycling journey.

    We’ve been upcycling garapa decking from Rosslyn’s 2008-9 deck that we salvaged and laid aside this past summer. Spanning half a year so far — from deconstructing and culling reusable material midsummer to multiple experiments determining optimal dimensions for adaptive reuse as bathroom paneling — we’re now scaling up production and the results are impressive. (Source: Upcycling Garapa Decking)

    By “multiple experiments” I mean empirically evaluating the most aesthetically pleasing, most practical, most installable, and most structurally durable form for the Garapa decking-turned-paneling. Yes, that’s a lot of *mosts* to undertake, but it’s not even the full scope of the challenge.

    In addition to devising a perfect product, we needed to coordinate an upcycling process that could be undertaken successfully on site. No loading, trucking, unloading, offsite milling and finishing, reloading, trucking, unloading, storing, etc. It might have been more affordable, and it certainly would’ve been less time consuming, to outsource this project. But that would’ve shifted several variables:

    • Increasing carbon inputs would have been inconsistent with our reuse objectives.
    • Transferring oversight to a third party would have reduced our design supervision (while necessitating excess production to ensure sufficient quality during installation.)
    • Undertaking the upcycling process at Rosslyn allowed for agility and flexibility during the fabrication process, enabling the team to repeatedly test samples in the icehouse, catching small details that might otherwise have been discovered too late, making small alterations, etc.
    • And despite the inevitable strain (as well as the potential for setbacks) that crept into the equation by committing to on-site fabrication, tackling this challenge in house ensured maximum creative control, significant learning opportunities, rewarding problem solving scenarios, a personalized sense of ownership for those who participated in this project, and a heightened sense of accomplishment upon completion.

    In short, upcycling our old garapa deck into the paneling that now distinguishes our icehouse bathroom was a vital, integral component of this adaptive reuse adventure. It was important to me that our team of makers and re-makers have the opportunity to invest themselves fully in this rehabilitation project, that each individual who verily toiled and trusted our vision experience a profound pride of ownership and accomplishment, and that the hyperlocal DNA of this two century old property be honored by favoring ingenuity and endurance over convenience.

    From the outset several were intrigued with the potential for this salvaged lumber.

    Hroth was an especially good sport, planing board after board and trimming the edges to determine what would work best. (Source: Upcycling Garapa Decking)

    Finding freudenfreude while upcycling lumber (Photo: R.P. Murphy)
    Upcycling Garapa (Photo: R.P. Murphy)

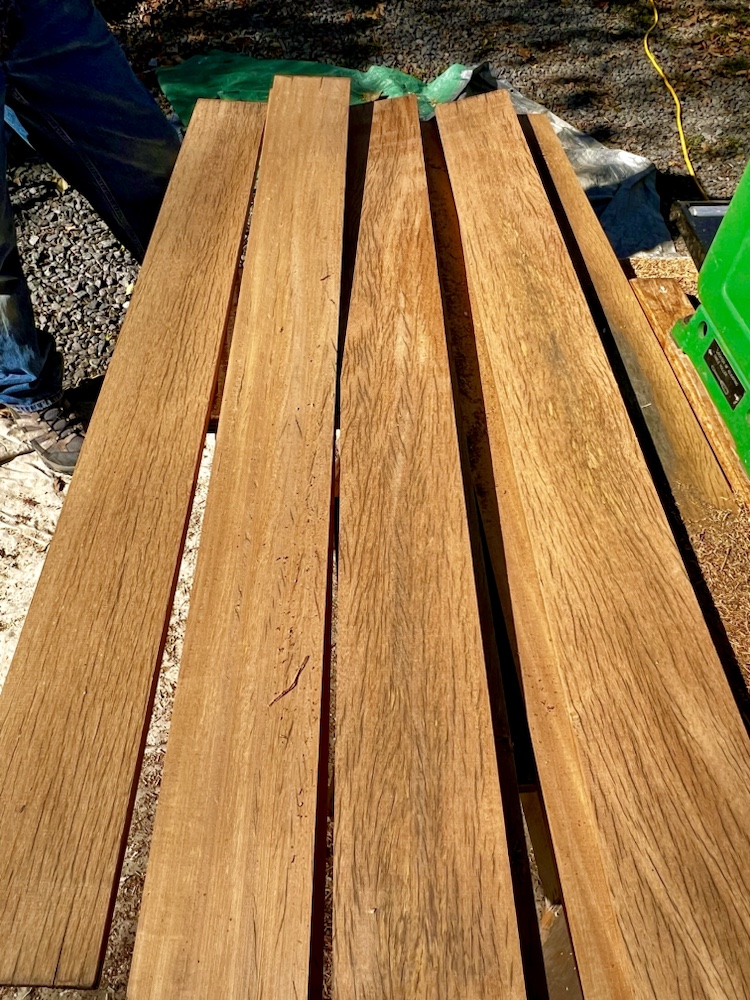
    As the wear and tear of a decade and a half— heavy foot traffic, enthusiastic labrador retrievers, hardy North Country winters, group grilling and furniture dragging, wine spills and miscellaneous mementos from lots and lots of living — was gradually milled away, the garapa’s handsome heart began to re-emerge.

    We have begun re-milling and re-planing garapa decking salvaged from Rosslyn’s summer 2022 deck rebuild. These sample boards are among the many weathered specimens carefully removed this spring and summer prior to rebuilding Rosslyn’s deck substructure and re-decking with new garapa. Hroth’s patient exploratory experimentation is the first phase in our effort to adaptively reuse this character-rich material in the icehouse. (Source: Upcycling Decking Debris)

    Deliberation. Exploration. Getting closer…

    Glorious Garapa: Upcycling Decking Debris (Source: R.P. Murphy)
    Glorious Garapa: Upcycling Decking Debris (Source: R.P. Murphy)

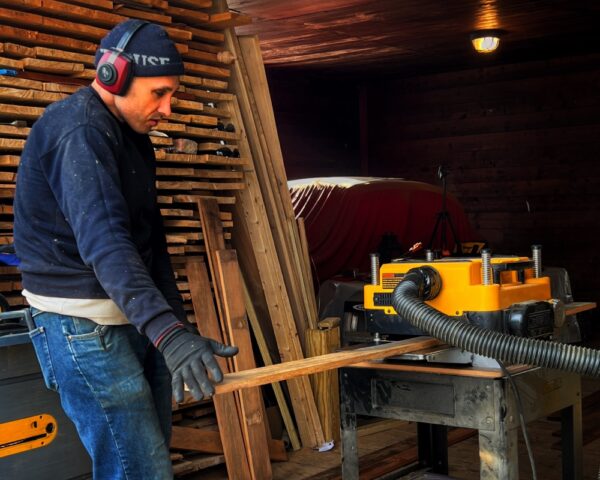
    At last, Hroth perfected the prototype. He then developed a process, a repeatable protocol, for which we could standardize the results primarily relying upon a tablesaw and bench planer. Then he taught Tony how to reproduce the same results in sufficient quantity to panel the still unframed icehouse bathroom.

    Tony Upcycling Garapa Decking (Photo: R.P. Murphy)
    Tony Upcycling Garapa Decking (Photo: R.P. Murphy)

    Tony is beavering away industriously… upcycling garapa decking into pristine planks for paneling.

    […]

    It’s a slow and painstaking process that demands plenty of patience and focus, but… transforming debris into beautiful finish paneling will prove rewarding, for sure… Tony is even beginning to appreciate what magnificence he is bringing into existence. (Source: Upcycling Garapa Decking)

    And so began a winter quest to reinvent debris as functional design-decor.

    Time for a progress report on the garapa paneling that will soon embellish the icehouse bathroom. We started out gently easing the edges, but several iterations later we’ve settled on a full roundover. (Source: Garapa Roundover: Easing the Edge)

    Months into this painstaking re-manufacturing process, several others had helped Tony from time to time, but there was no illusion. Tony had taken ownership of the garapa upcycling quest!

    I joke with Tony that he’s investing lots of love into transforming this material. From debris to centerpiece… he’s literally been working and reworking [this upcycled garapa] since last September or October. That’s a LOT of love! (Source: Garapa Roundover: Easing the Edge)

    By late winter Tony had finished planing (down to 9/16”) and dimensioning (down to 4”) the garapa decking. At almost a thousand linear feet we paused and reevaluated the quantity to be certain we would have sufficient usable material for the entire interior of the icehouse bathroom (walls, niche, and mechanical room door).

    We revisited options for joining the paneling. To be fastened horizontally to the studs with concealed fasteners, joining the boards would be an important way to stabilize and visually address the gaps between boards. We considered tight lap joints and nickel gap lap joints, eventually settling on a nickel gap T&G type joint. But how best to accomplish this?

    Peter’s solution for the ash and elm flooring seemed like our best option for the garapa paneling. We would create garapa splines that would fit into grooves in the sides of the paneling boards. If expansion and contraction (think visible gaps, between boards, etc.) weren’t an issue it might have been viable to just but the boards up against each other. But it’s a bathroom, so fluctuating humidity levels definitely needed to be factored into the equation. The splined joint would be a perfect solution.

    And finally there was the question of edging. I wanted to ease the edges just enough to accentuate horizontal shadow lines (which stylistically echo the T&G nickel gap in the rest of interior) while deemphasizing dimensional disparity between boards. So a router joined the production protocol as Tony uniformly finished the visible edges of the paneling.

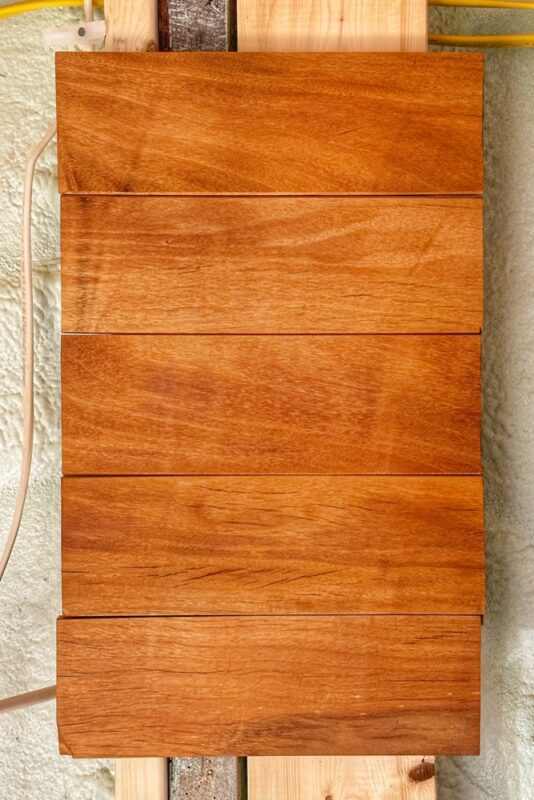
    Garapa Edge Profiles v2.0 (Photo: Geo Davis)
    Garapa Edge Profiles v2.0 (Photo: Geo Davis)

    And then there was the final step, oiling the garapa. As often, we turned to Bioshield Hard Oil for a hand rubbed, ecologically responsible finish. Eric’s team tackled the oiling, and the photo above gives you a preview of the garapa, edged and oiled. This was the final sample that we greenlighted before installation began.

    And, for just a little longer, I’ll keep you in suspense before I share photos of the now completed garapa installation. Remember, anticipation is half the pleasure!

    Installation of Garapa Paneling

    I’ve dividing this monumental update into two posts to fairly review and showcase a project that has taken the better part of a year from beginning to finish. Thanks for your patience. I promise you that the photos you’ll witness soon, the finished bathroom paneling, will be worth the wait.

  • Home is Wherever I’m with You

    Home is Wherever I’m with You

    Sailing in San Diego, April 27, 2023 (Photo: Richard Darmanin)
    Sailing in San Diego, April 27, 2023 (Photo: Richard Darmanin)

    Homecoming! After a week in the Gila Wilderness with John Davis and other Rewilding friends I’m reunited with my beautiful bride. The photo above has *almost* nothing to do with my backcountry adventures in the middle of 3 million acres of New Mexico wilderness. That image was taken about a month ago when Susan and I were sailing in San Diego. The common denominator? “Home is wherever I’m with you…”

    Instead of getting tangled up in words and thoughts about homecoming, today’s post will lean into the lyrics of the song “Home” by Edward Sharpe and the Magnetic Zeros… “from Edward Sharpe & the Magnetic Zeros’ debut album ‘Up From Below’…”

    Oh, home, let me come home
    Home is wherever I’m with you
    Oh, home, let me come home
    Home is wherever I’m with you

    Sometimes it takes being away from home to identify “homeness”. I’ve been meditating on this question of what makes a house a home for a looong time. And I’m not ready to offer a definitive answer yet. But juxtaposing glimpses — one above, and the other in my unplugged memories of six days and nights in the Gila — reminds me that a BIG piece of the puzzle is Susan. Home is wherever I’m with you!

    If you don’t know this catchy song by by Alexander Ebert and Jade Allyson Castrinos, here’s the full adventure.

    “Home” is a song written and recorded by American group Edward Sharpe and the Magnetic Zeros. It was released in January 2010 as the second single from the album, Up from Below… The song is a duet between Alex Ebert and Jade Castrinos, with portions of spoken word from both. (Source: Wikipedia)

    A quick post for a contemplative homecoming. Ideas percolating…

  • Artichoke Time Prequel

    Artichoke Time Prequel

    Just as there’s a time for asparagus (and tulips and dandelions and radishes and maple syrup and…) there’s a time for artichokes. As it’s only just beginning, today’s post is more of a prelude, an artichoke time prequel.

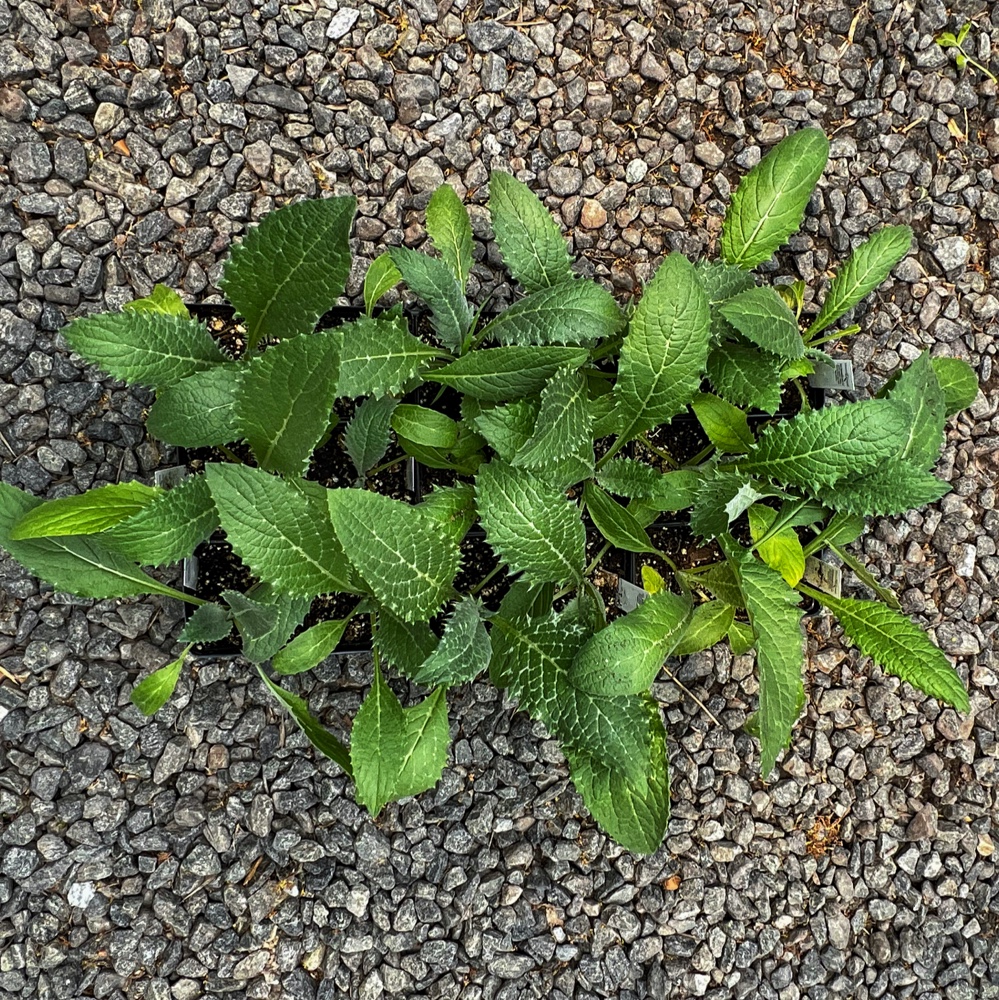
    Artichokes Ready to Transplant (Photo: R.P. Murphy)
    Artichokes Ready to Transplant (Photo: R.P. Murphy)

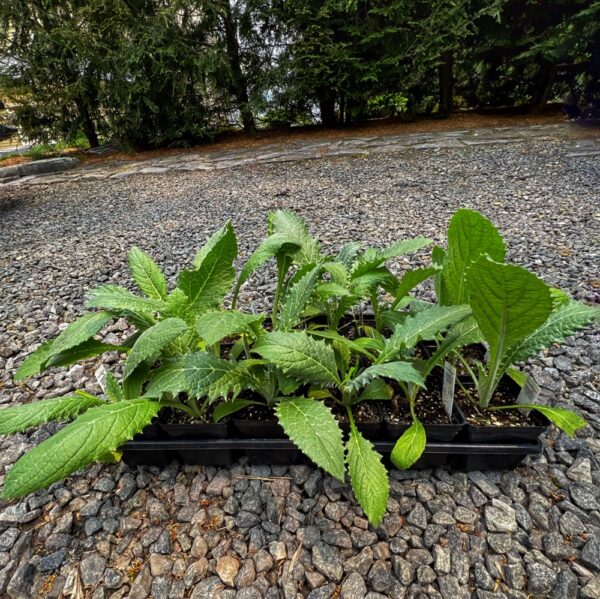
    Look at those healthy artichoke starts ready to transplant into Rosslyn’s garden! We were actually ready a week ago, but the damaging cold snap tempered are enthusiasm. So we post plowing to our planting until we know that temperate weather is here to stay.

    Artichokes Ready to Transplant (Photo: R.P. Murphy)
    Artichokes Ready to Transplant (Photo: R.P. Murphy)

    At this point, we’re probably safe, but if you more days of delay, can’t hurt. We’re still crossing our fingers and waiting to see if any of the frosted tomato plants recover, so at this point, we’re experiencing the gardener-equivalent of “gun shy”, I guess.

    Once these beautiful thistles are thriving in the ground, I will post an update. And then, the next magical moment will be the formation of the chokes!